| Better depiction by using environmental functions - Visual Options / Assessment Plugin - |
 |
| Support Topics | |||
| Support Topics / UC-win/Road | |||
|
|||
| Introduction
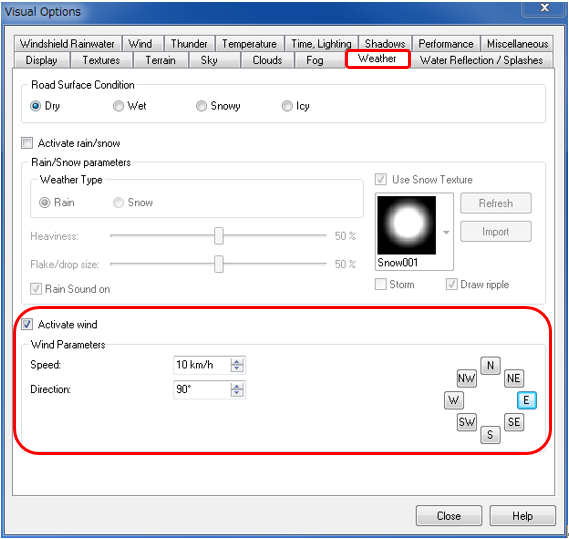
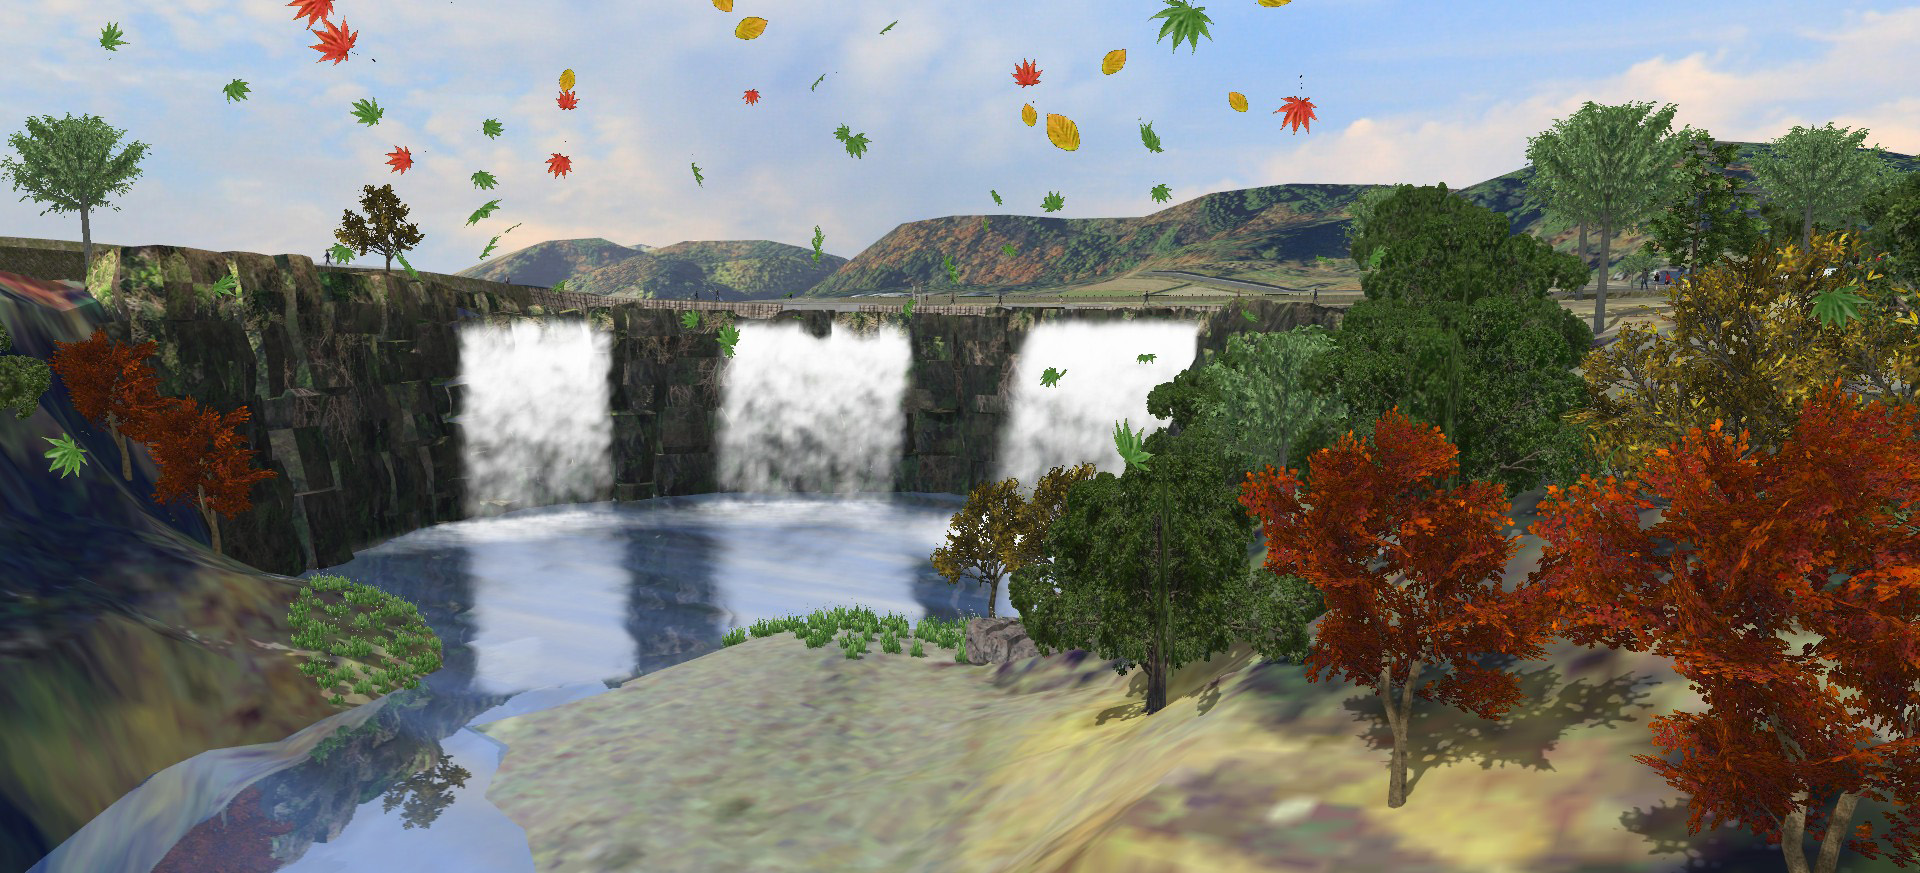
In the previous support topic, we explained how to improve scenery expressions such as the water surface depiction by using the lake function and the depiction of mist and waterfall by using the smoke function. This time, we introduce the functions of the "Assessment plug-in" that is newly added to Ver.12.1, features of natural lights and mist, and the Ver.13 new function "Wind". Wind setting The image of wind can be expressed in Ver.13. Fluttering objects can express the blowing wind. As the objects, two textures for wind particle and one cloth type texture are available. To draw the wind particle, go to "Home" menu - "Visual Option" - "Weather", check "Activate wind", and select wind speed and wind direction. The wind direction can also be selected with buttons like [N] and [S]. Next, open the "Wind" tab and check in "Draw wind particle". Go back to the Home menu and click "Environment" to start the wind depiction.
Two types of wind parameter (particles and cloth particles) In the "Wind parameter" of "Wind" tab, users can select the number of particles and two textures for them, and the number of cloth particles and one texture for it. The wind particles express rotating images in specified size. The speed and angle of the rotation are random values between the max and min set values. On the other hand, texture that is transforming like cloth depicts the cloth particles. Green leaf, autumn leaf, plastic bag, and paper waste are available as default common textures. Users can use their own textures by saving them in the folder below before launching software or by checking "Use a secondary texture directory" in "Home" menu - "Application Options" - "Default Settings" and selecting a folder. For example, a scenery of cherry blossoms fluttering in the wind can be easily depicted. □Folder of wind particles C:\UCwinRoad Data 13.0\Textures\WindDebris *If you use external texture folder, the folder structure should be the same as that of default folder. In this case, create <External folder>\Textures\WindDebris and save images in it.
Mist setting When the Linear fog type (density of fog depicted in line from the starting position to ending position) is selected in "Visual Options" - "Fog" tab, the starting position and ending position can now be specified with the distance from the viewpoint (unit: m). It helps users to select the beginning position of fog and the range entirely covered with fog.
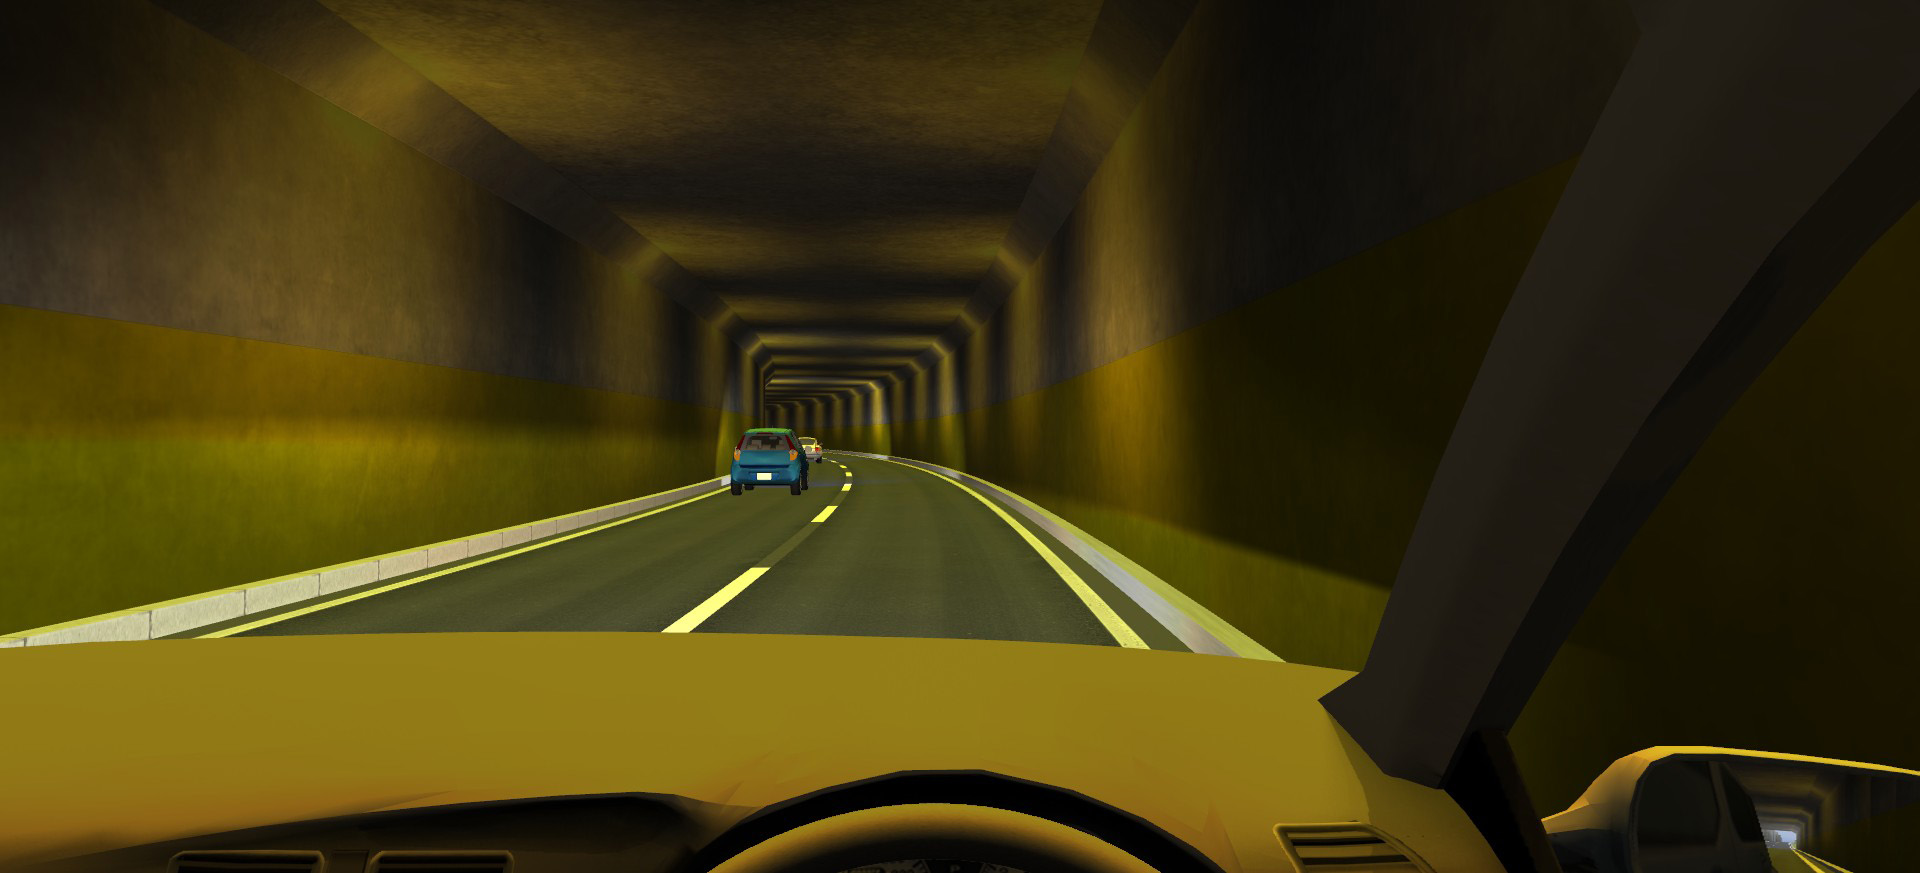
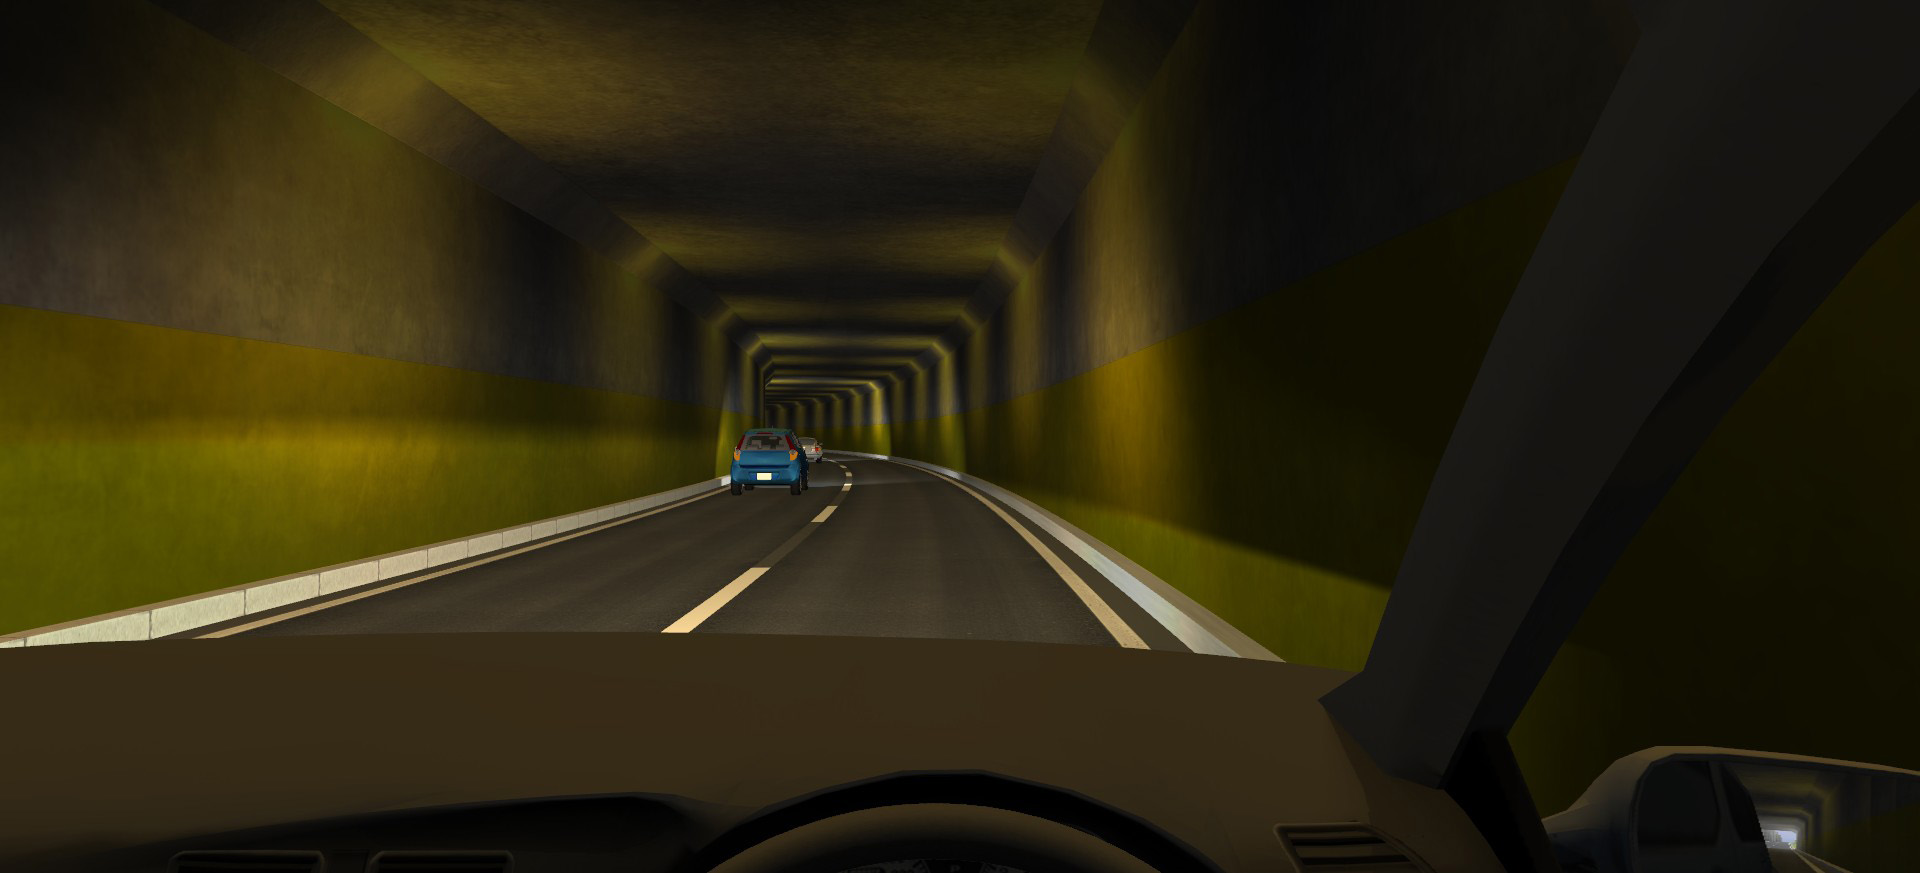
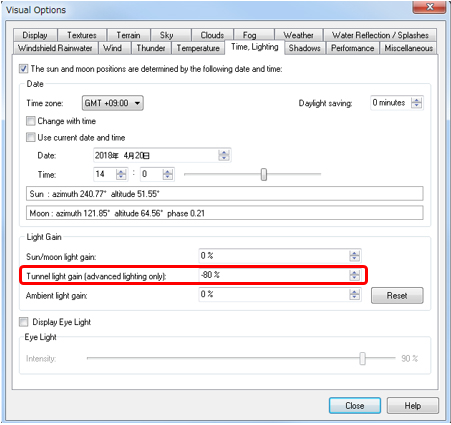
Ambient light setting In UC-win/Road Ver.13, the strength of light in tunnel can be changed. In "Home" menu - "Visual Options" - "Time, Lighting" tab, users can enter value for "Sun/moon light gain" and "Ambient light gain". "Tunnel light gain (advanced lighting only)" can also be adjusted.
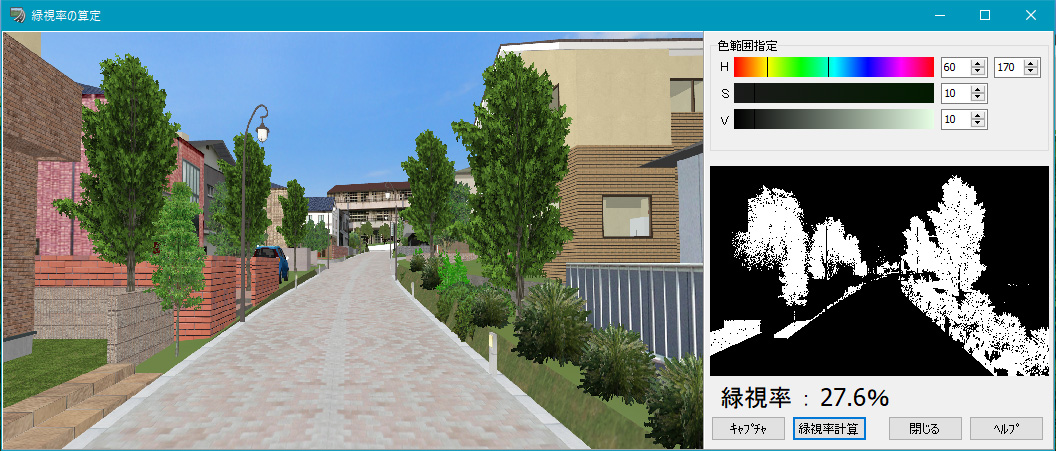
Utilization of Assessment plug-in Here we introduce how to use a new function "Assessment Plug-in Option" added in Ver.12.1. The Assessment plug-in can execute the following three evaluations by using the UC-win/Road's real-time simulation. Green view rate calculation Recent years, more and more local governments are starting to use the green view rate as the standard of environmental assessment. It is used for green increasing activities and scenery preservations in Osaka, Kyoto, Nishinomiya in Hyogo, Koto-ku in Tokyo, and Chigasaki city. According to the investigation by Ministry of Land, Infrastructure, Transport and Tourism, man start to feel that there are a lot of green around them when the green view rate exceeds 25% (social experimental investigation of correlation between the amount of green in city and the psychologic effect by MLIT, 2005). In the green view rate investigation, errors may occur due to the photo shooting angles and the difference of focus distance of cameras, or the investigation is sometimes influenced by weather. On the other hand, in VR simulation, it is easy to use a common viewpoint, view angle, and light. In addition, the green view rate can be reviewed for landscapes even at the planning stage that do not actually exist.
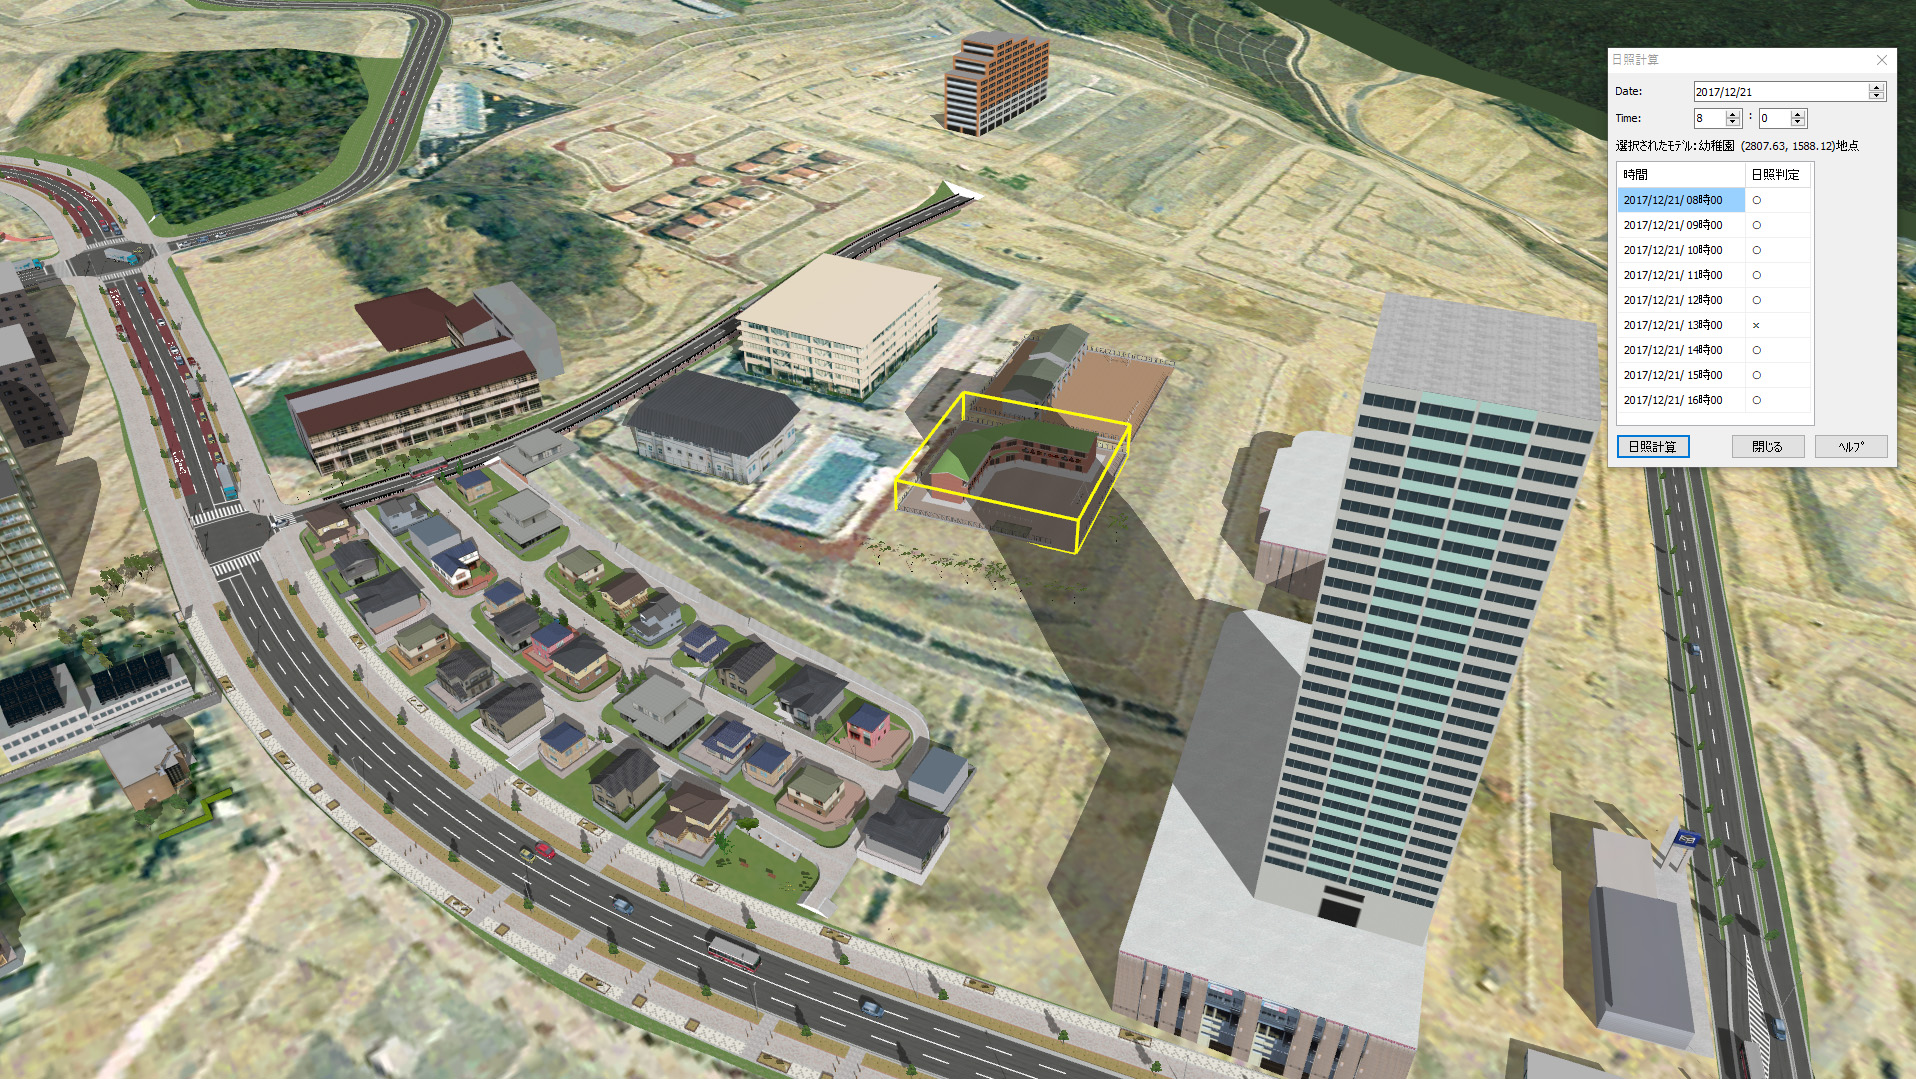
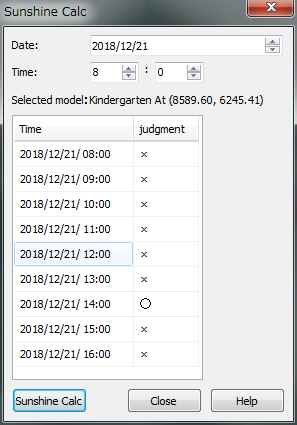
Sunshine Calculation In the sunshine calculation, hourly sunshine against a selected building model on the specified date can be calculated. The winter solstice is the default date, but the detailed time setting is available. By moving the viewpoint on VR, obstructions seen from the target building can also be checked.
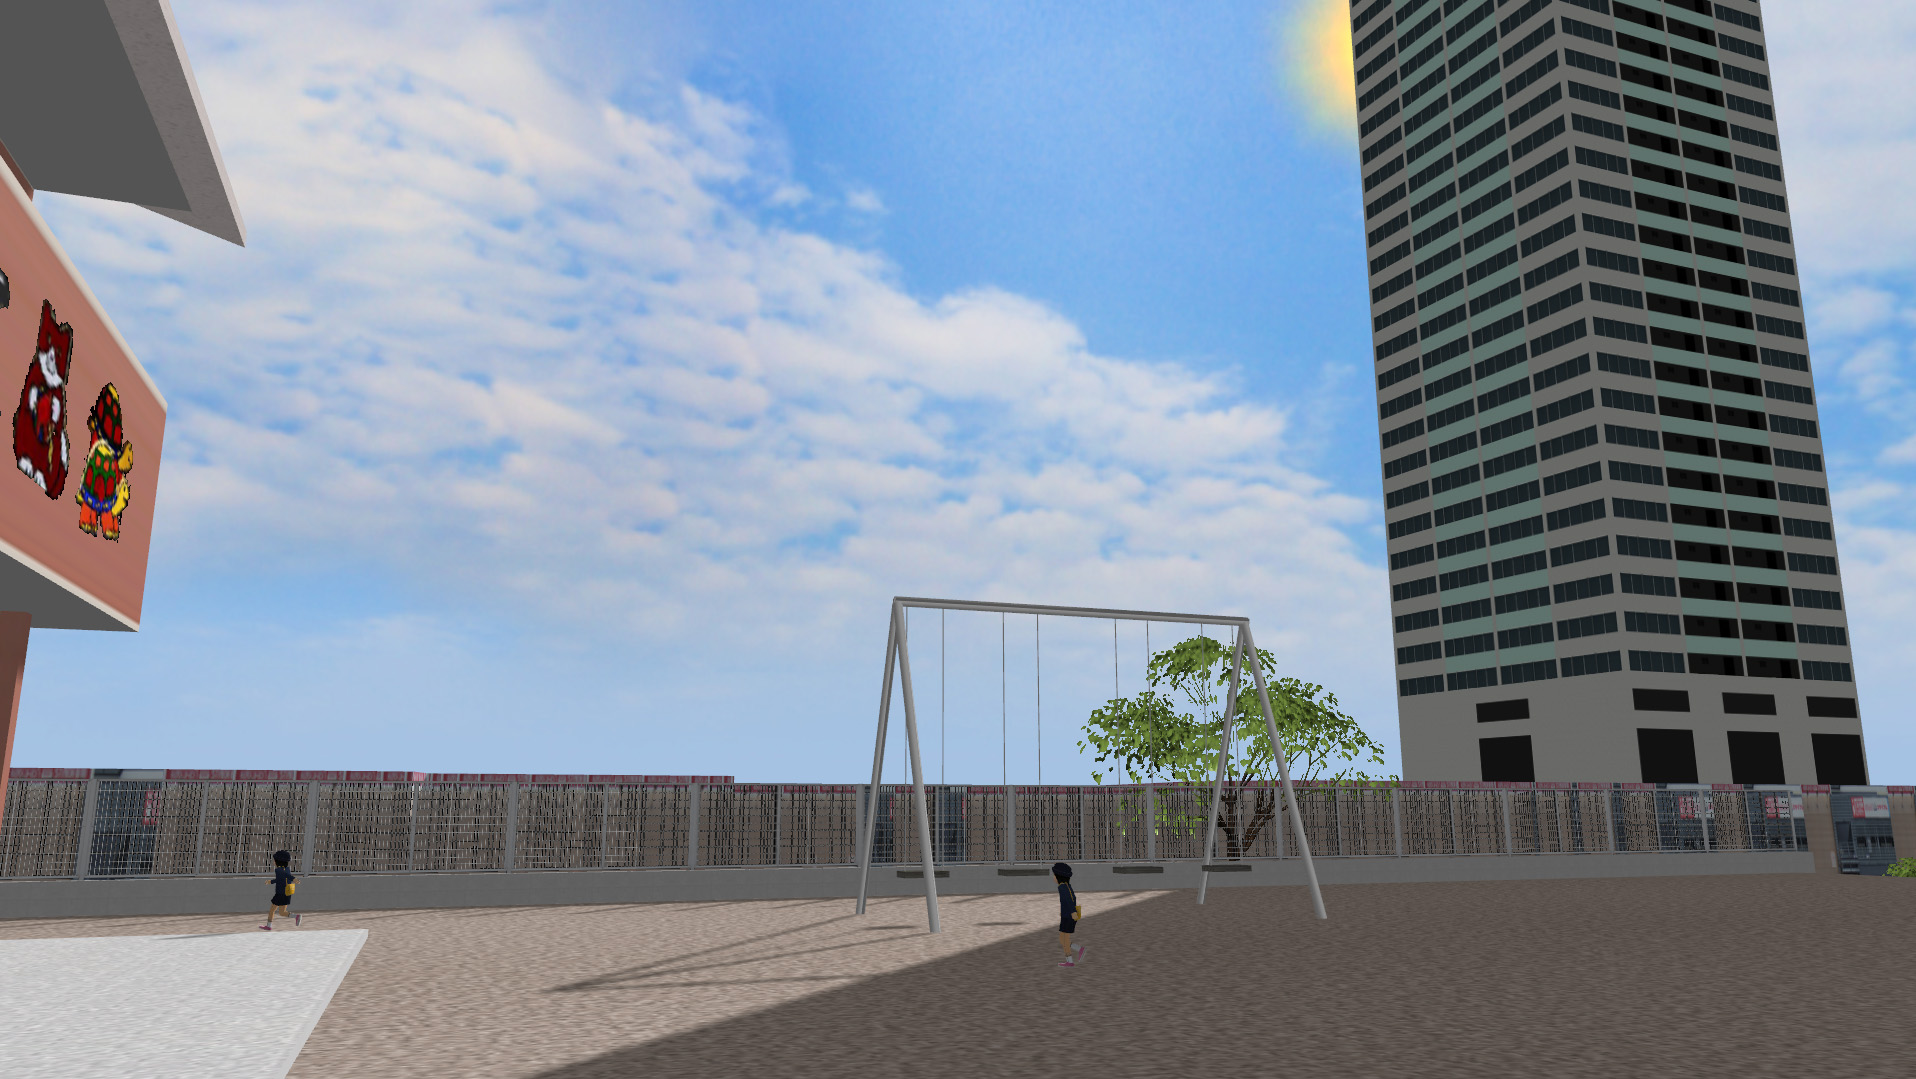
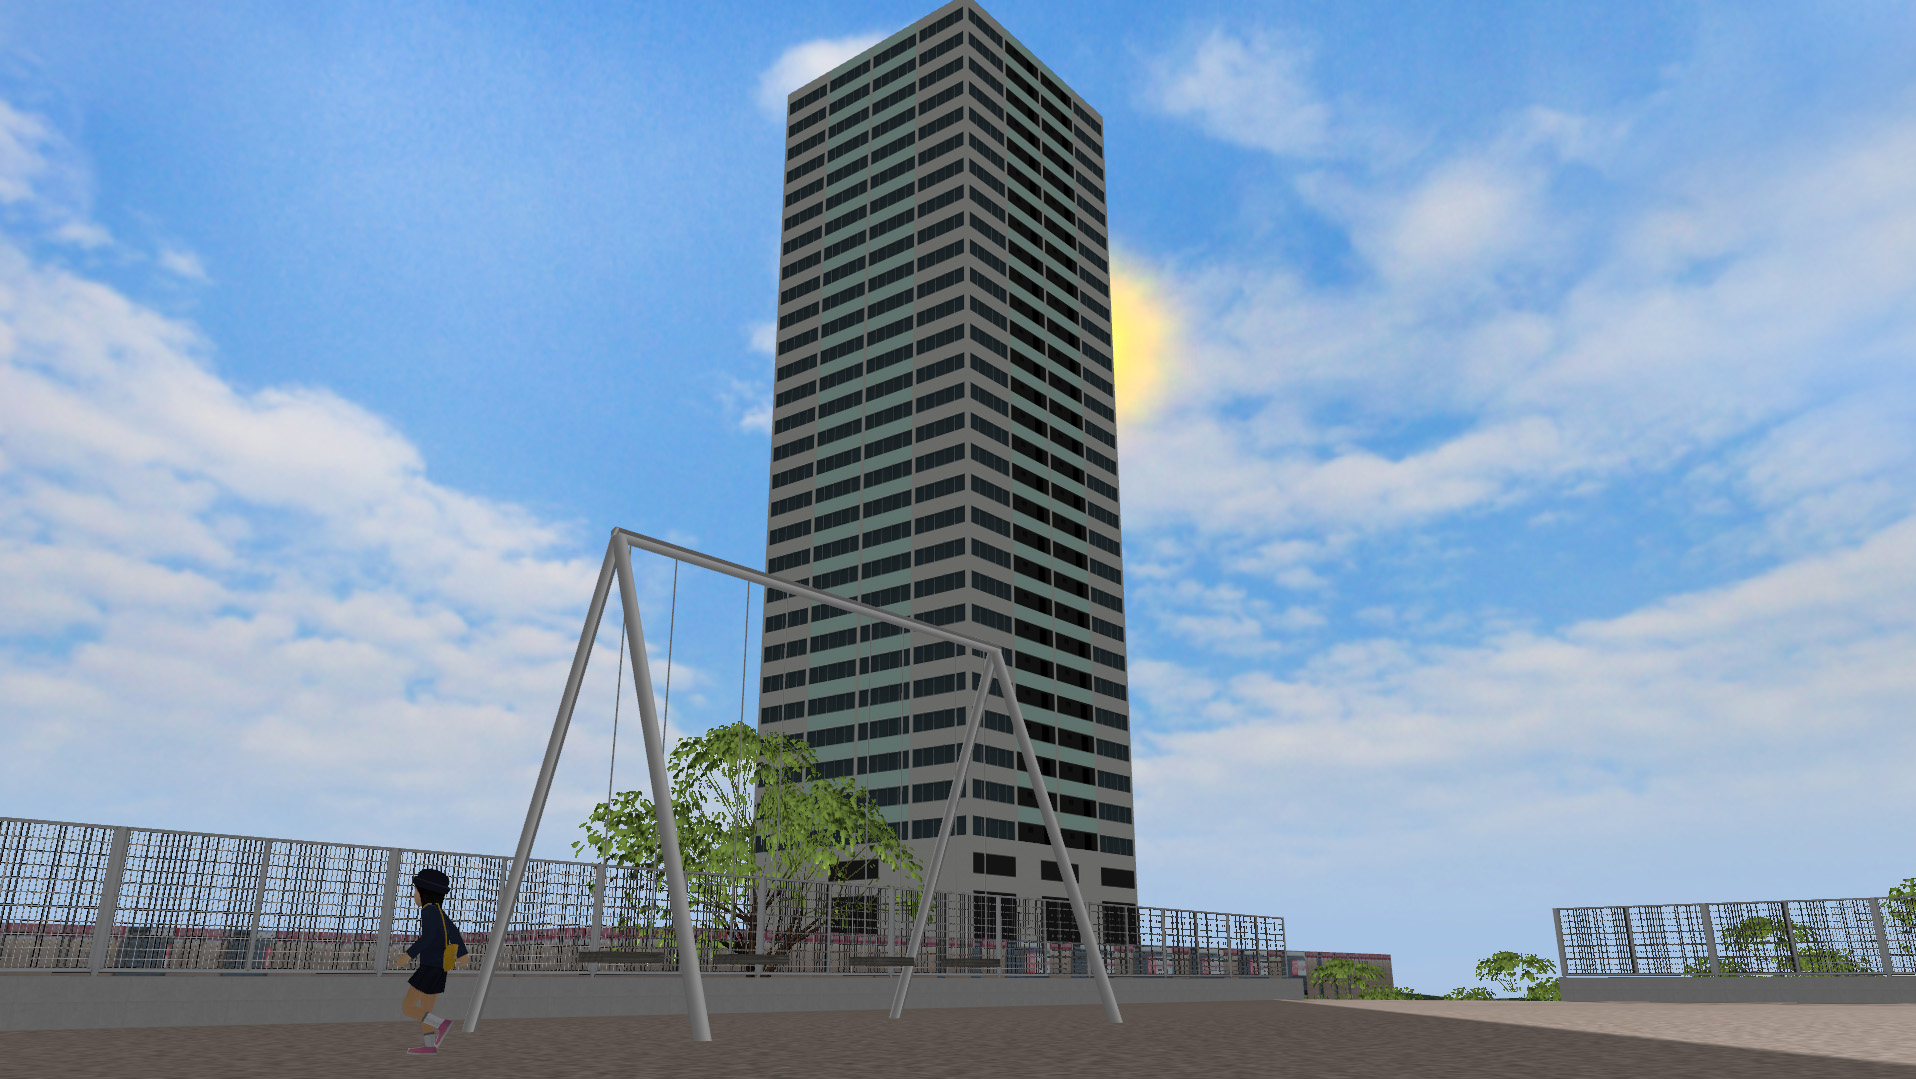
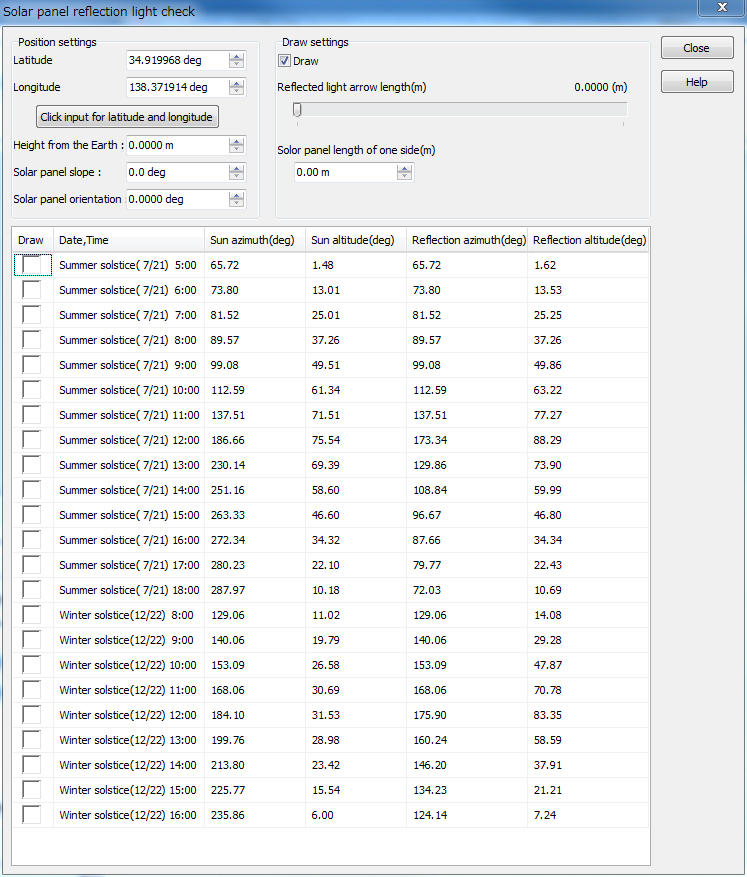
Reflected light check In "Reflected light check" function, the sunshine direction reflected on solar panels can be checked. The summer solstice and winter solstice are available for time setting. Users can either enter latitude and longitude or click on the VR space to decide on the position where the reflection is calculated. After setting the size, height, slope angle, and direction of the panel, the hourly angle of incidence and reflection can be checked. For example, users can test if the low sunshine coming from south reaches northern high buildings on the winter solstice, or if sunrise or sunset on the summer solstice affect vehicles passing on roads around and what slope angle has no effect on the vehicles.
Conclusion Visual option functions explained here are available in the Standard version. Please utilize these new features to express new VR environments. In addition, the "Self Simple Assessment Support website" (http://assessment.forum8.co.jp/) is open, and information of the self simple assessment is provided on it. |
||||||||||||||||||||||||||||||||||||||||
|
|||
| (Up&Coming '18 Spring issue) | |||
 |