|
 |

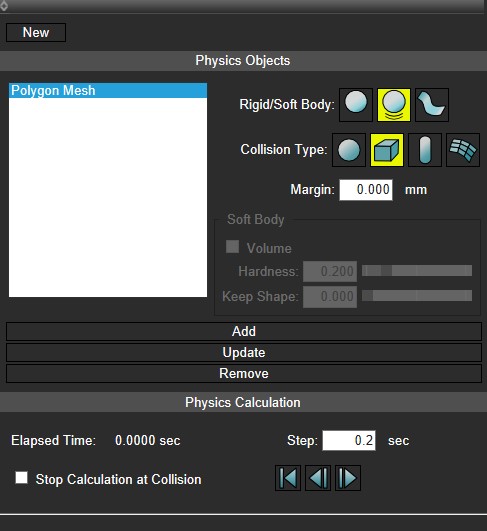
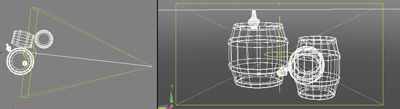
The Physics Assistant script characterizes shapes as "static rigid body", "dynamic rigid body", or "soft body", and expresses how shapes collide with each other over time. Although animation is not yet supported, it can be used to simulate the installation of a shape dropped from above onto uneven ground, which is difficult to do manually, or the movement of a cloth covering multiple shapes. *The Physics Assistant is available in Shade3D Standard/Professional. ● Physics Assistant Window From the main menu, select "Script" and then "Physics Assistant" to open a window where you can register and delete shapes to be used, set the type of stiffness to be applied, the collision type of the shape, the softness of the soft body and the elapsed time.
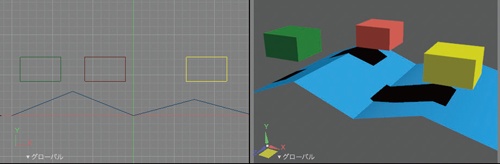
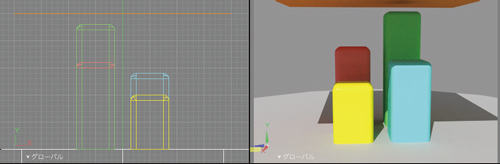
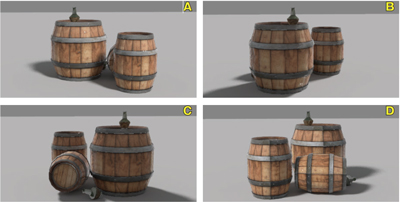
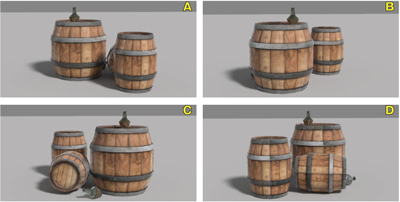
● Place Shapes on Inclined Surface By performing collisions between shapes that are assigned to either "static" or "dynamic" shapes, even complex shapes can be placed physically correctly. - Before collision / Red, green and yellow objects are dynamic, and blue object is static.
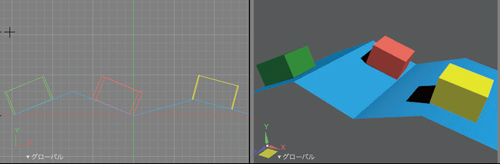
- After collision
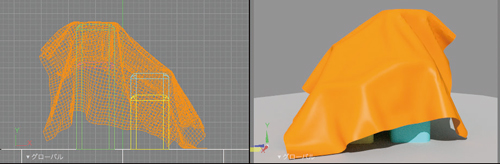
● Cloth Simulation over Objects Shapes assigned to the soft body have a specified softness and can express the movement of the cloth that deforms to the shape it collides with. - Before collision
- After collision
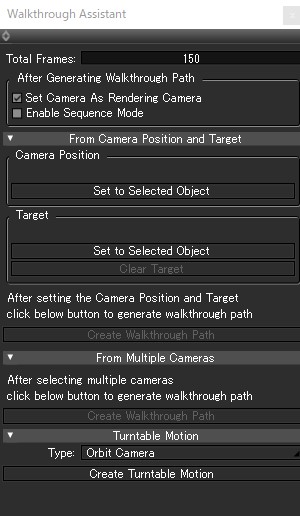
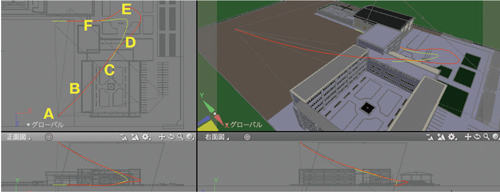
The Walkthrough Assistant uses two linear shapes to create camera motion, one as a camera position and the other as a gazing point. Motion can be created by connecting multiple camera movements. It is also possible to create turntable motions that rotate the camera or scene around the gazing point. Clicking "View" - "Walkthrough Assistant" in the main menu displays a window for setting the number of frames and assigning the line shape to the camera position and gazing point.
● Define the camera position and gazing point with two line shapes Setting up a linear shape for the camera position and for the gazing point creates a motion in which the cameras move from the start points to the end points of the linear shapes. - Linear shapes for the camera position (red) and for the gazing point (green) and the camera position
- Set linear shapes for the camera position (red) and for the gazing point (green) in the scene.
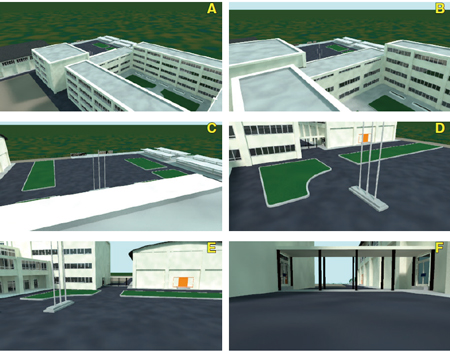
- Walkthrough animation created
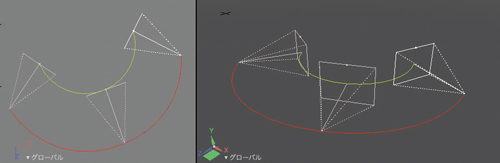
● Combine several cameras to create motion Combine multiple cameras with different angles of view etc. in a selected order to create a single motion. - Cameras A-D and the camera position (red) and the gazing point (green) created
- Walkthrough animation created
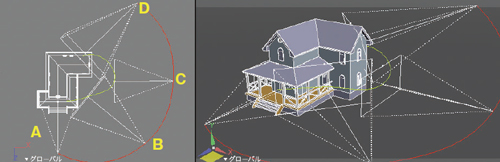
● Create a turntable that rotates 360 degrees Rotates the camera or scene 360° using the rotation joint around the gazing point of the current camera position. - Rotation joint (yellow) created at the current camera position and gazing point
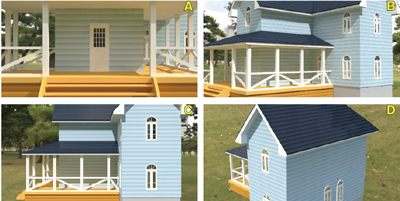
- Turntable animation rotates the created camera
- The direction of the light source can be fixed in the scene rotation.
|
|
|
|||||||
|
|||||||
| (Up&Coming '23 Spring issue) | |||||||
 |
|||||||


