| Support Topics / UC-win/Road |  |
|
| How to improve your operation learning level |
| Support Topics | ||||
|
||||
| Here we explain useful ways for speedy and efficient operations in UC-win/Road and its simulation. |
| Movement of viewpoint |
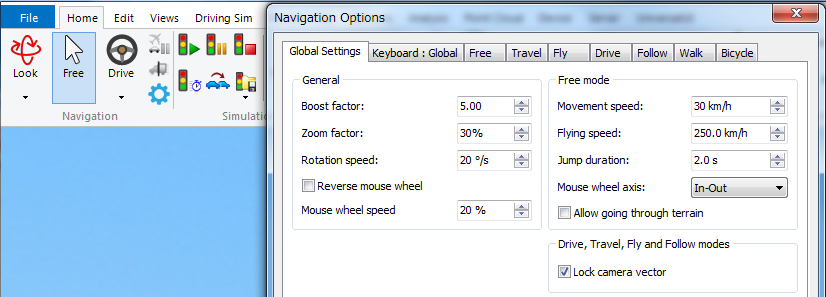
| Speed-up by Shift key While you are pressing Shift key on your keyboard, a message "Booster On" is displayed on the upper left. In this state, you can move up and down, right and left, back and forth, or with mouse wheel at five times faster than usual. Moving speed can be changed in the navigation option window.
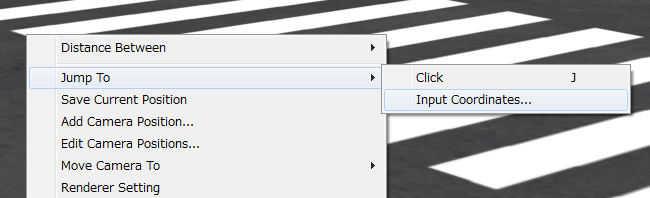
When you click the J key on your keyboard, a message "Click where you want to jump" appears at the upper left. In that condition, click somewhere in the screen to quickly move there. This operation is useful for presentation because it is easy for people unfamiliar with UC-win/Road to grasp positional relationship in the space than specifying the camera position. Move with numbers on the keyboard When you press number buttons on the keyboard (not the numeric keypad), the camera immediately moves to the corresponding viewpoint registered on the top ten of the camera position list.
|
| Arrange, move, and delete models |
|
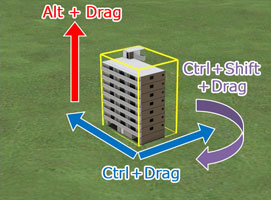
Move arranged models
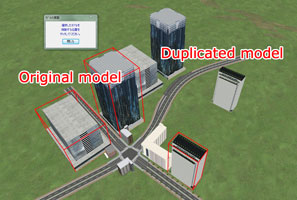
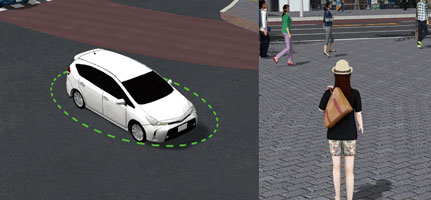
When you click existing objects while pressing the Ctrl key, a frame in red, which normally is in yellow, will appear around it, and you can select multiple objects at the same time. If you right click and select "Duplicate Objects", the selected objects will be duplicated at the position you click. To clear your selections, press the space bar. Also, objects in the red frame can be deleted at once if you select "Delete Selected Objects" from the right click menu (also possible to delete models only or trees only).
Direct arrangement of roadside objects To place 3D models as a roadside model, select a model and click on the road while holding Ctrl, Alt, and Shift. It takes much less time than the way to set the object position in the roadside model editor.
|
||||||
| Editor screen |
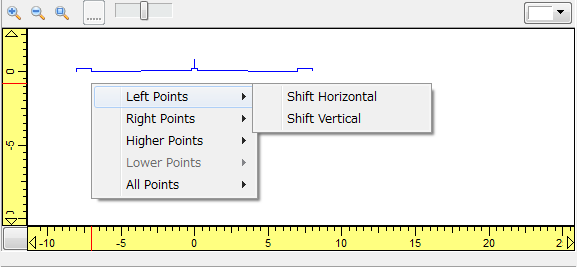
| Shifting the view range in the editor screen Editor screens such as the road plan view and section view have yellow rulers at the left and bottom side, and you can shift the view range from right to left or up and down. In addition, a square button at the intersection between two scales has a function to reset scaling. Moving the shape in section editor screen Right click on the section shape screen displayed at the upper left on the section editor screen to move all nodes consisting the section to right, left, up, or down. For example, in order to change the width of carriageway, right click on the center of it, click Left Points -> Shift Horizontal, enter volume of shift. It takes only a second to change the width because the nodes at the left road side will shift while keeping its shape.
|
|||
| Presentation |
| External view during driving and walking If you turn the mouse wheel while you are in the car or walking, you can switch to the external camera. Drag to see the car from various viewpoint or to change the direction of walking.
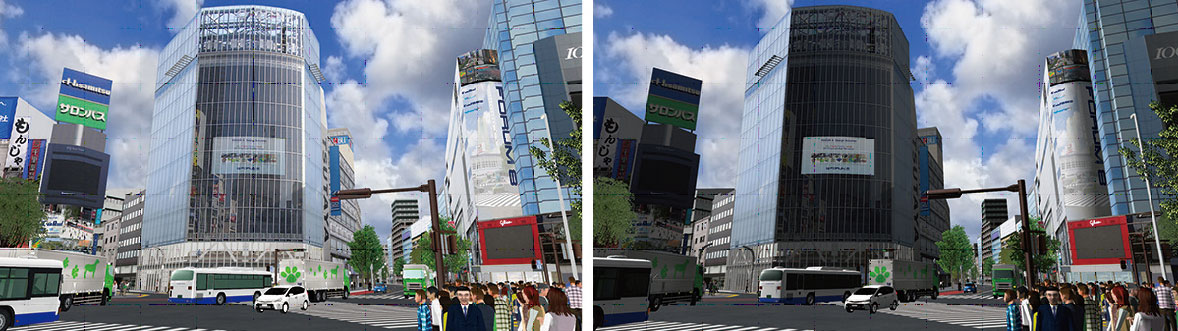
Gear operation during the driving with the keyboard In the keyboard operation, the gear can be changed by D and U keys. With D key, the shift changes in the order corresponding to drive, neutral, parking, and reverse. U button allows you to return to drive gear in the reverse order, and extra press of U key shifts the gear to second and low to use the engine brake. Horizontally fixing the view point Press Insert key to fix the point of view in horizontal. It is useful when you want to move the camera along horizontal grounds and roads. Adjusting brightness in the space The VR environment is bright in the default setting. However, it looks to be flat in that light space because irregularities are lost. Reduce the ambient light gain and the intensity of eye light in the "Time, Lighting" tab in the Visual Options in order to give the environment sharp contrast and reality.
If the box of the position map in the visual options is checked, the plan view is displayed at the bottom left, and the camera will move to the place you double click. If "Rotate position map" is checked, the double click is not workable.
Please try these functions to improve the work efficiency of simulation operating and editing. |
|
|||
| (Up&Coming '17 Summer issue) | |||
 |