| Enhanced section creation |  |
| Support Topics | |||
| Support Topics / UC-win/Road | |||
|
|||
|
Road section of UC-win/Road When creating a road with UC-win/Road, the appearance and functions of the road, such as the number of lanes, the width of the lane, the presence or absence of guardrails, the width of the sidewalk, and the texture of the road surface, are defined by the road cross section. For this road section, the editing function of "lane details" has been enhanced since Ver.13. Zebra expressions that were troublesome until then can now be easily done. This time, we will introduce the editing of road sections with expanded functions. The road section design is simplified, the number of sections in the project can be reduced, and section editing can be more efficient. First, open the screen for editing the road section in the following procedure. If you only want to edit or display the section currently in use, you can edit it from the icon button on the right end of the menu "Home". 
Fig.1 "Section" button in the menu "Home" To assign a section to a road alignment, open the target road profile screen from the road plan and define it. Open the road plan from the menu "Home"-"Plan View" or the menu "Edit"-"Plan View". Right-click on the road alignment and select “Edit” → Road to open the target road longitudinal edit screen. The cross section button opens the road cross section registration screen. 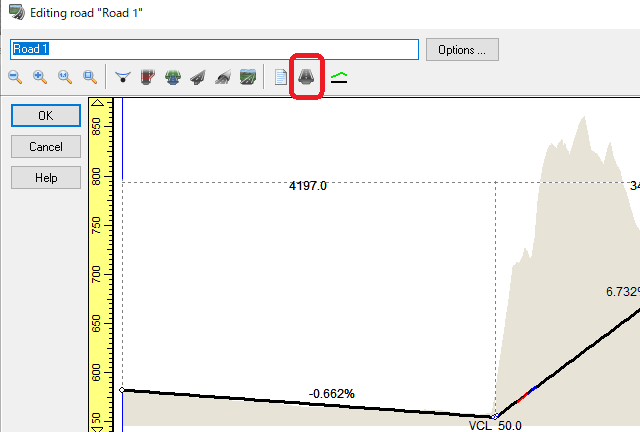 Fig.2 Vertical alignment screen Select the target cross section on the road cross section registration screen and press "View / Edit" to open the road cross section edit screen. 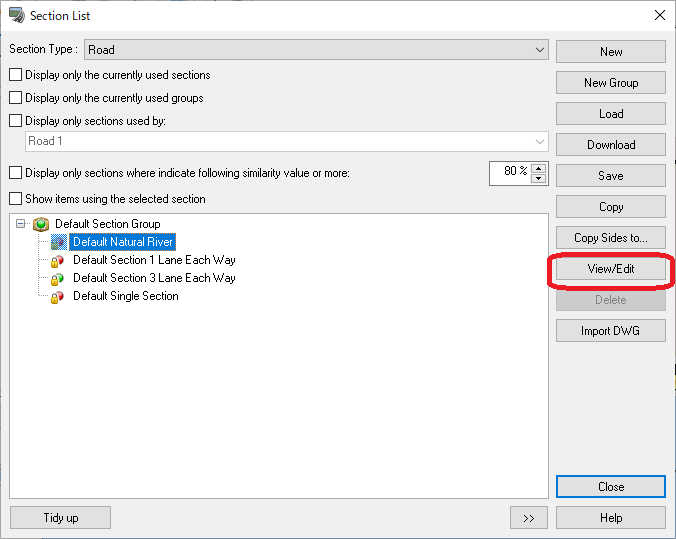 Fig.3 Road registration screen The road section defines each part such as a sidewalk, a roadway, a curb, etc. in a single stroke. The starting point is the left end and is defined in the order of left → right. The list on the right is from top to bottom. The origin (X1 = 0.0, Y1 = 0.0) is placed at the position of the road alignment. Textures of each category can be applied to images in other folders freely by "Import" in addition to images prepared in advance. 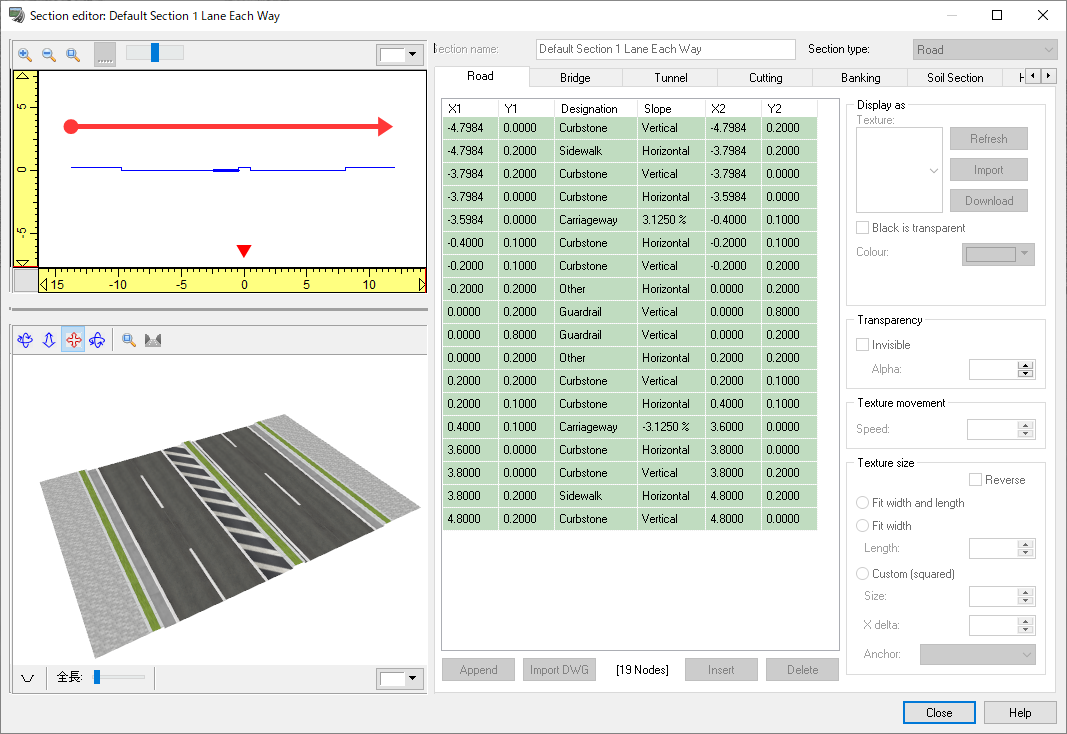 Fig.4 Editing screen for road section Edit lane details To edit a roadway, select "Roadway" in the section view or the list on the right and click "Roadway Details". The number of lanes is now displayed on the "Road Detail" screen instead of entering a value. 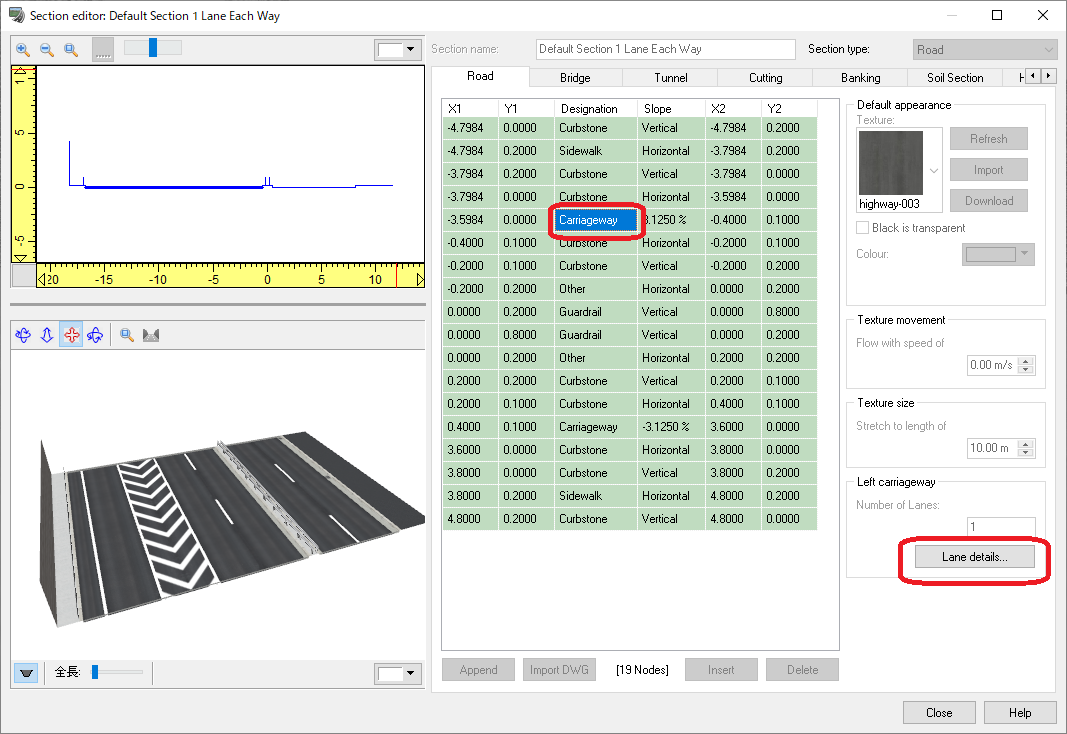 Fig.5 Editing the road The following three points have been mainly improved in "Roadway Details". 1. The required number of lanes and white lines and zebras between lanes can be freely inserted and deleted. The ability to set lanes, gaps, and edges in succession makes it easy to express complex white lines along zebras. By inserting a gap between the end and the lane, the shoulder and white line can be expressed, and the shoulder can be included in the roadway, so it is possible to drive beyond the shoulder without special setting. In addition, the 3D preview is dynamically updated even during editing operations, and the editing result can be checked immediately, reducing the time required for editing. 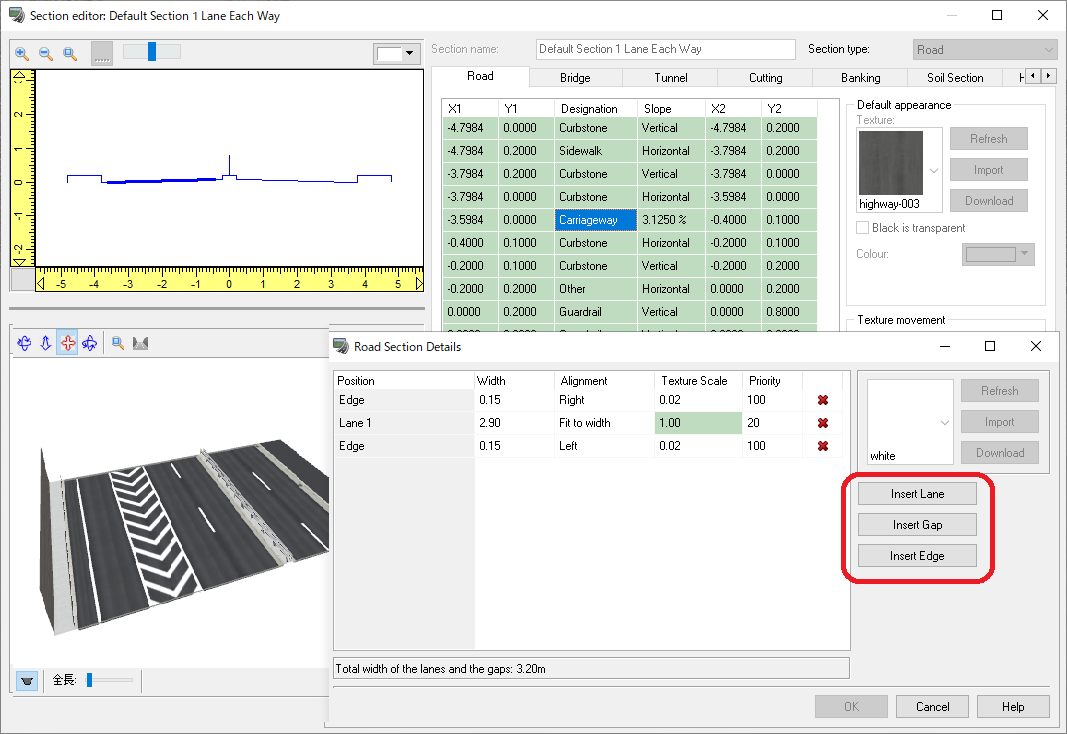 Fig.6 Lane detail screen 2. Freely edit the lane and gap texture alignment and scale. Different expressions are possible by setting one texture image and changing the alignment and scale. The following four types of settings are available for alignment. The default is "Fit to width". Other settings include "Left", "Center", and "Right". The scale is 1 by default. If you want to change the interval between white lines, such as zebras, you can edit the scale value by changing the alignment to something other than "Fit to width". 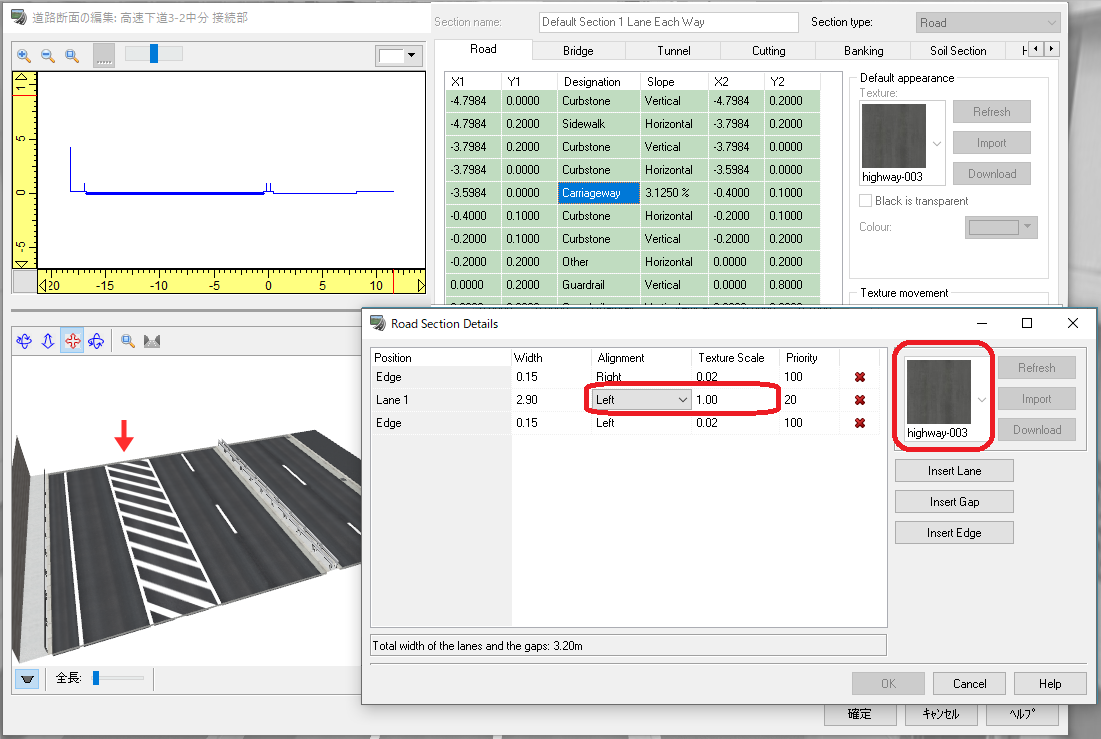 Fig.7 Texture alignment (Left) and scale setting 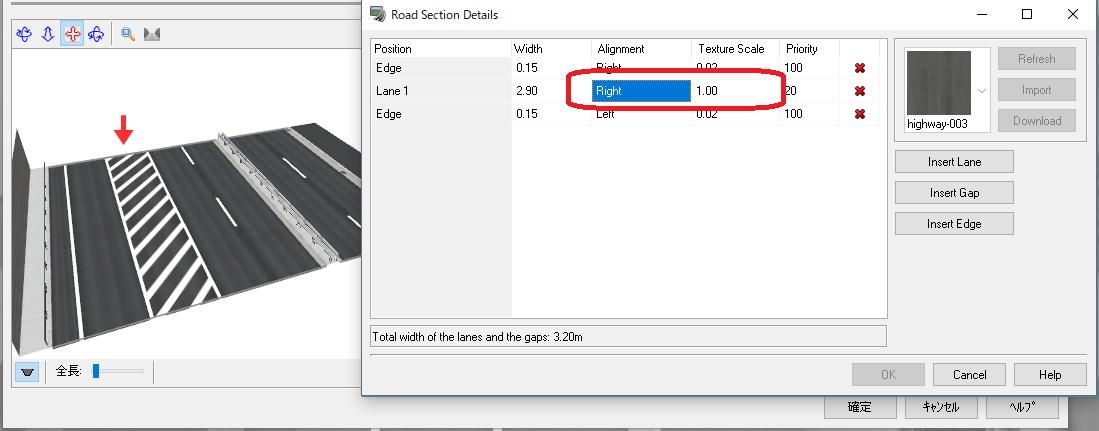 Fig.8 Texture alignment (Right) and scale setting 3. White lines and zebra patterns can be freely designed by setting the priority of decreasing the width of lanes and gaps at places where the number of lanes increases and decreases. 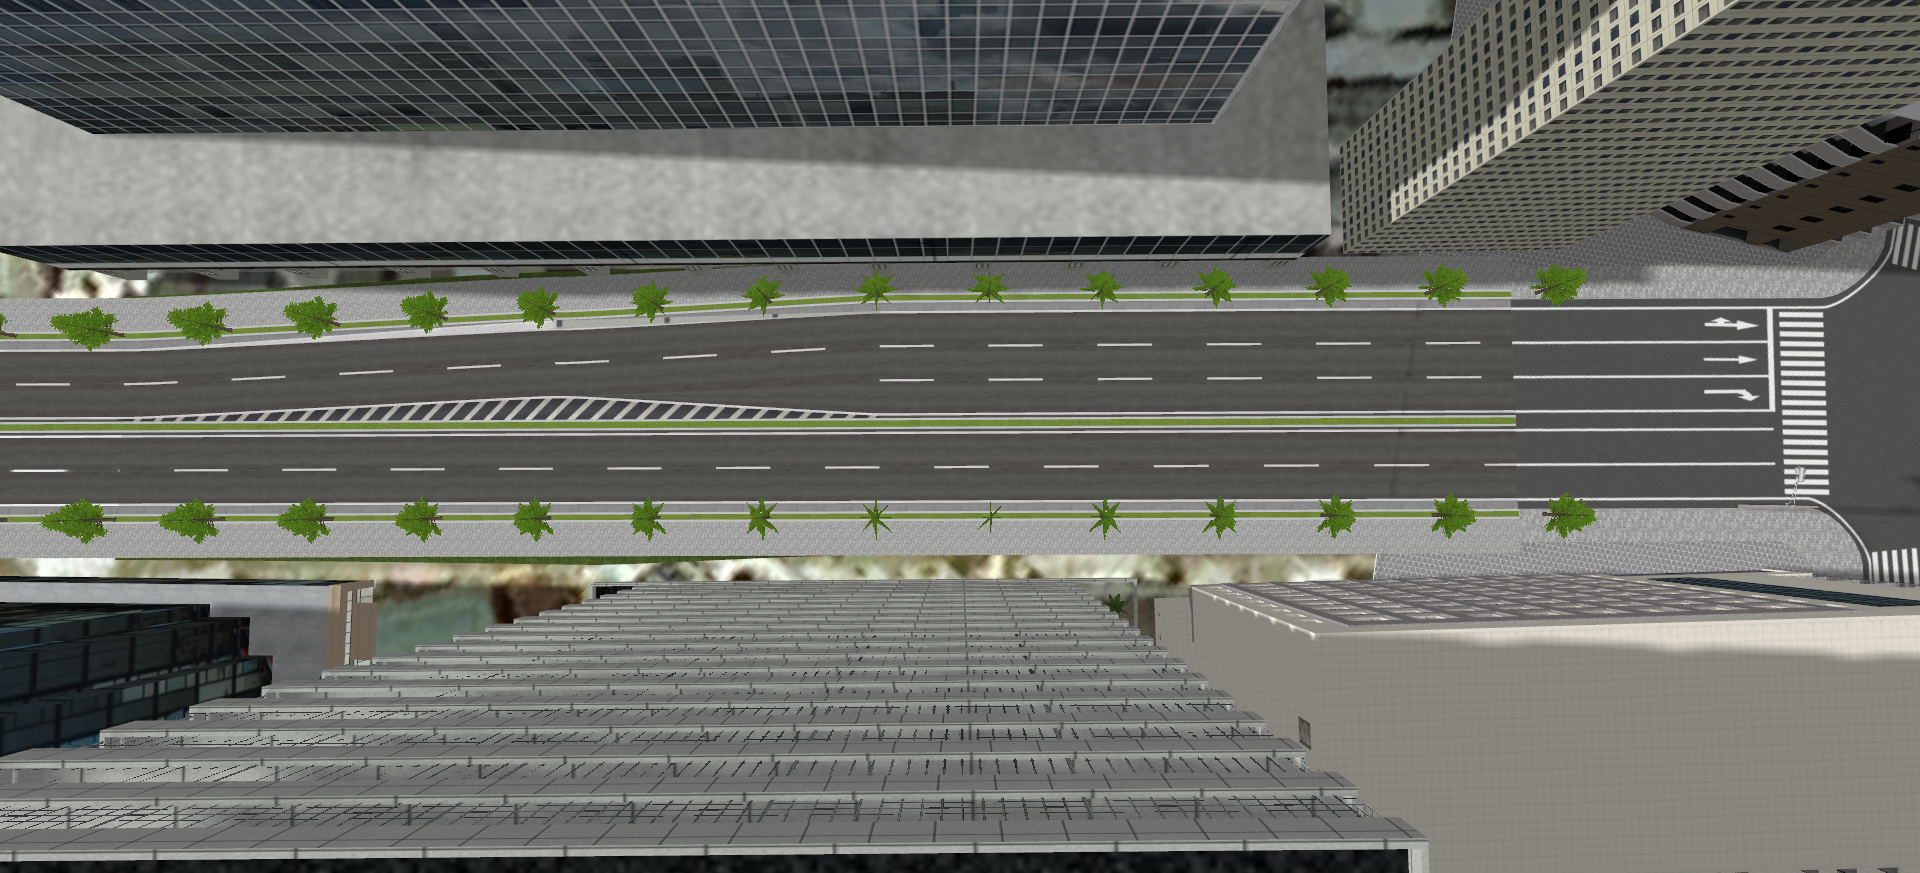
 Fig.9 Right turn lane marking pattern 1 and setting example 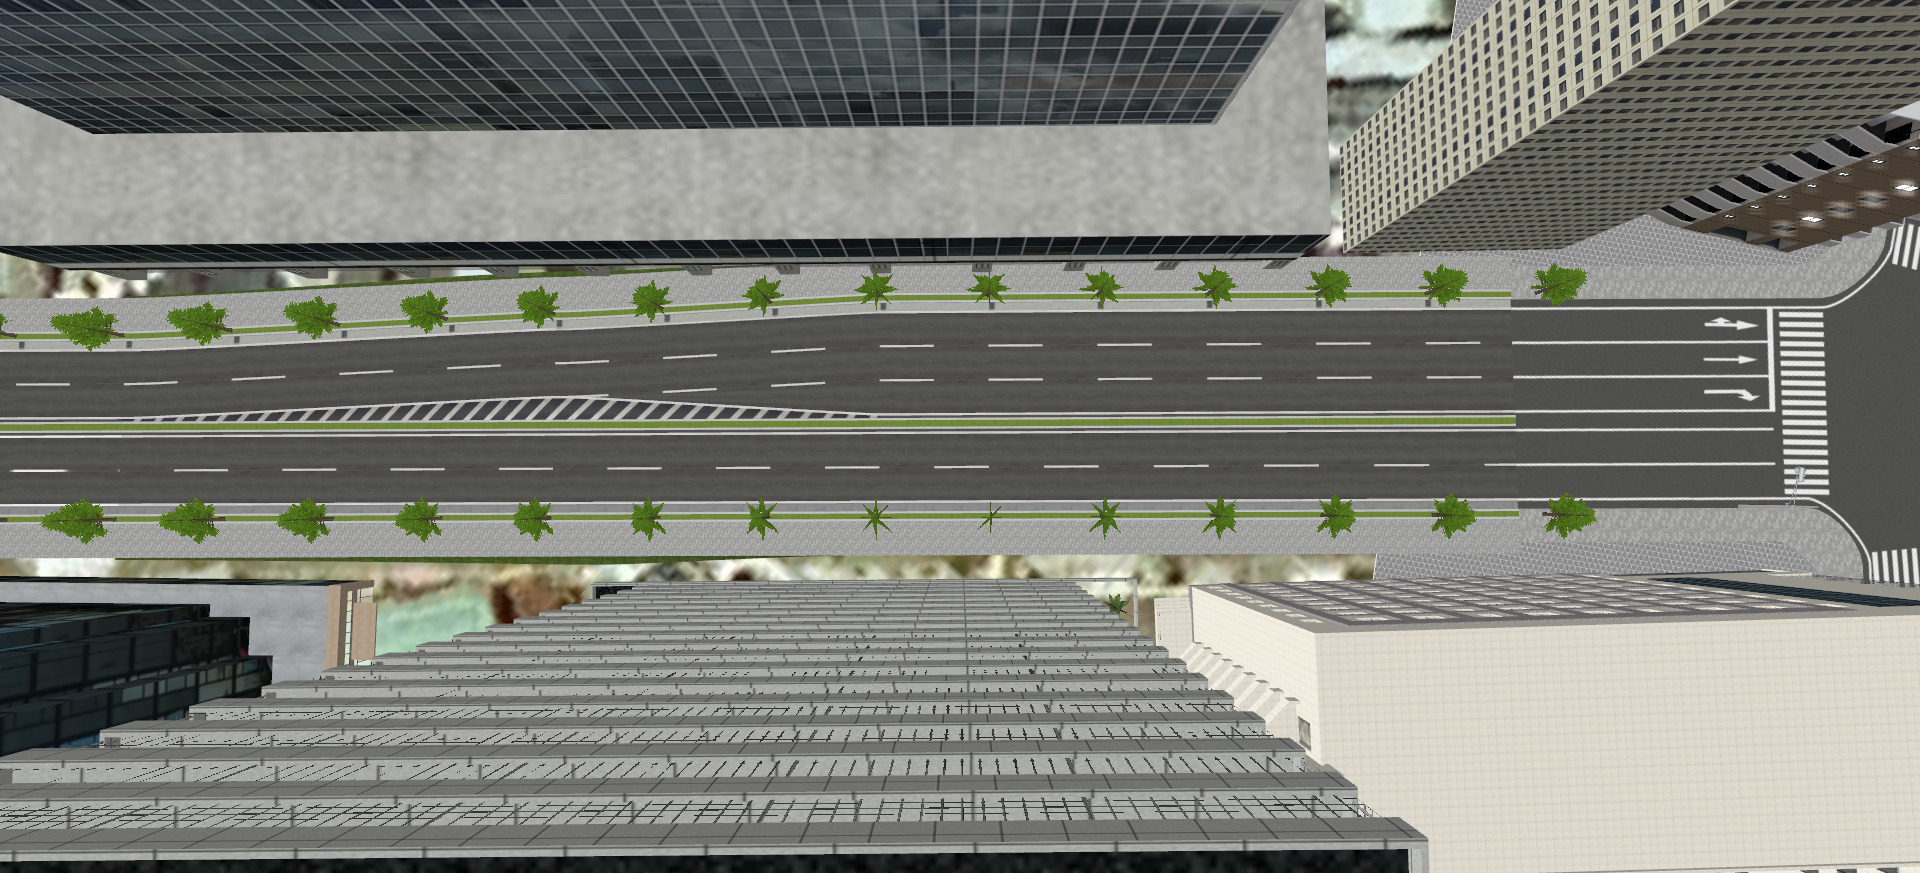
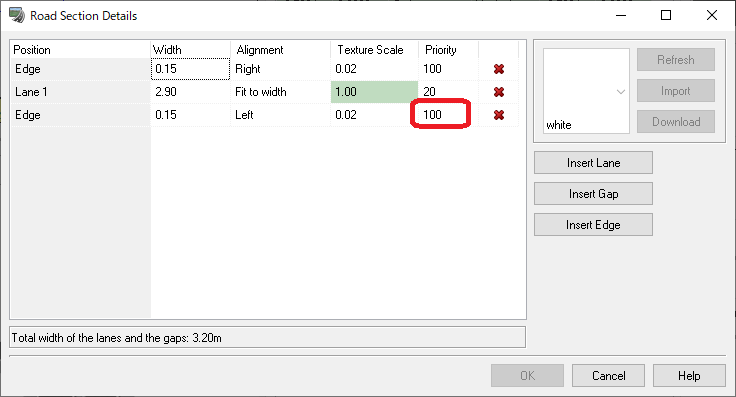 Fig.10 Right turn lane marking pattern 2 and setting example Setting of cross section that can drive oncoming lane To set a situation where the vehicle can run off the oncoming lane, such as when driving in a narrow alley, set the width of the lane to include the oncoming lane and check the black color transmission of the texture. In the details of the road, the width corresponding to the oncoming lane is the end, and the texture is black. Under "Other", wrap and hide. Next, set the right lane in the same way. 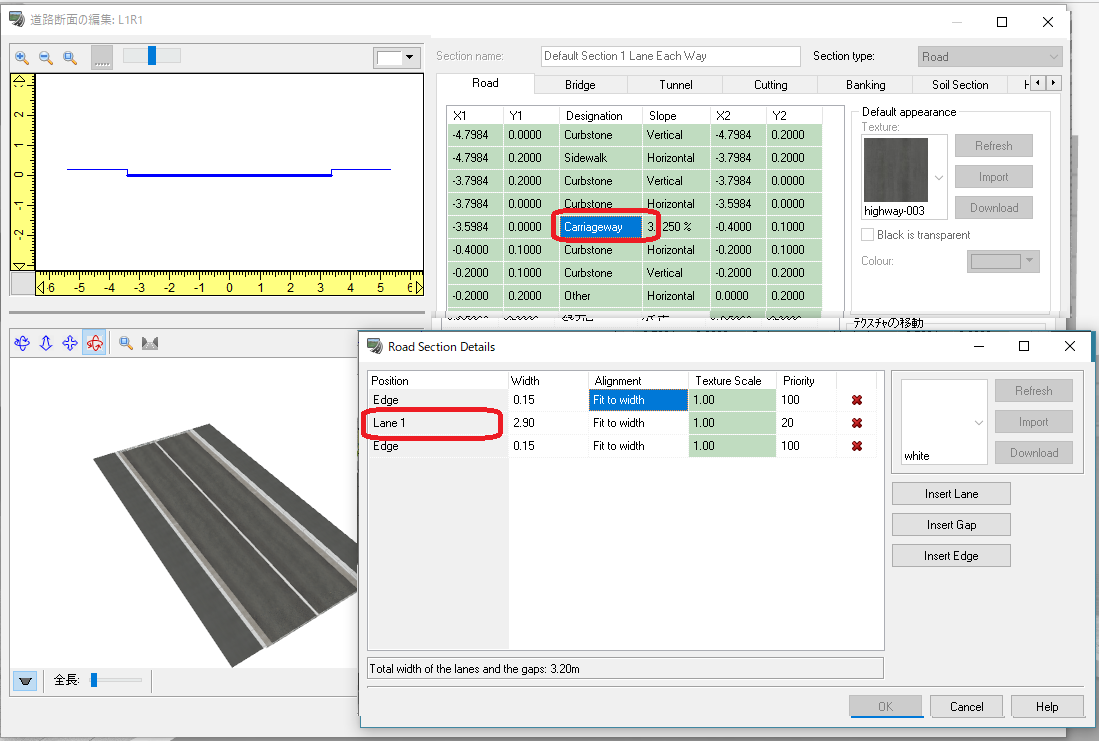
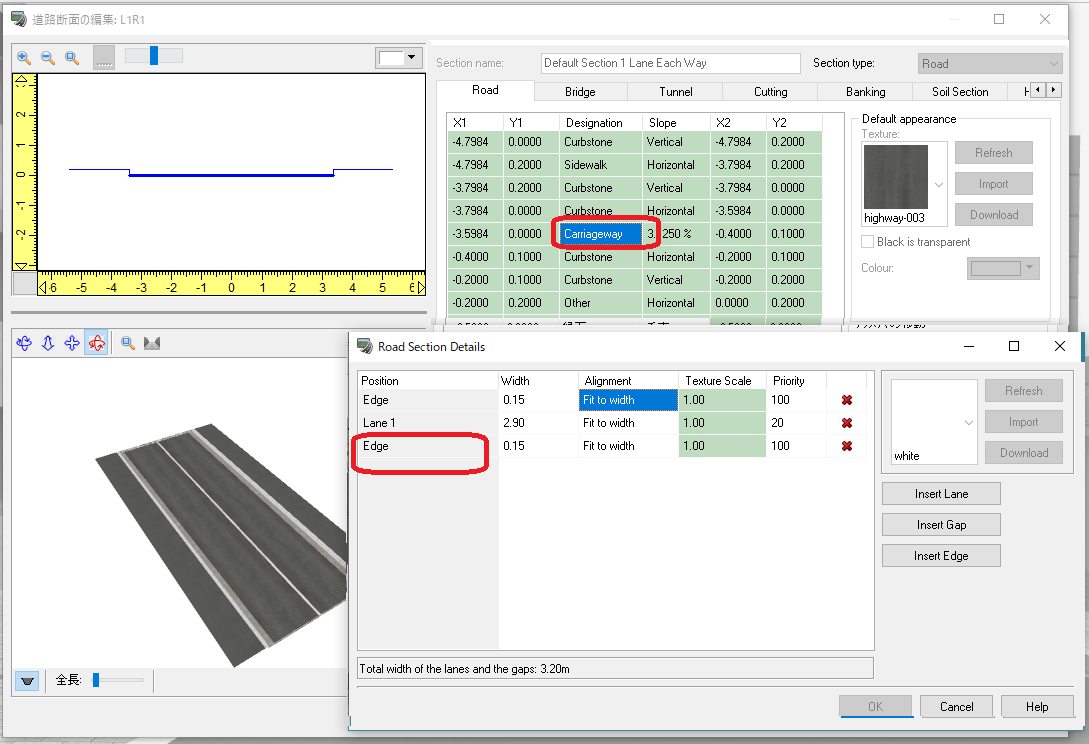 Fig.11 Left side road setting (left) and right side road setting (right) of a road section that can extend into the oncoming lane
|
|
|||
| (Up&Coming '20 New Year issue) | |||
 |

