As you create details of VR data, the simulation performance gradually
goes down since the drawing processing and motion calculation increase
load. Simulations with low performance gives a bad impression to viewers
as well as causes a VR sickness. In this topic, we introduce performance
settings in UC-win/Road Ver13.1 and how to improve the performance.
What affects performance
The number of installations to be displayed, the number of polygons, and
rendering processing of reflection and light affect the performance of
VR simulation greatly. In addition, creating or displaying the following
items have a great effect on the performance. It is important to limit
the number or the range of these objects and display settings or to show
them in different timing to decrease the effect on performance.
- Objects having large influence: Take care not to show many objects in the
view at the same time (3D tree, lake, video wall).
- Display settings having large influence: Take care not to display the effect
at the same time with other objects having large effects (reflection on
road, rain water on windshield, etc.)
- Elements whose number has a great effect: Need to limit the number of objects
or simplify it (Lighting (light source), bloom, transparent polygon, fire
and smoke, etc.)
Performance setting by using visual options
Here we introduce performance settings adjustable in UC-win/Road Ver13.1
and its effects.
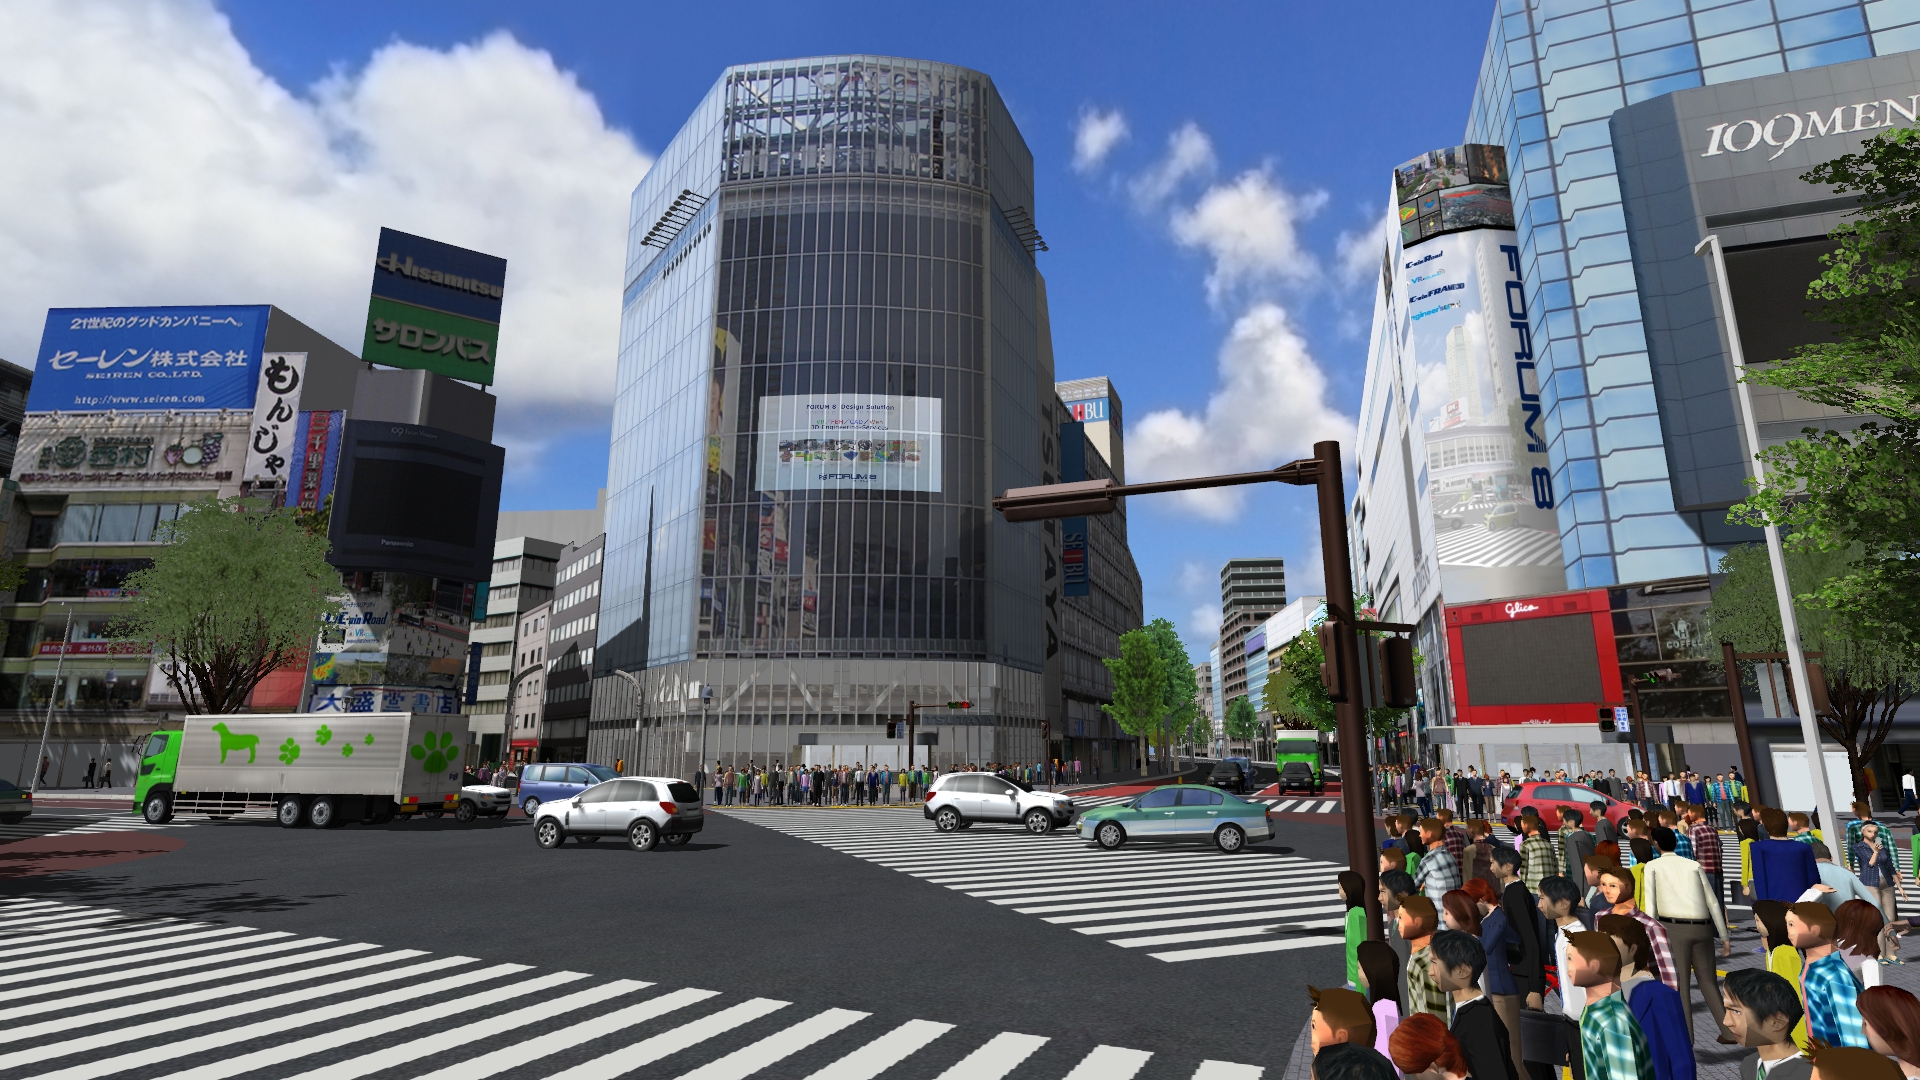
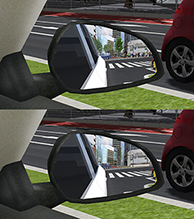
View distance
This is a setting of drawing range. It is a sphere shape with the current
camera location as the center. Since the height is also considered, it
requires a wide space when displaying in the perspective view in order
not to highlight the edge of drawing range. On the other hand, when seeing
from the low viewpoint of such as human, the edge will still be natural
even in a small space. The images below are the comparison of the height
of viewpoint with the view distance of radius 0.5km. The perspective view
gives an impression that sceneries ends in the middle of space. On the
other hand, since the edge of displayed range is hidden by buildings, the
view from ground level don't provide a feeling of strangeness. In addition
to the display range, users can set the range of each road related factor
in detail required for each situation.
 |
 |
| Fig.1 View distance 0.5km (Left: perspective view, right: from ground level) |
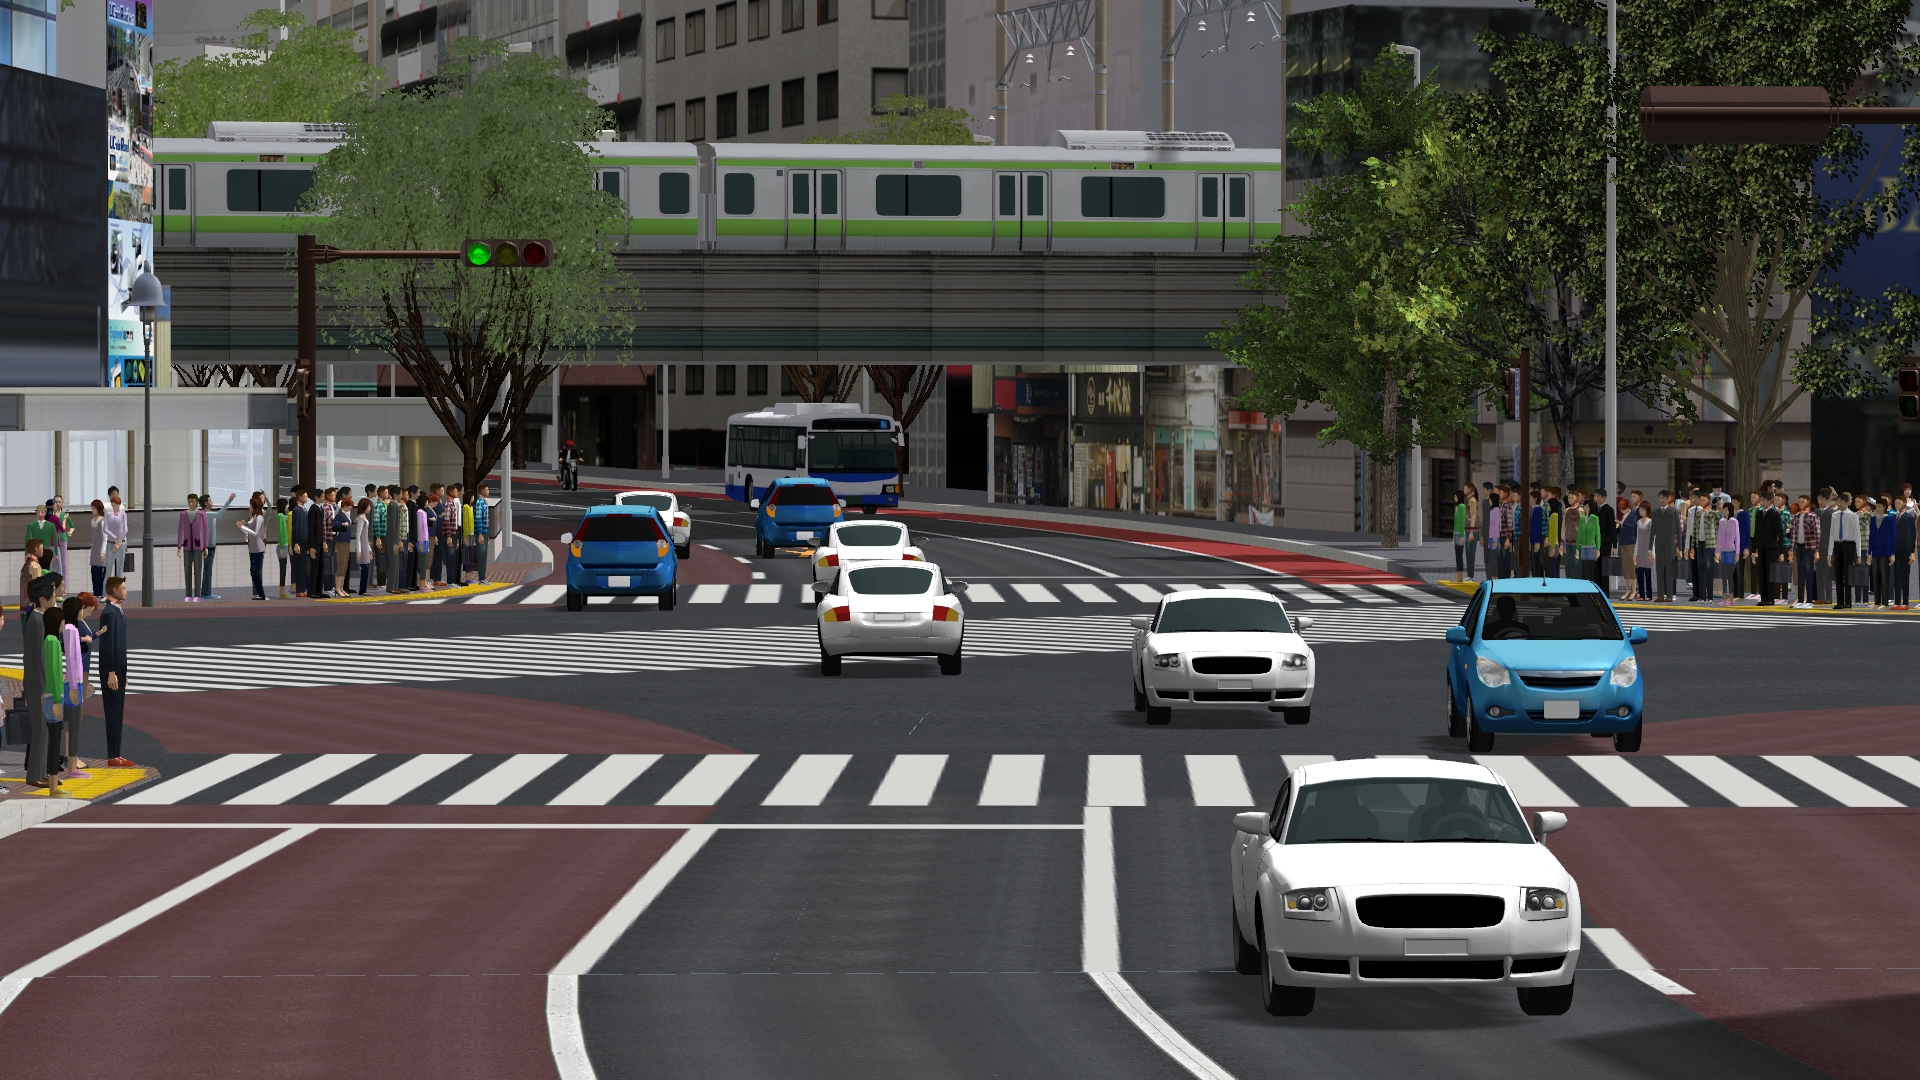
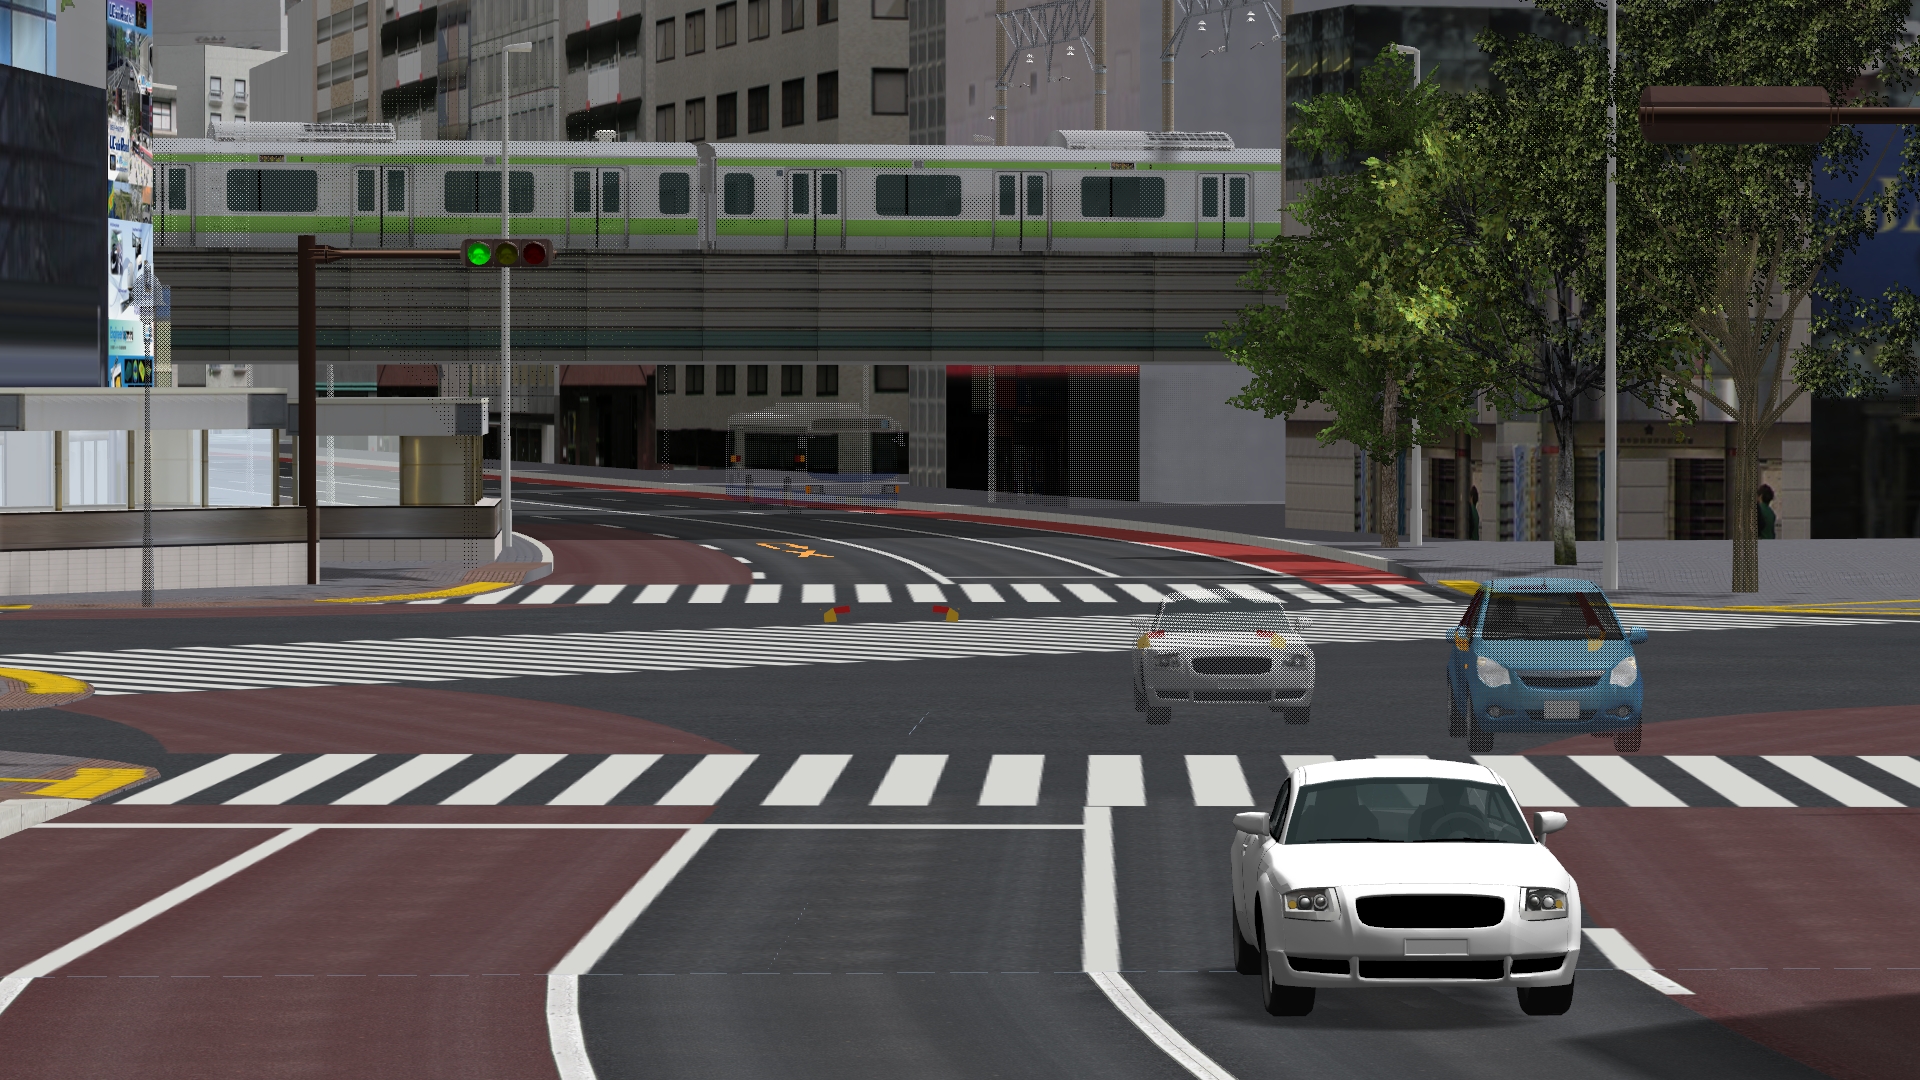
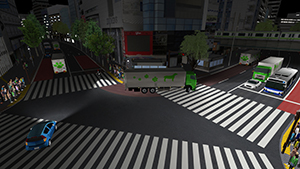
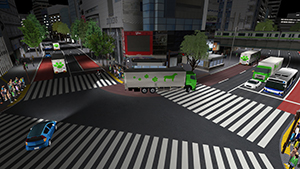
Hide far objects
This function is valid in the initial settings. Objects, traffic models,
and characters in farther place than specified distance are not displayed
when the display size written on screen becomes smaller than a certain
value in order to improve the performance. Set the value with angle, and
the object becomes hidden when lines connecting the edge at up, down, left
and right side of the object and the view point is under a certain angle.
The bigger the angle is set to, the nearer models become undisplayed. In
this case, viewers are easy to notice objects appearing and disappearing.
 |
 |
| Fig.2 View of each visibility angle (Left: 0.5 deg., right: 2.5 deg.) |
3DS models & FBX scenes dynamic LOD
A dynamic LOD setting that switches models according to the display angle
is available for 3D models and FBX scenes. The way of thinking of angle
is the same as the setting to hide faraway objects. For the dynamic LOD,
the setting is not about the presence or absence of display but the switch
of model itself based on the distance. If using a complex model with lots
of polygons, users can improve the performance without having big effects
on the appearance by setting that the low polygon model would be used for
objects displayed small. In the visual options, you can change the degree
of switching according to the situation by selecting multiple against the
dynamic LOD setting.
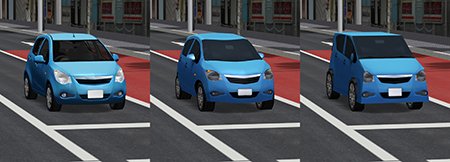 |
| Fig.3 Model dynamic LOD setting (the number of polygon from left: high,
medium, low) |
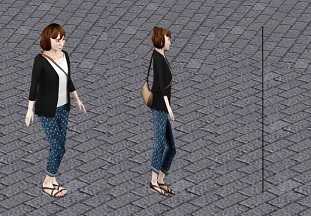
Characters LOD
This is the LOD setting for MD3 and FBX characters. You can switch the
display mode of character in 3 modes: Smoothing mode -> Low resolution
mode -> Symbolic mode. The low resolution mode automatically creates
a static image without animation. If you choose bigger angle, the performance
improves while the low precision becomes remarkable.
Setting of 2D/3D tree LOD
You can select the angle to switch to 2D trees for 3D trees and that of
the branch mode (the number of branches of tree texture to be intersected)
for 2D trees. The single branch mode displays only one tree texture and
the camera angle is adjusted automatically so that the camera always shows
the texture from front side. Since 3D trees have a large effect on the
performance, we recommend you to switch 3D trees to 2D trees when you see
from a far camera position.
 |
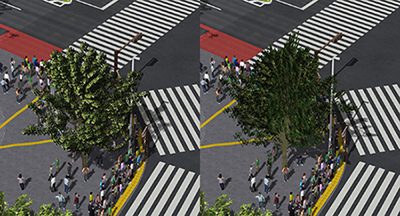 |
Fig.4 Character LOD (From left: Smoothing mode,
Low resolution mode, Symbolic mode) |
Fig.5 Setting the switch of 2D/3D display improves the performance. |
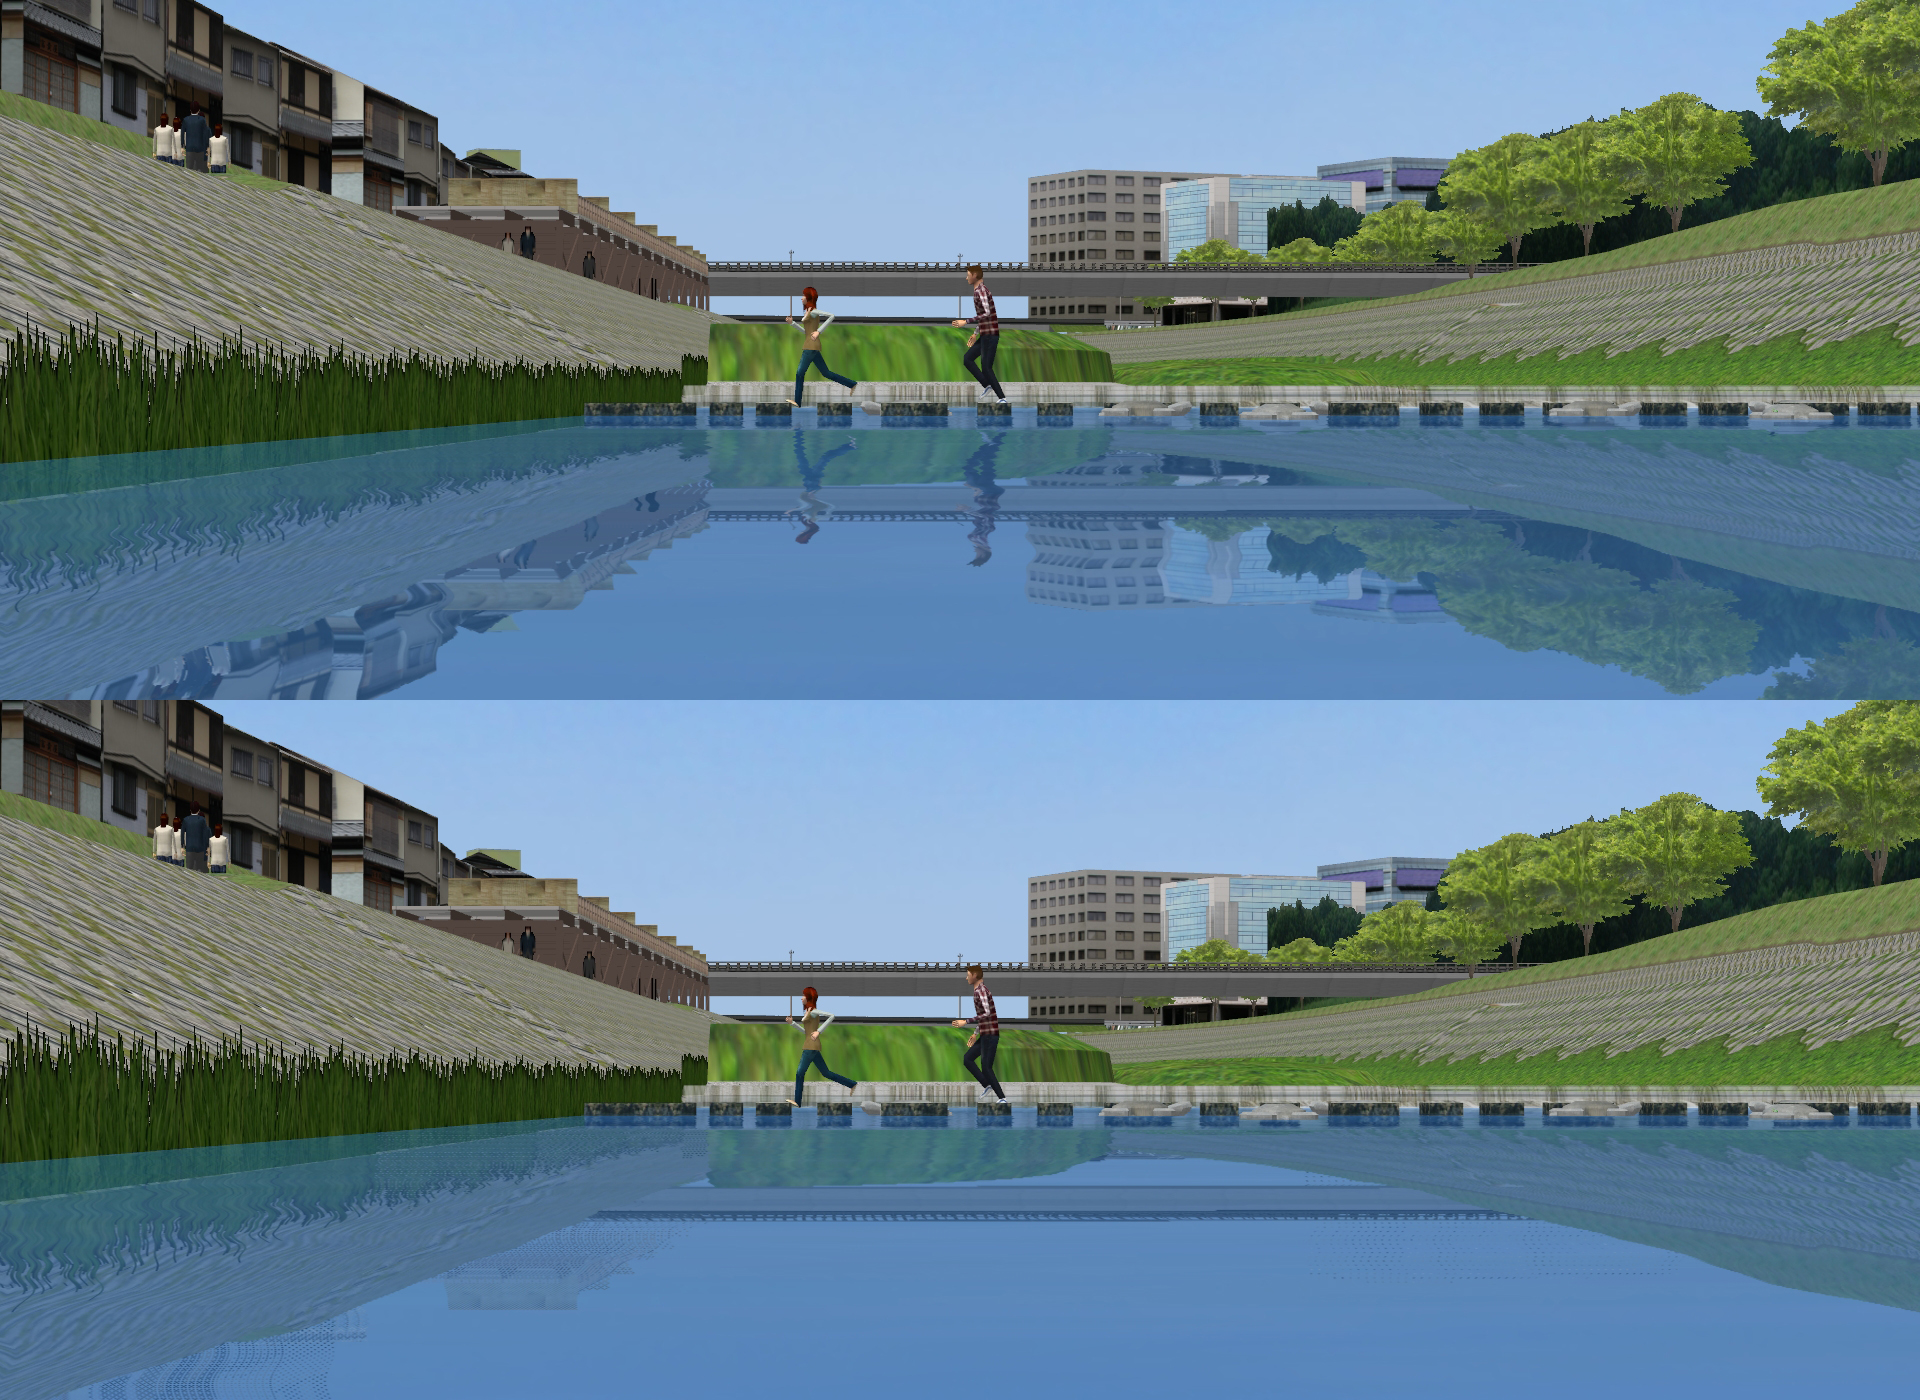
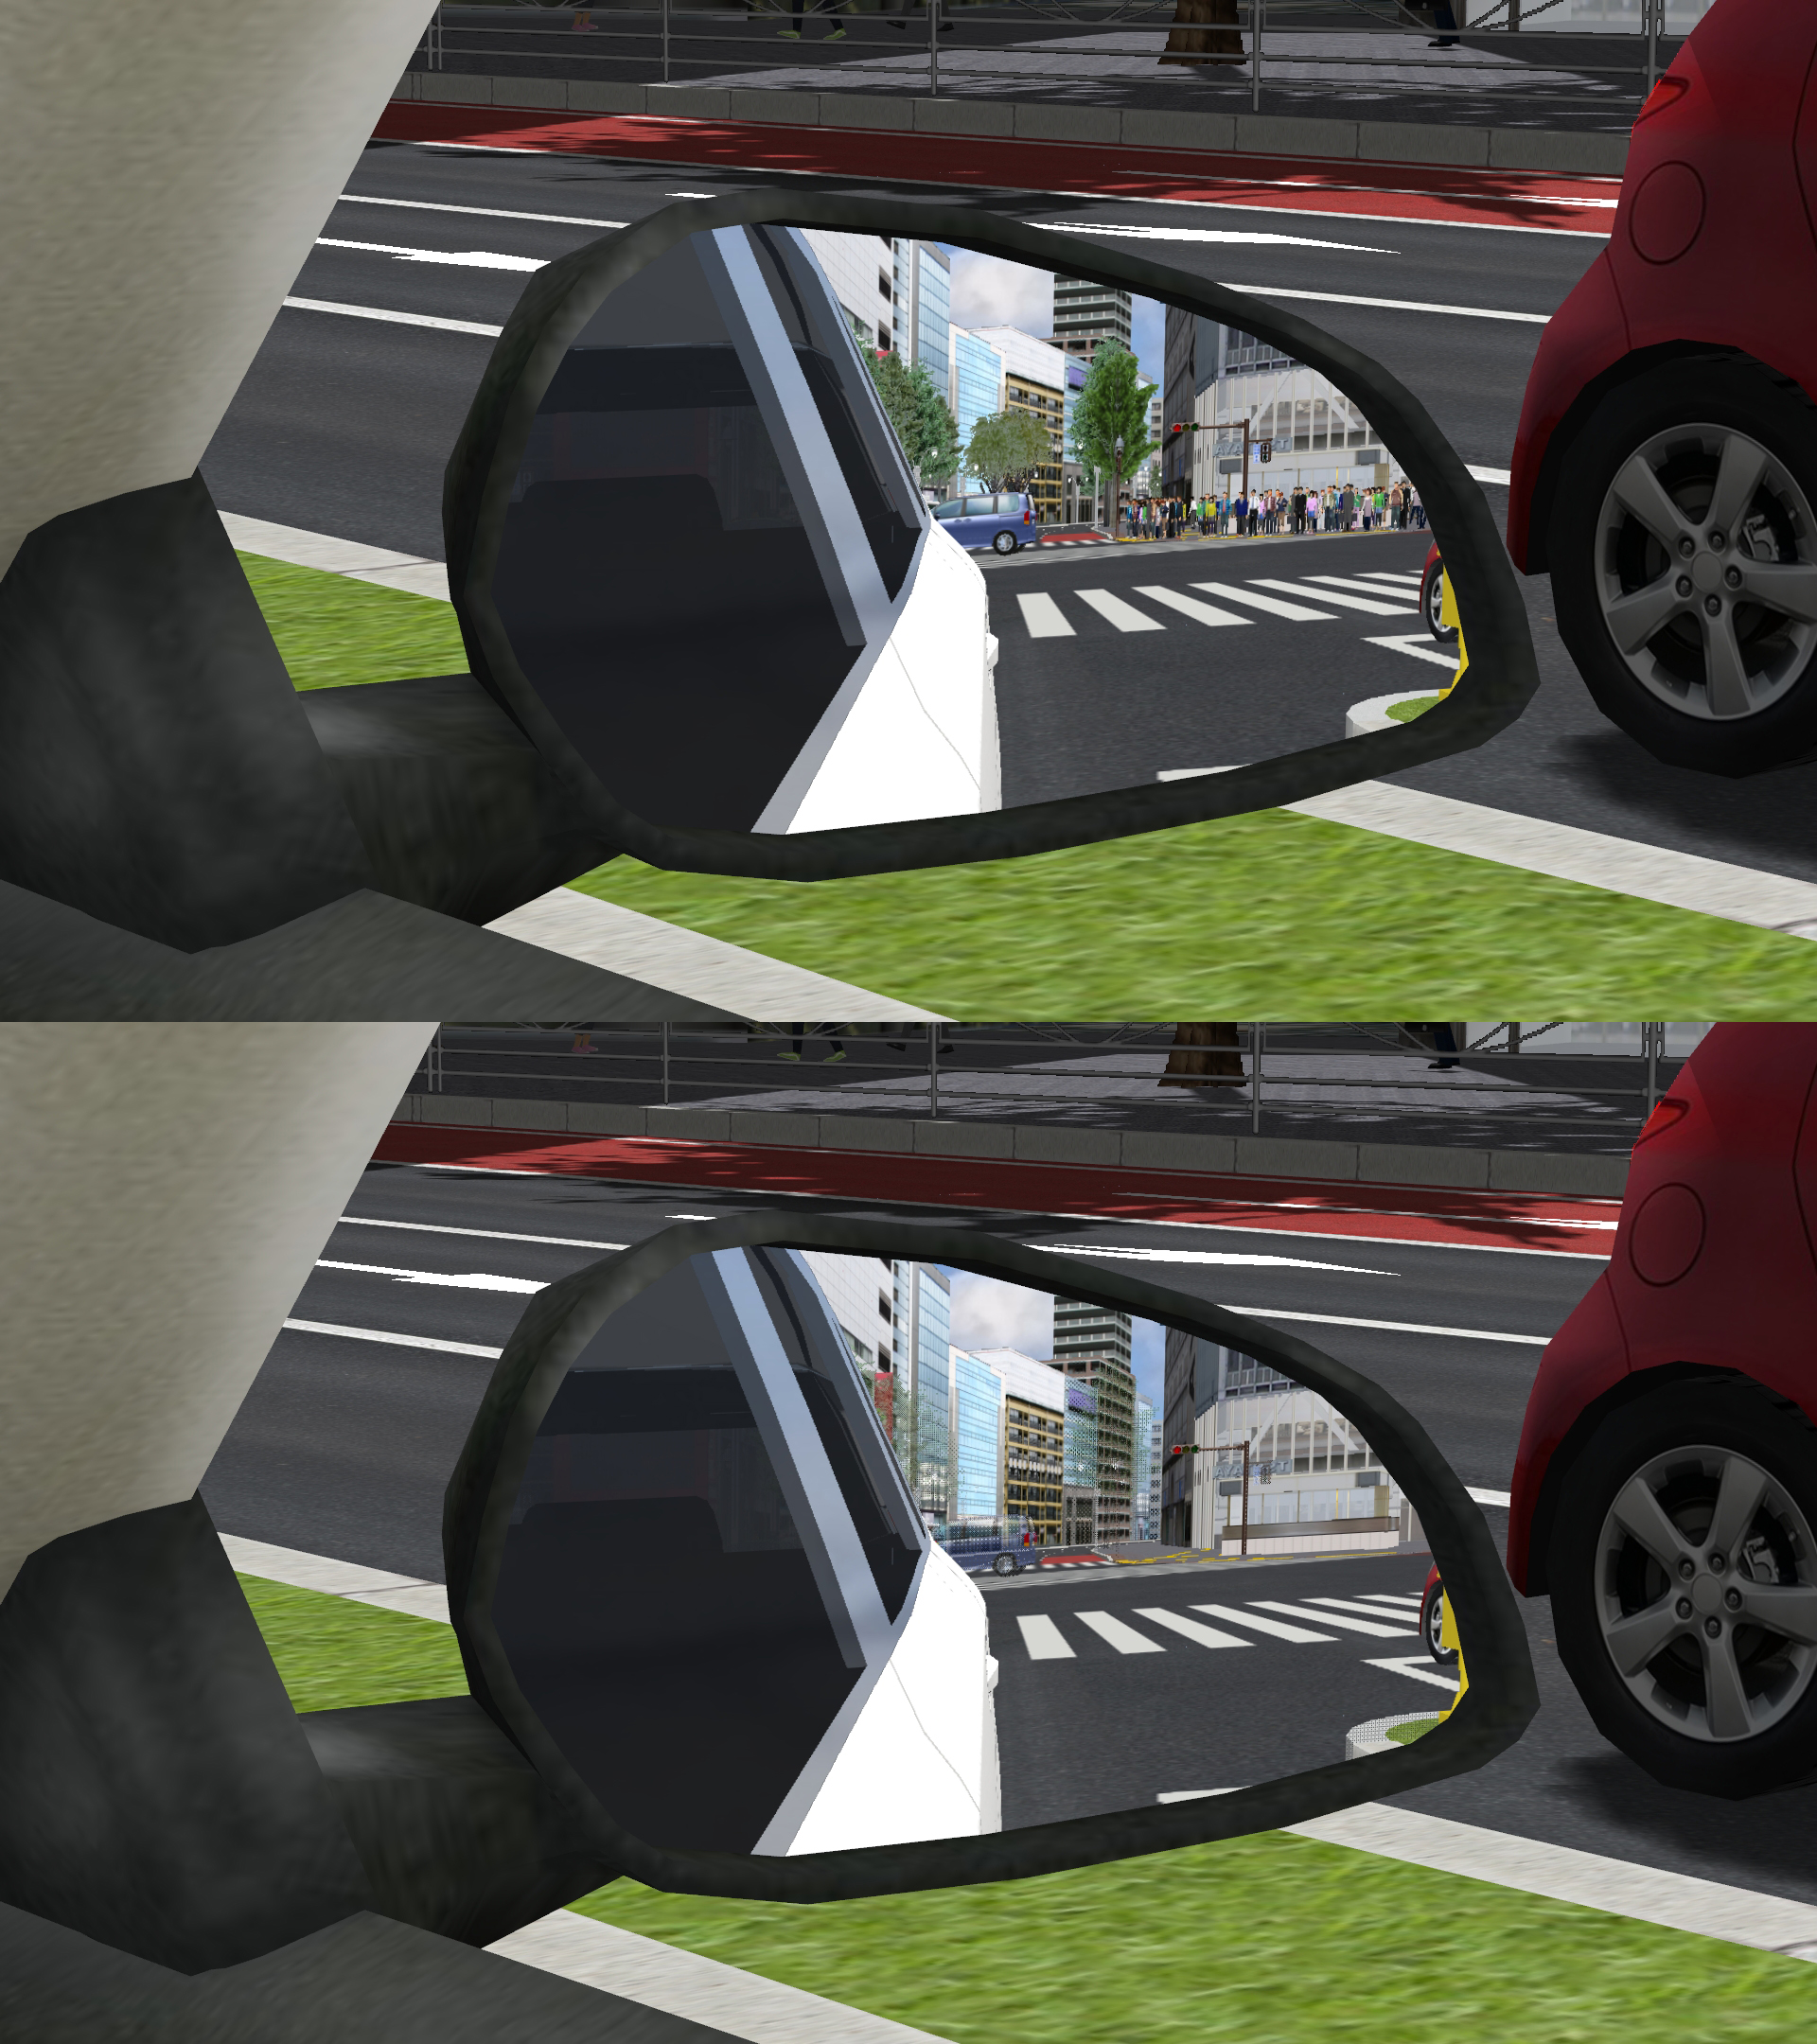
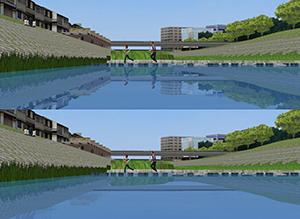
Reflections
This setting is for lakes and mirrors and monitors during driving. Separately
from the normal space setting, users can select a multiple number of displayed
angle for objects reflected on lakes and mirrors. To improve the performance,
select the multiple of displayed angle and simplify the drawing processing
of reflection because small objects and far objects are not noticeable
in lakes and mirrors.
 |
 |
| Fig.6 |
|
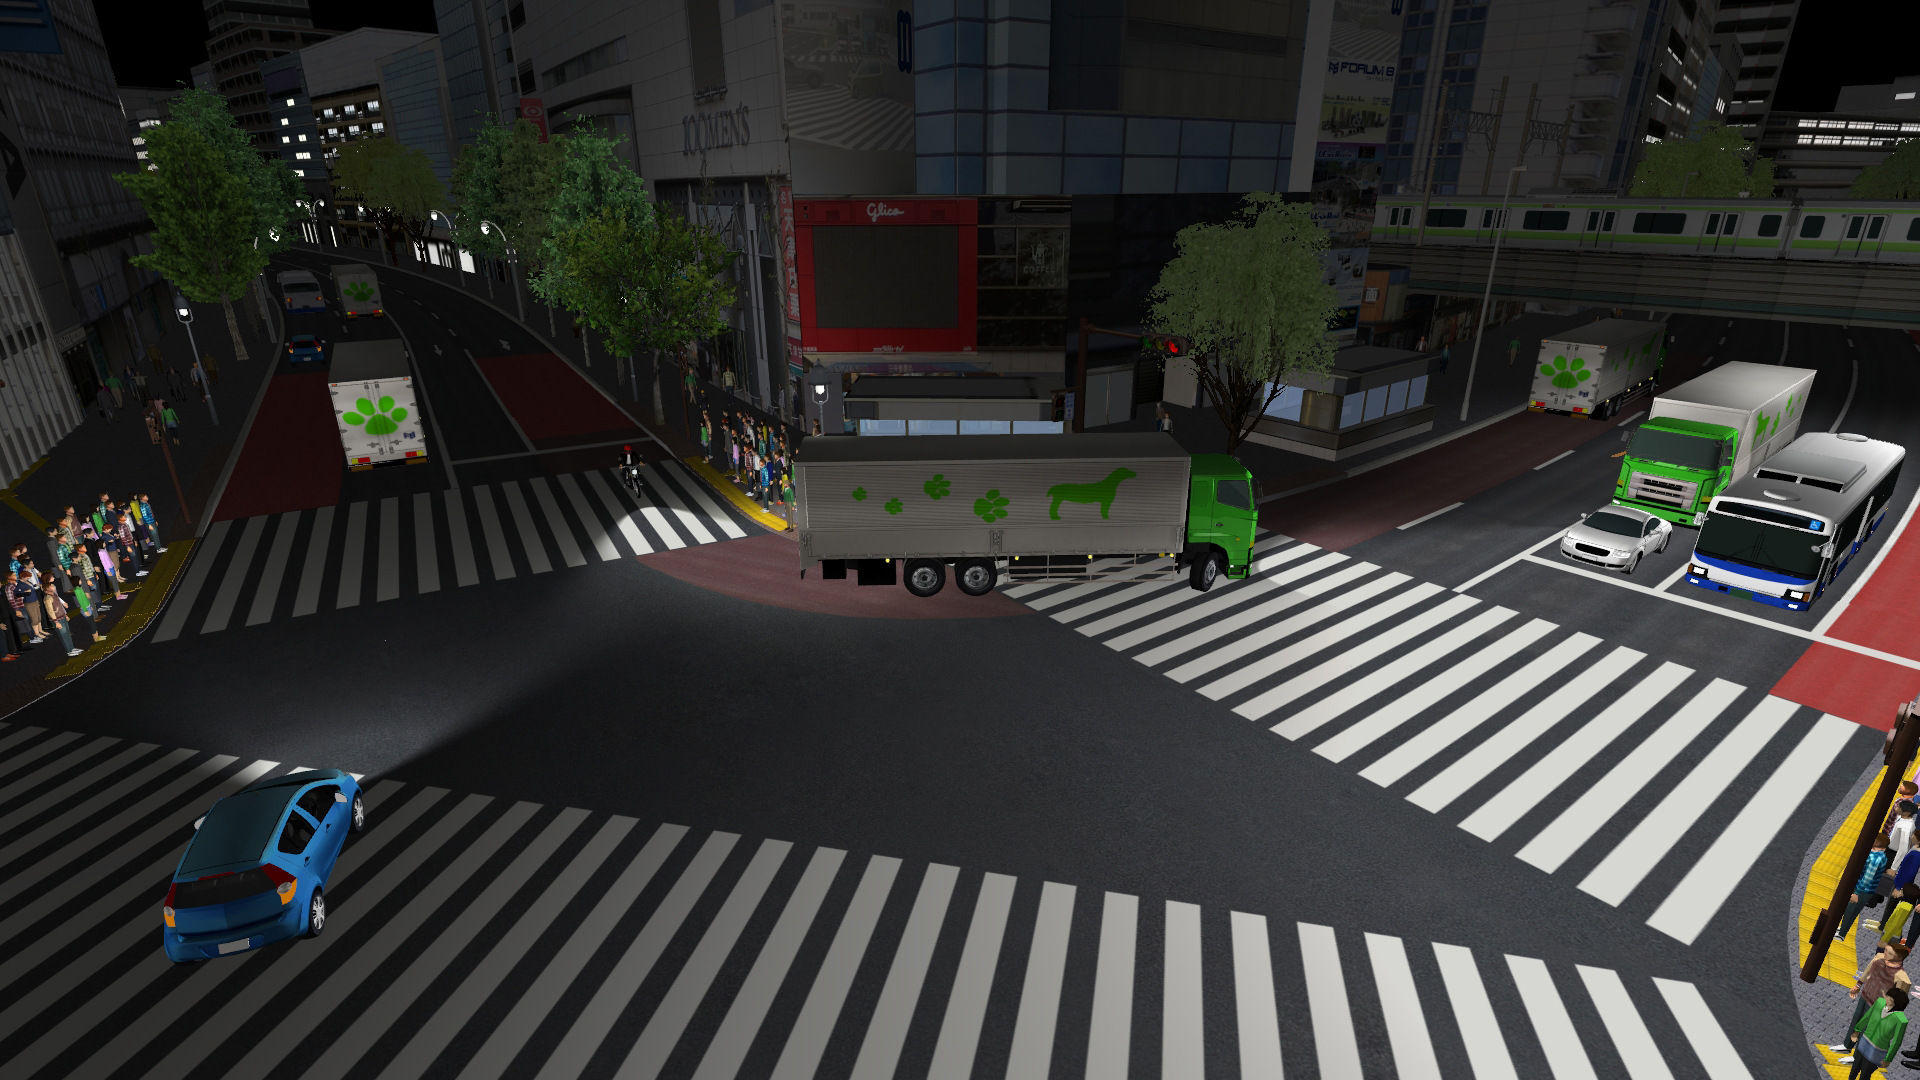
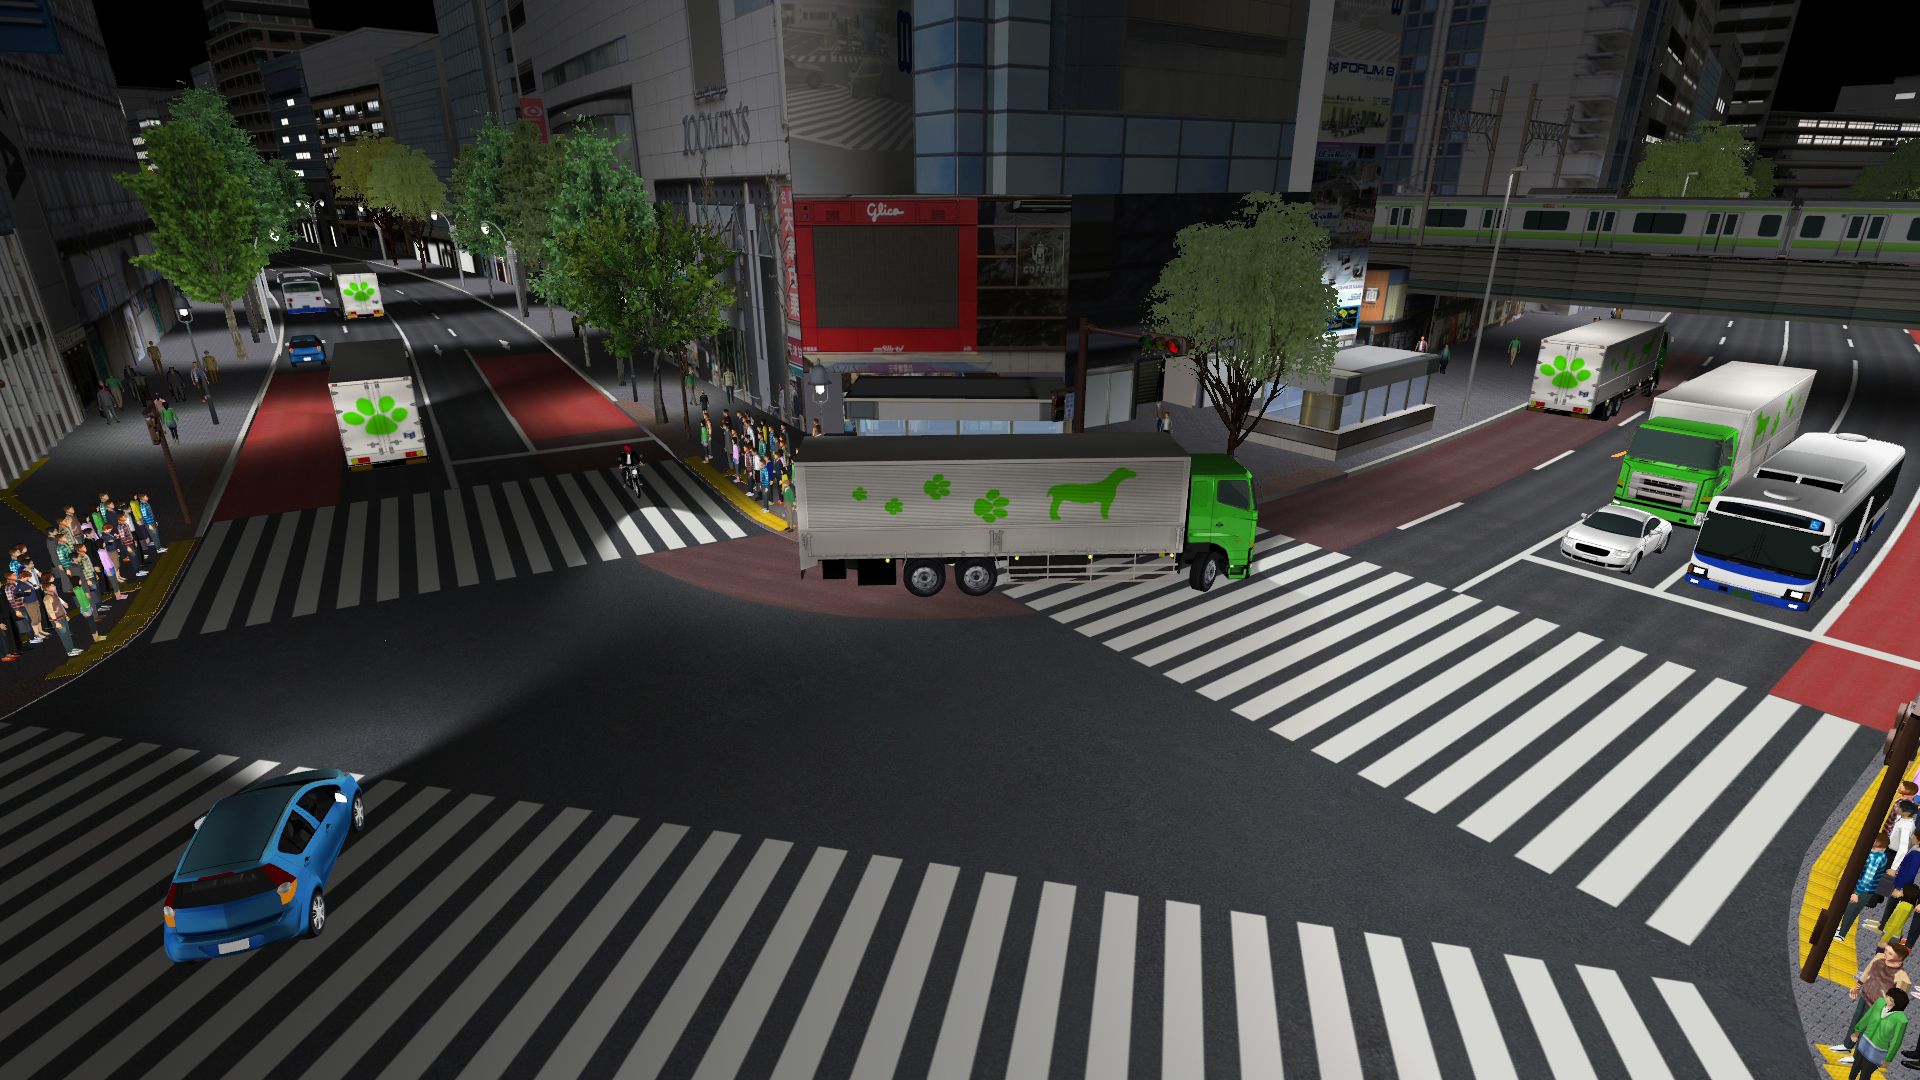
Advanced Lighting
You can change the number of valid light source for advanced lighting used
for objects, vehicles, and street lights. The light source near from the
view point become valid preferentially. Light sources out of the limit
number are not lit but become valid when the camera approaches it. The
default setting of the max display number is 20 and the max display number
is 100. A lot of light sources causes the low performance. You should reduce
the number of objects or light sources on one model.
 |
 |
| Fig.7 Max light source display number: Left: 20, right: 100 |
Performance setting for each scene
When seeing VR in various viewpoints, different performance setting is
required by scene. For example, when the performance is optimized for the
perspective view, the view may not be displayed beautifully or the load
may become high when seen from the human eye line, and vice versa. As we
introduce below, using different settings according to situations allows
you to keep high performance.
Performance adjustment effective for the perspective view (wide view)
This is effective when you want to show a wide range or the following patterns
also have a great effect.
- Increase the display angle of general / traffic flow objects.
- Increase the LOD of characters and 3D trees. -> Use high LOD for objects
seen from far away place.
- Set the model LOD (setting other than the visual options) for many models.
- Increase the value multiplied by display angle -> If there is a lake,
the reflection and processing decrease.
Settings effective for low viewpoint (pedestrian)
When the camera in pedestrian viewpoint doesn't show far scenery, using
shorter view distance can have a large effect. By selecting a distance
that can be looked over from the major places as standard, the PC doesn't
use so much processing power while giving no bad effect to the appearance.
Also, you can set shorter view distance when reproducing the view from
pedestrian from where faraway roads cannot be seen.
- Use shorter view distance and road view distance -> Adjust the view
distance based on the visibility of road so that the scenery looks naturally.
- Reduce the max number of light source.
- Use larger angle in the smoothing mode -> Characters seen from the
pedestrian view can be displayed naturally even not in the smoothing view.
Settings effective for driving view
The same measure as the pedestrian view is effective for the driving view.
To set a visual distance at bridge and tunnel separately according to visibility
is a good way when simulating a drive on highway. When a cockpit and mirrors
are displayed, reducing the texture size of mirror and multiplying larger
value by display angle is also good measures.
|