Shade3D
In August 2018, "Shade3D" joined FORUM8 products. This long-selling
Japan-made conprehensive 3D CG software covers from modeling and rendering
to animation, 3D CAD, and 3D print. In this topic, we introduce more enhanced
depiction examples brought by the cooperation between Shade3D and UC-win/Road.
From Shade3D to UC-win/Road: High-precise 3D model expansion
High-precise model data created in Shade3D can be read and used in UC-win/Road.
Loaded models can be used not only for landscape but also for walking,
flight, and driving. Users can perform a simulation while changing time
and weather in real-time.
Export from Shade3D
Here we introduce a linkage with vehicle models. Models created in Shade3D
can be exported in formats that can be loaded in UC-win/Road. Both Shade3D
and UC-win/Road support a variety of formats, and complex shapes can also
be exported in FBX and COLLADA (dae) formats with animation. To run objects
as vehicle model in UC-win/Road, export models in 3DS (3ds max) format.
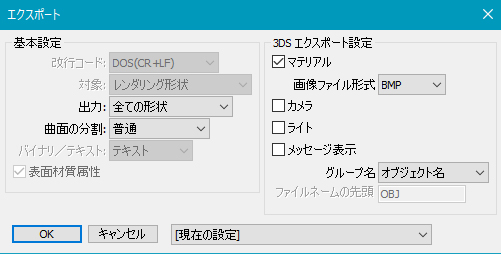
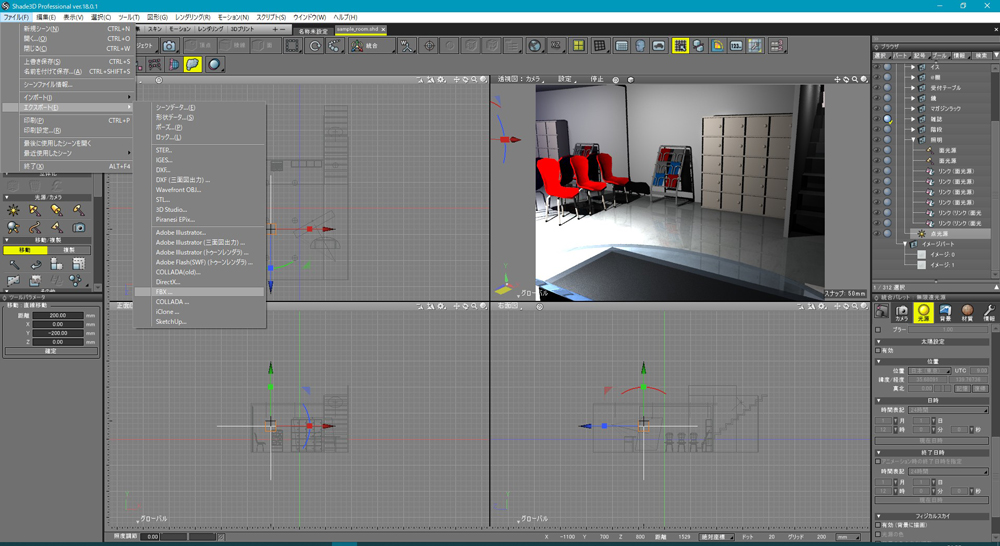
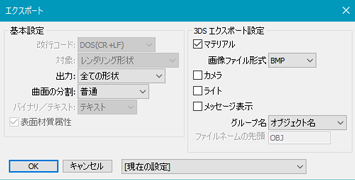
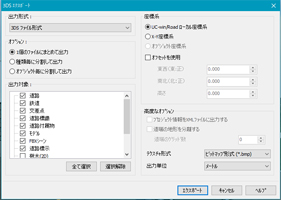
Export models in 3DS format from "File" - "Export" - "3ds Studio" in Shade3D main menu. Create a new folder for images of material that are output at the same time.
 |
 |
| Fig.1 Create models in Shade3D |
Fig.2 Shade3D: 3DS export setting |
Import models in UC-win/Road
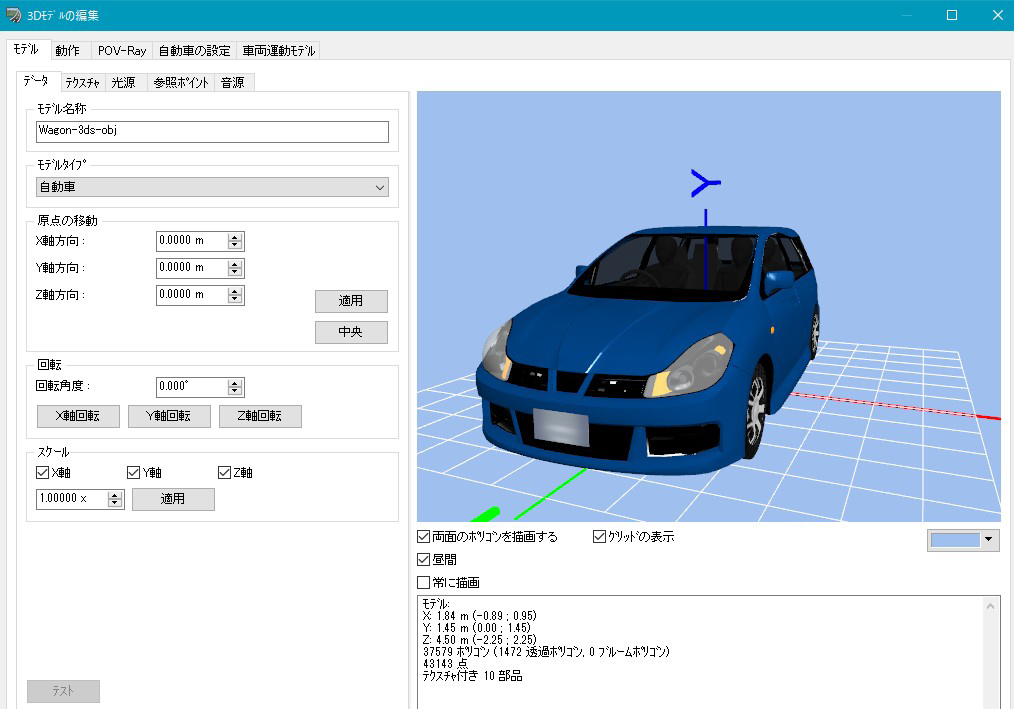
Go to "Library" - "Load" to import 3DS data exported
from Shade3D. Check textures and adjust them if required.
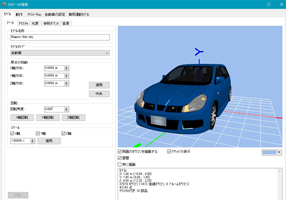 |
| Fig.3 UC-win/Road: Edit 3D models |
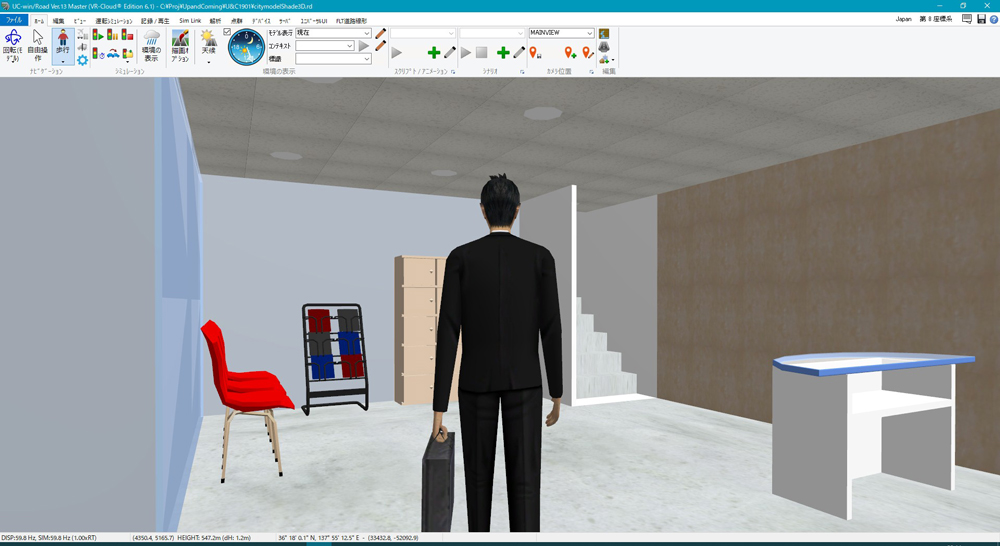
Display VR in UC-win/Road
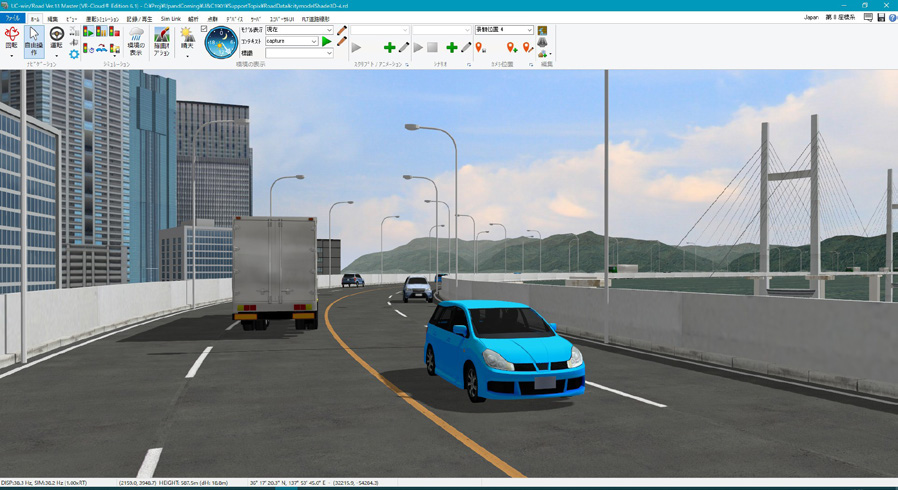
In the case of vehicle, users can register something like cockpit as "Cars"
for "model type" and add it to traffic flows. In the case of
architecture and interior model, "walking" simulation is executable
immediately after models are arranged on the default terrain. Different
from a panorama view, users can walk through models and check exterior
and scale freely. No advance route setting or camera work is required for
free walking.
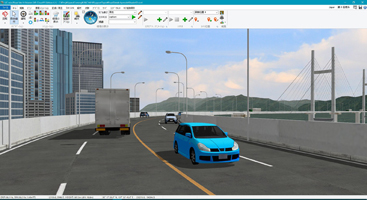 |
| Fig.4 Utilize models for VR data in UC-win/Road |
 |
 |
| Fig.5 Shade3D interior model |
Fig.6 Walkthrough in UC-win/Road |
From UC-win/Road to Shade3D: Images with photorealistic texture
Based on UC-win/Road data, Shade3D's photorealistic rendering function
draws textures such as transparancy and reflection on surface material,
and atmosphere expressed by gradation of shade thickness made by the calculated
light wrapping around it.
|
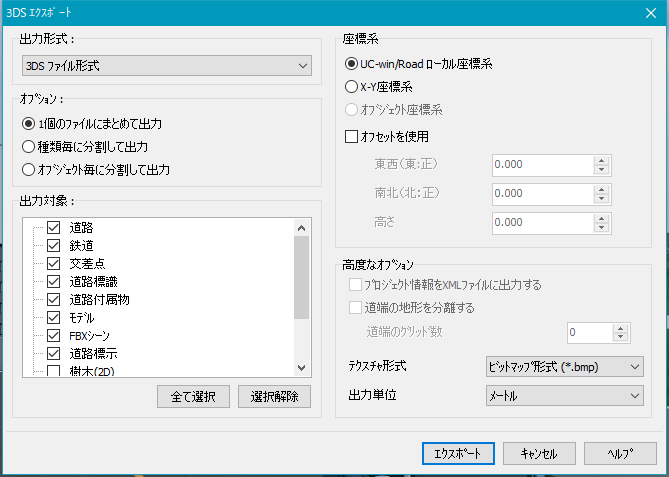
Export from UC-win/Road
Export VR data created in UC-win/Road in file formats that can be read
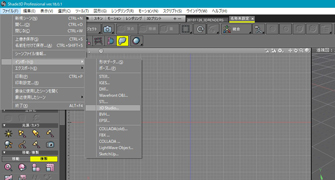
in Shade3D. Go to UC-win/Road "File" menu - "Export"
- "Export 3DS" to output a 3DS file. Create a new folder for
texture images exported with 3DS files.
In UC-win/Road, users can select type of 3DS objects to be output such
as road, model, and tree. Here, export models except terrain to change
location in Shade3D. When setting different materials in Shade3D for example
to glass on architecture model, users can also add material not by exporting
one from UC-win/Road but by brushing up models in Shade3D. In this case
users should arrange vehicle models in Shade3D since traffic flow is not
exported in 3DS.
|
|
 |
| Fig.7 UC-win/Road: 3DS export setting |
|
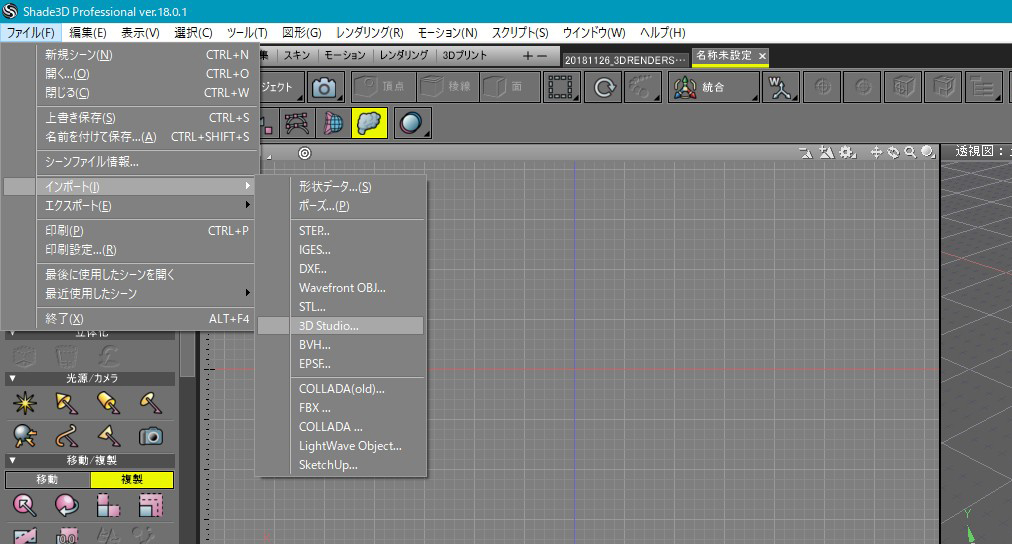
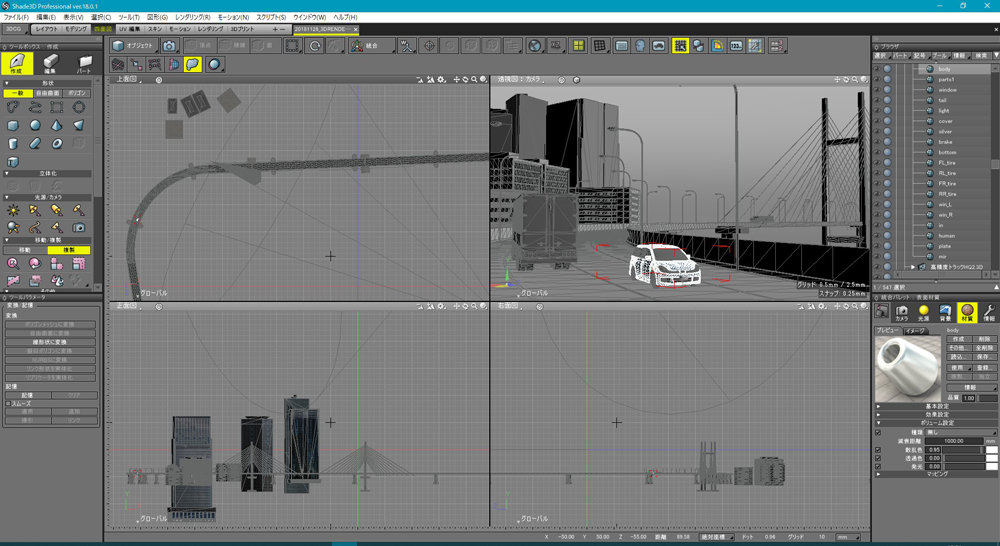
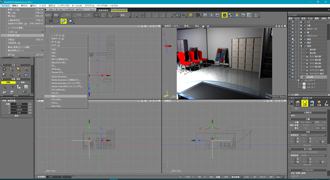
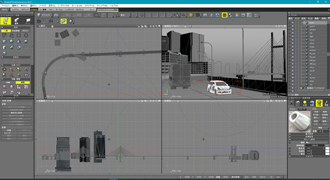
Import in Shade3D
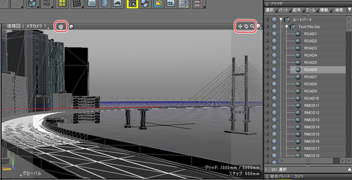
Launch Shade3D and go to "File" menu - "Import" - "3D
Studio" to import 3DS file you exported. Click the double-circle icon
on each drawing and the whole model is displayed. When a model is displayed,
you can set cameras from the camera window or the navigator at top right
in a drawing. Select a road and click the double-circle icon, then the
camera moves and display a selected shape at center of the screen. Angles
can be changed by adjuster at top right.
 |
 |
| Fig.8 Import in Shade3D |
Fig.9 Shade3D: Camera angle setting |
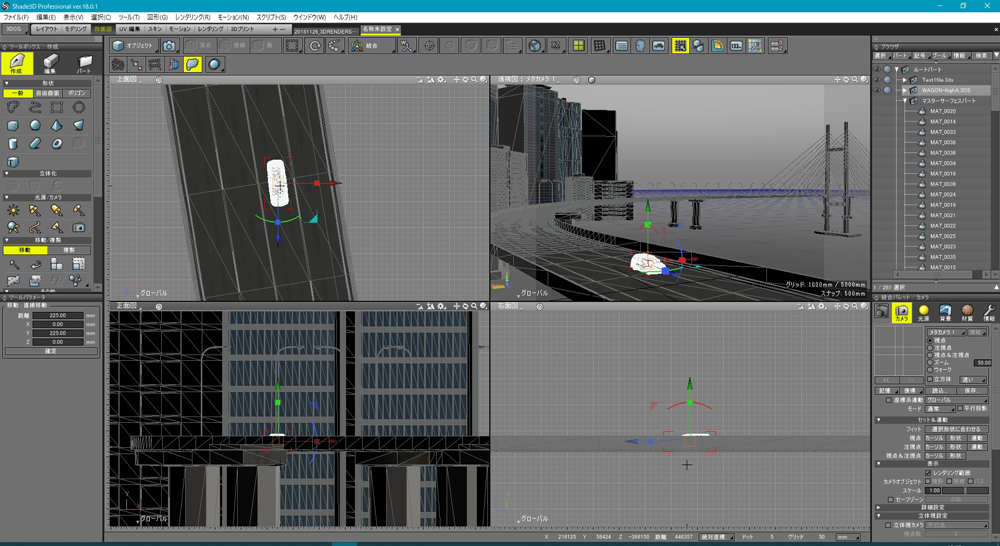
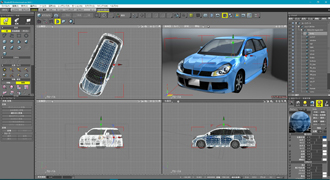
Import and arrange vehicle models
Created vehicle models can be imported and arranged on road. Angles can
be set.
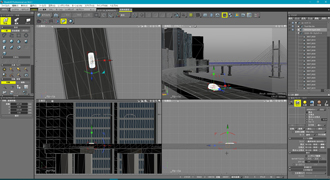 |
| Fig.10 Shade3D: Arrange vehicle models |
Material / light source / background setting
Next, select materials for rendering. Detailed setting including gloss,
reflection, and transparency for each object is available. Users can apply
default materials such as metaric texture, stone material, and glass. In
addition, users can set solar light and add effective light sources like
spot light. Arbitrary images and product contents images can be selected
for backdrop.
 |
| Fig.11 Shade3D: Object material setting |
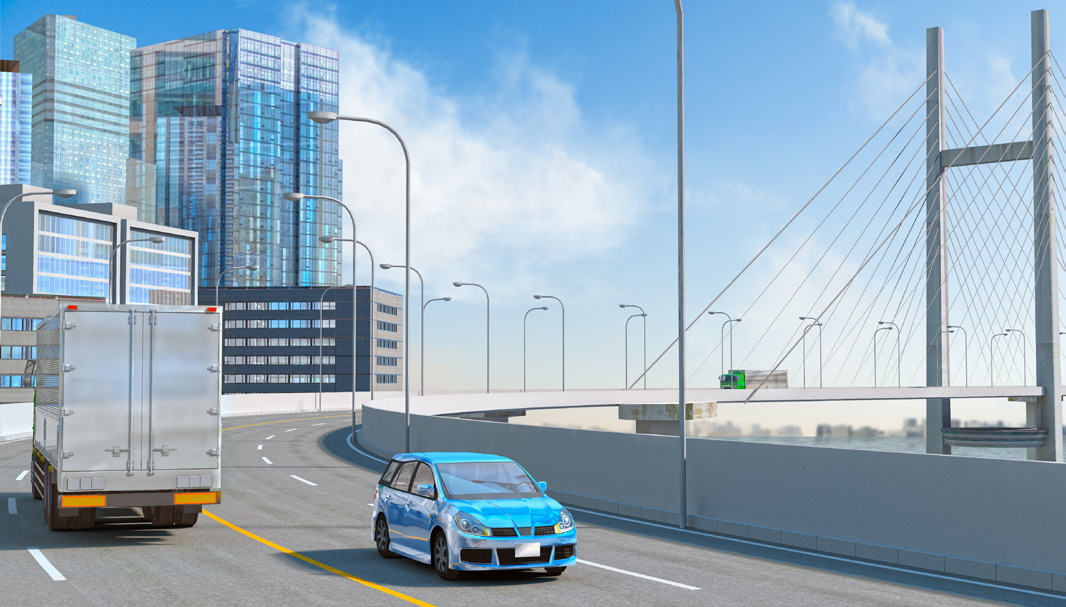
Rendering
After finishing settings, conduct a rendering from "rendering"
menu - "start rendering". Open "rendering setting"
to configure a rendering method and image size in detail. Users can check
depictions of light and shade and atmosphere such as vehicle's polish,
scenery reflected on vehicle body, transparency through glass, shade density.
 |
 |
| Fig.12 Shade3D rendering |
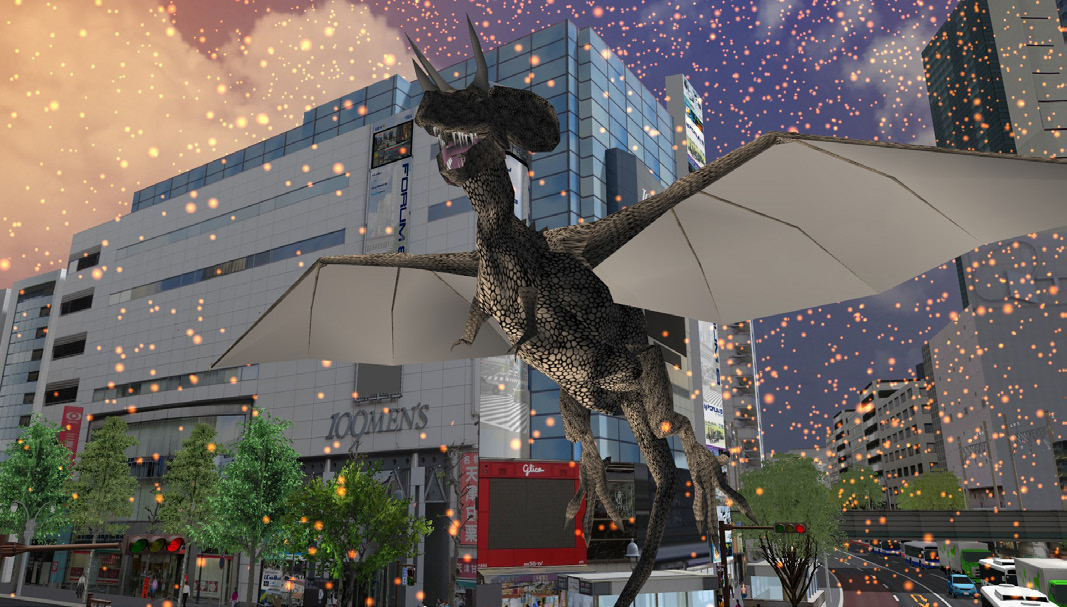
Fig.13 UC-win/Road: Flight simulation |
Conclusion
Shade3D models let us experience a variety of VR cooperating with several
UC-win/Road functions. If you have VR goggles like Oculus Rift or HTC VIVE,
you can see models in VR environment by just connecting it.
|