| Support Topics | |||
| Support Topics・ UC-win/Road | |||
|
|||

|
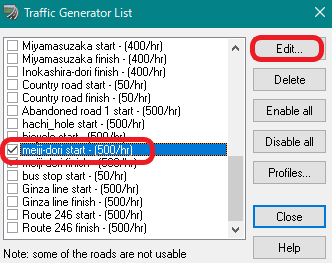
The UC-win/Road has a variety of traffic simulation functions. In this topic, we introduce its advanced settings and control settings related to the traffic flow simulation. Change the traffic volume and speed by lane The amount of traffic can be specified by the number of vehicles generated per hour on each road. In addition, the amount of traffic, speed, and traffic profile (ratio of vehicle type) can be set by lane too. This setting allows you to reproduce traffic situations according to each road, for example, you can make differences in congestion by lane, reproduce bus lanes, or run many trucks on the left lane and faster vehicles on the passing lane on highway. Go to "Edit" tab - "Traffic" on the menu and click "Generator" to open "Traffic Generator List" screen.
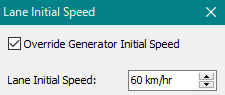
Select an object traffic flow and click "Edit" to open "Traffic Generator Editor" screen. Click [+] mark and lanes are displayed. You can configure the volume of traffic, initial speed, and profile for each lane.
Specify the traveling direction of specific vehicles Normally, vehicles traveling on roads created in the UC-win/Road change directions at intersections and branches at random. This means the same vehicle does not always go to the same direction when repeating simulations. If you want to see an autonomous driving on a specific route or to make a certain vehicle go to a fixed route in scenarios, please add a vehicle group and fix the route. This setting allows you to make a certain vehicle go to a specific direction. For example, you can make a scenario with an emergency vehicle coming from behind overtakes the vehicle in operation and turns left at the next intersection.
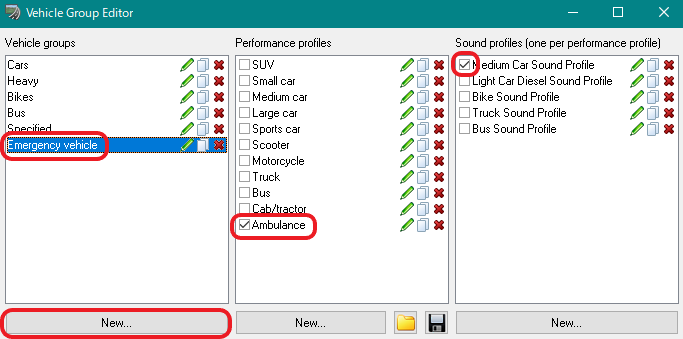
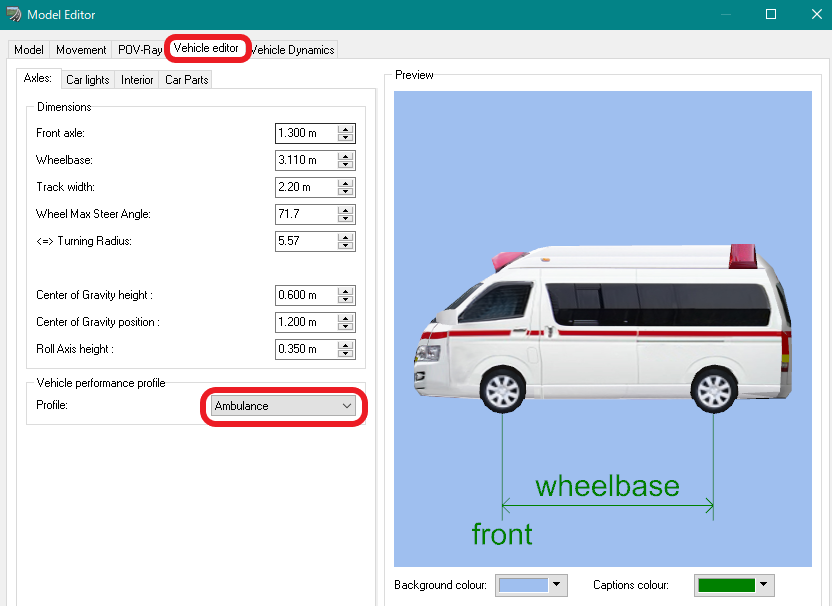
First, create a vehicle group and a profile for the specified vehicle. On the menu, click "Vehicle Groups" in "Traffic" in "Edit" tab to open "Vehicle Group Editor" screen. In "Vehicle groups", click "New..." and create a new vehicle group (emergency vehicle in the image). In "Performance profiles", create a new profile by clicking "New..." or copying the profile of other vehicles. In the image, the performance profile named "Ambulance" is added. Make sure that only "Ambulance" is checked in the performance profile when "Emergency vehicle" is selected in the vehicle group, and "Ambulance" is not checked for other vehicle groups. Select any sound profile for "Ambulance".
Next, assign the created performance profile. Open the model editor of the vehicle model to be controlled, and change the vehicle performance profile to the newly created profile (Ambulance here) in "Vehicle editor" tab. If you want to control one vehicle among several same type vehicles like passenger car, create the controlled model by copying the normal vehicle model and use a different profile between randomly traveling models and the controlled model.
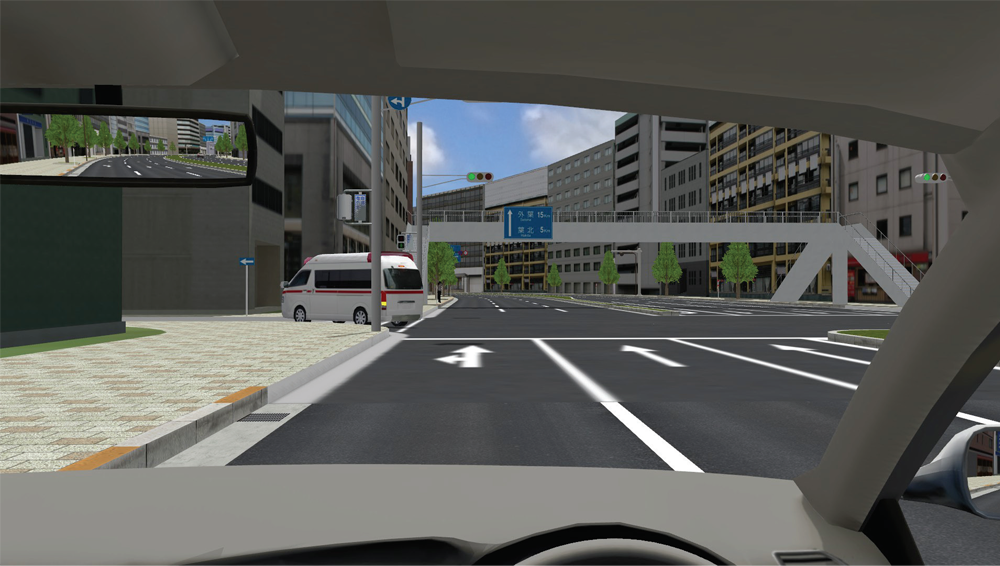
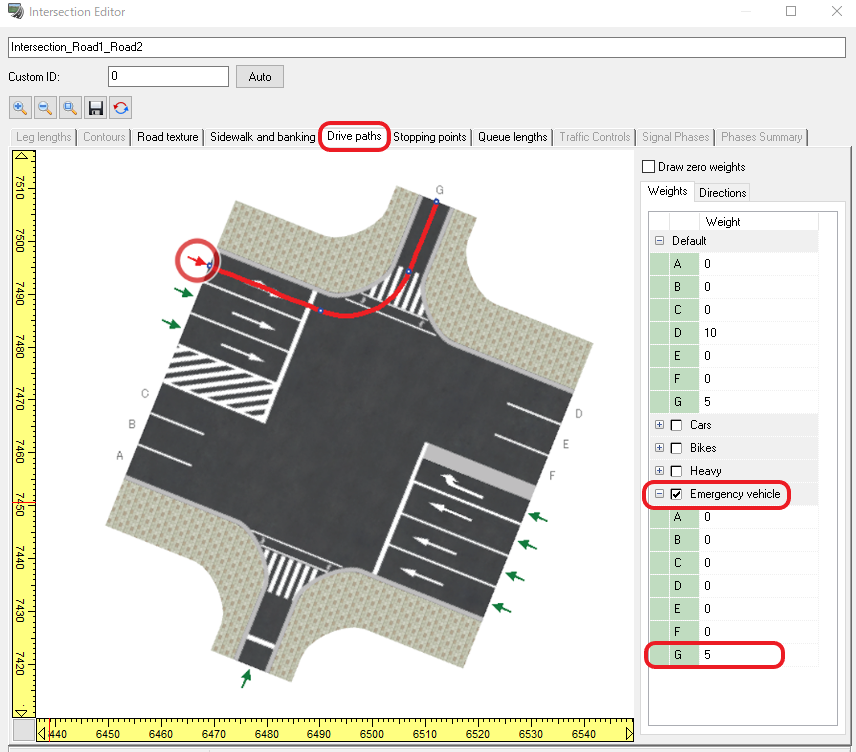
After finishing the vehicle setting, decide a travel route. Left click and right click an intersection on the route and open "Intersection Editor" screen. You can specify the direction of travel for each vehicle group in "Drive paths" tab. To make "Emergency vehicle" turn left in the image below, click the arrows on the routes, check "Emergency vehicle" group in the table on the right, enter a value only in the weight of left direction and 0 in the other weight fields. By entering a weight value in only one field like this, the vehicle with its profile checked moves only in the decided direction.
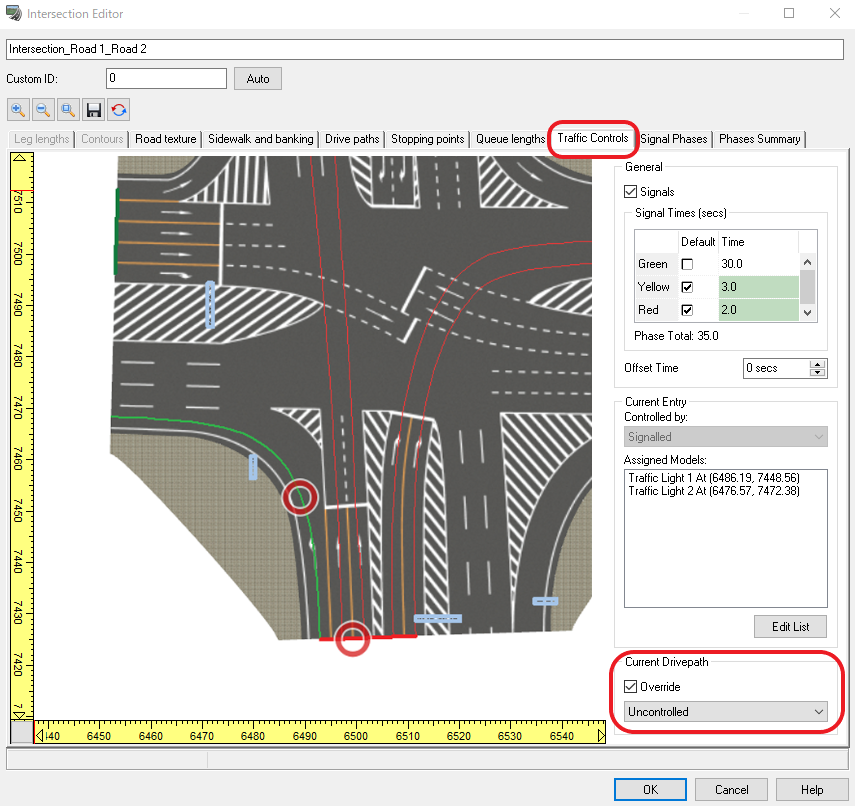
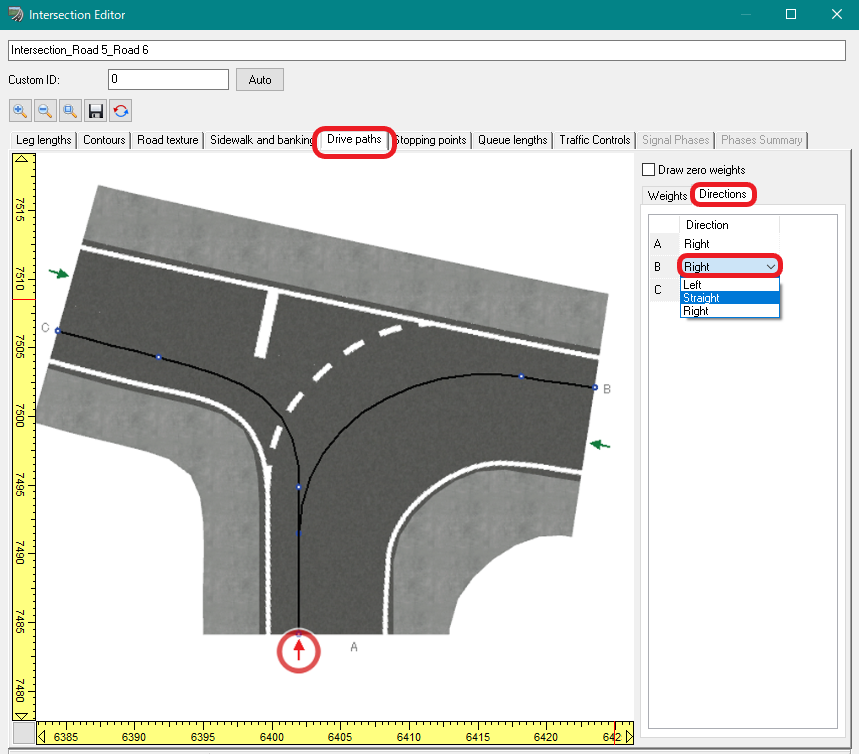
Control of blinkers Blinkers when turning right or left are automatically controlled by software, but you may want to change its behavior depending on road structure. For example, in the case of an intersection like the one in the image, vehicles going rightwards from the bottom are recognized as turning right at the intersection by default and the right turn signal is given automatically. However, in this case, the road from the bottom to right is the main road and is regarded as a straight road, and no turning signal is needed. On the intersection edit screen, you can change behaviors of blinkers from the default setting. Open "Drive paths" tab and click an entrance point (green arrow) at the edge of the driving route that you want to change. The exit direction can be set on "Directions" tab on the right side. Here, we change "Right", the initial setting of the route to right, to "Straight". Now vehicles going from the bottom to right won't use blinkers.
You can also control the blinkers of a particular vehicle in scenarios, which can be set on "Event editor" - "Model Control" tab. Select the target model and specify the blinking pattern and control time.
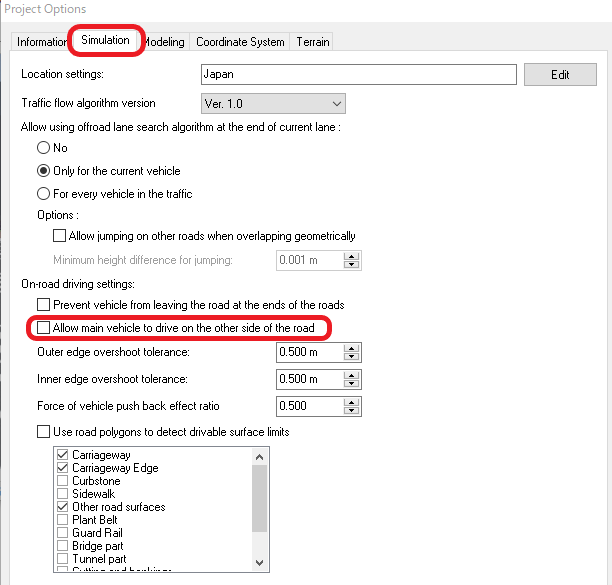
Driving range setting in Ver.14.2 From the Ver.14.2, vehicles can run outside the lane without special road sections which were necessary to reproduce the driving in the opposite lane in the past. To use this function, go to "File" menu, "Project Option", "Simulation" tab, and put a check in "Allow main vehicle to drive on the other side of the road".
We will continue to enhance the traffic flow settings in UC-win/Road. | ||||||||||||||||||||||||||||||||


|
|||
| (Up&Coming '21 New Year issue) | |||
 |


