User Introductions User Introductions
 |
|
 User Introductions User Introductions
Up and Coming web magazine-customer case study (Customers listed below
are using UC-win/Road effectively and efficiently-they are a few of our
valued customers.)
Customer Introduction Up and Coming No.41 - No.85: (J) indicates Japanese written article
Engineering
Consultants |
- New Business Div., Fukuoka Office, Taisei Engineering Co., Ltd.
2010 Fresh green leaves issue
- IT & ITS Planning Div., Toyota Motor Corporation
2009 New year special issue
- Lithosphere Group, IDEA Consultants, Inc.
2008 Mid summer issue
- EAZET Sales Dept., Asahi Kasei Construction Materials Corporation
2008 Fresh green leaves issue
- Highways & Bridge Dept., Overseas Consulting Administration, Nippon
Koei Co.,LTD.
2007 Late fall issue
- NEWJEC Inc.
2006 Spring issue
- Nishitetsu C.E.Consultant Co., Ltd.
2006 Mid summer issue
- Daiichi Fukken Co.,Ltd.
2005 Mid summer issue
- Docon Co., Ltd.
2005 New year special issue (J)
- JR - Central Consultants
2004 Spring special issue (J)
- Metro Planning Consultant
2004 Summer issue (J)
- Yachiyo Engineering Co., Ltd.
2004 New year special issue (J)
- Structure Engineering Center, Japan
2002 New year issue (J)
- Asia Air Survey Co., Ltd.
2001 Spring issue (J)
- San Doboku Consultant Co., Ltd.
2001 New year issue (J)
|
| Academics |
- Laboratory for Cognitive Systems Science, University of Tsukuba Graduate
Schoo
2009 Late fall issue
- Kakogawa Design Group, Super Science High School, Kakogawa Higashi High
School
2009 Fresh green leaves issue
- Disaster Prevention Engineering, Faculty of Engineering, Tokyo City University
2009 Early spring issue
- Lab. of Landscape Engineering, Tokyo University of Agriculture
2008 Late fall issue
- Dept. of Civil and Environmental Engineering, , Hosei University
2008 Early spring issue
- Dept. of Information Engineering, Meijo University
2007 Spring issue
- Dept. of Civil and Environmental Engineering, Gunma University Graduate
School
2007 Fresh green leaves issue
- Transportation System Lab., Nihon University
2007 New year special issue
- Daido Institute of Technology
2006 Spring issue
- Regional planning laboratory, Utsunomiya University
2004 Spring issue (J)
- Kyushu Surveying College
2002 Spring issue (J)
- Kinki University Technical College
2002 Spring issue (J)
|
Government
Public |
|
Research
institute |
|
Road
construction |
|
| Constructor |
|
| NPO |
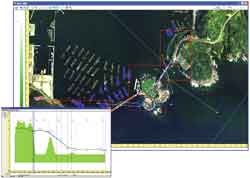
- Tokai Loop Road VR Simulator
2002 Summer issue
- J-FORCE
2001 Summer issue (J)
|
| Overseas |
|
|
|
UC-win/Road Q&A
|
|
| Q1. |
How can I obtain the data of 50 meters terrain elevation in China? |
| A1. |
To date, there is no one fixed format. You can obtain the information in
several formats.
2D data (contour lines) is the most widely used format, and the next most
popular format would be in Microstation. (*.DGN)
If you prefer "DEM" 3D digital terrain model, you can log on
to the following website. However, you need to apply for free DEM data
prior to your use.
http://www.usgs.gov/
http://www.ngdc.noaa.gov/mgg/topo/globeget.html
Contact this organization for more precise terrain data.
State Bureau of Surveying and Mapping (SBSM)
TEL : 86-10-6848-9486 |
| |
|
| Q2. |
Modeling, Texturing, Export Tips from 3D Studio Max into UC-win/Road |
| A2. |
.3DS Format:
UC-win/Road can import 3D model data stored in the .3DS format. Though
this format is very widely compatible between 3D software packages, there
are a few steps to follow when modeling and texturing that will make exporting
into UC-win/Road much easier.
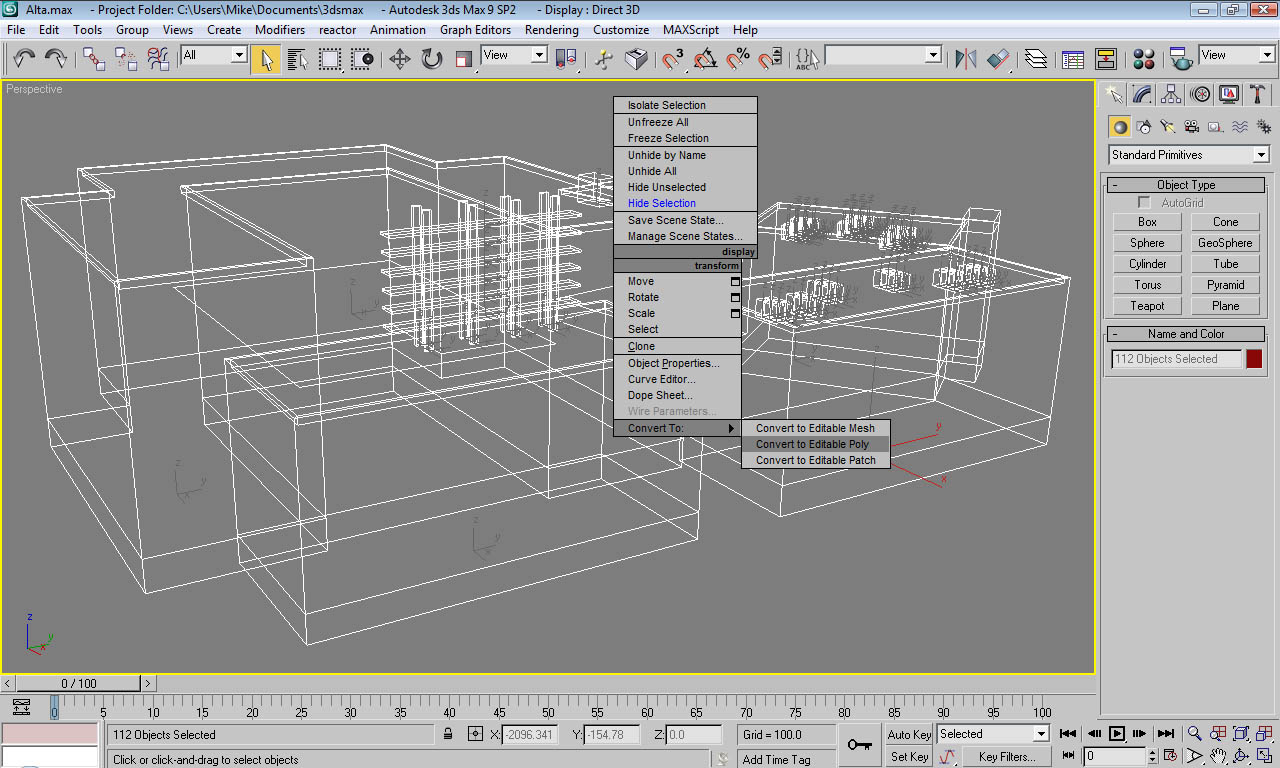
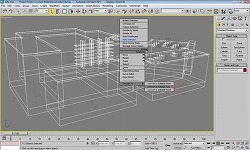
1. Editable Poly: After completing a model in Studio Max, convert all objects into editable
polys by right-clicking on the model and selecting onvert to editable polys.
Do this prior to texturing, as the texturing method we will use works most
smoothly with editable poly models.
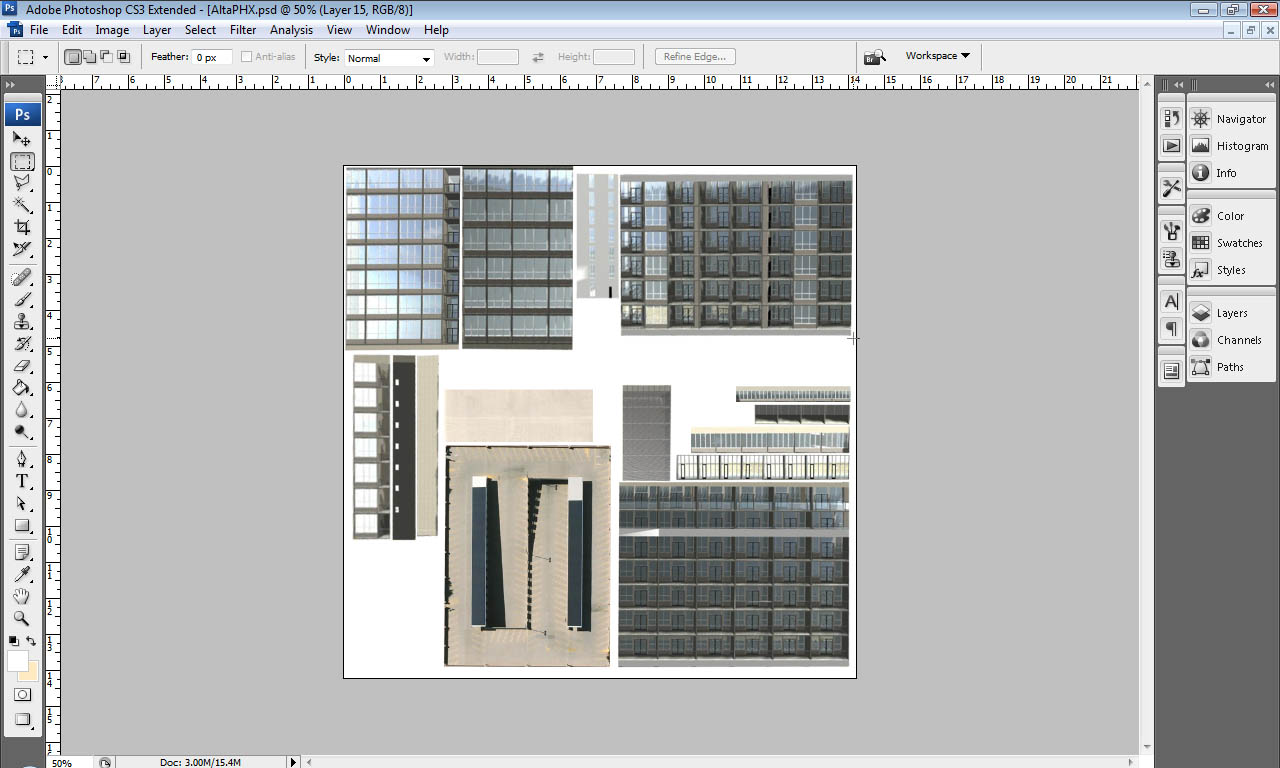
2. Prepare the texture for your model in Photoshop as a single image that will be used for texturing
the entire model. Keep to these uniform pixel dimensions (512x512, 1024x1024,
2048x2048, etc.) as they render far crisper in UC-win/Road than just any
uniform scale (500x500, for example). There is a very noticeable decrease
in display quality when not using these texture dimensions. The following
is an example of the texture prepared for the building used in this tutorial:
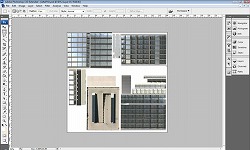
Note: Keeping to a single texture image will make your model easy to texture,
works best with the .3DS model format, and reduces the margin for error
when exporting to another 3D application such as UC-win/Road. It is also
very easy to edit your texture's appearance on your model live with both
Photoshop and 3D Studio Max open at the same time and not having to deal
with several image files open simultaneously.
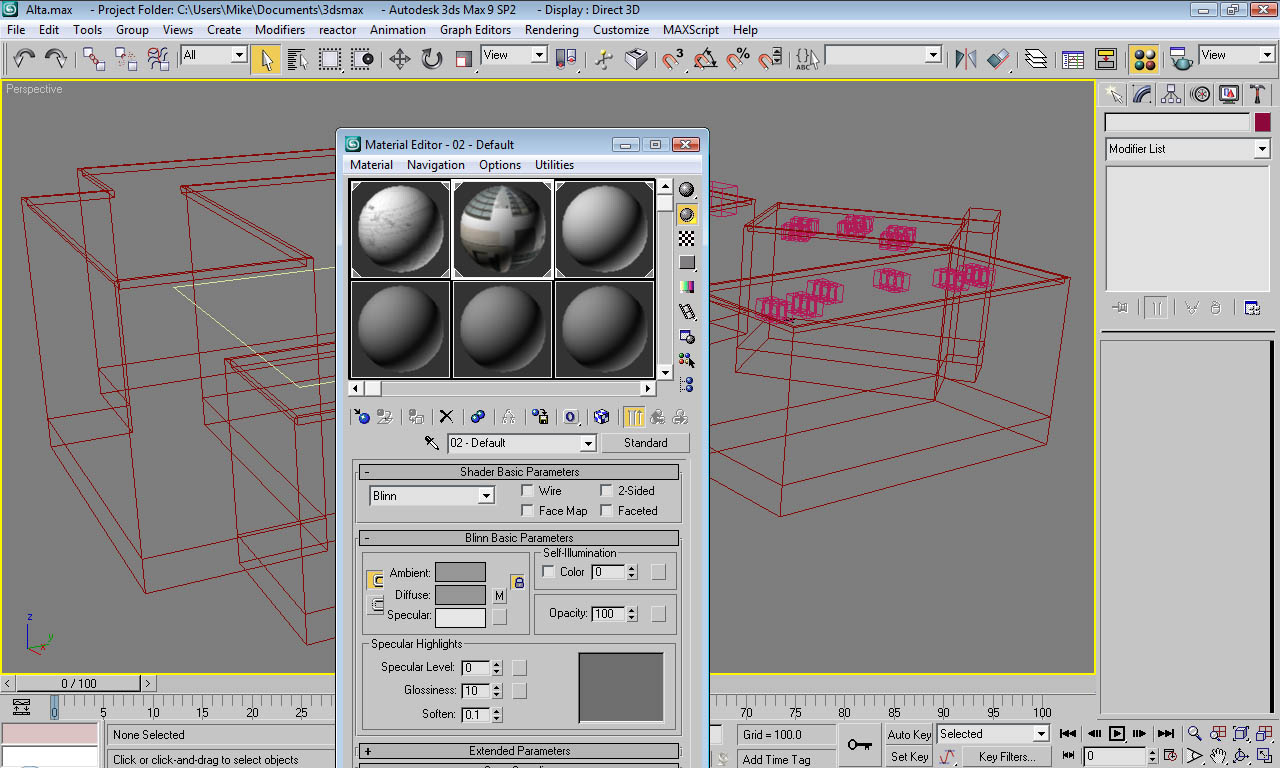
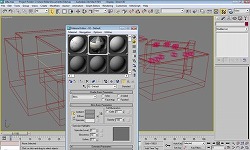
3. Add your texture to the material editor: under Blinn Basic Parameters, click the empty
map button after diffuse and select the path to your texture. Now, be sure
to hit the  button so that your texture will be visible on your model once it is applied.
To apply the texture to your model, simply drag the sphere in the material
editor with your texture onto your highlighted model in the main work area.
A sloppy-looking mess of a texture should appear all over your model. Make
sure you have Smooth + Highlights selected in the viewport properties. button so that your texture will be visible on your model once it is applied.
To apply the texture to your model, simply drag the sphere in the material
editor with your texture onto your highlighted model in the main work area.
A sloppy-looking mess of a texture should appear all over your model. Make
sure you have Smooth + Highlights selected in the viewport properties.
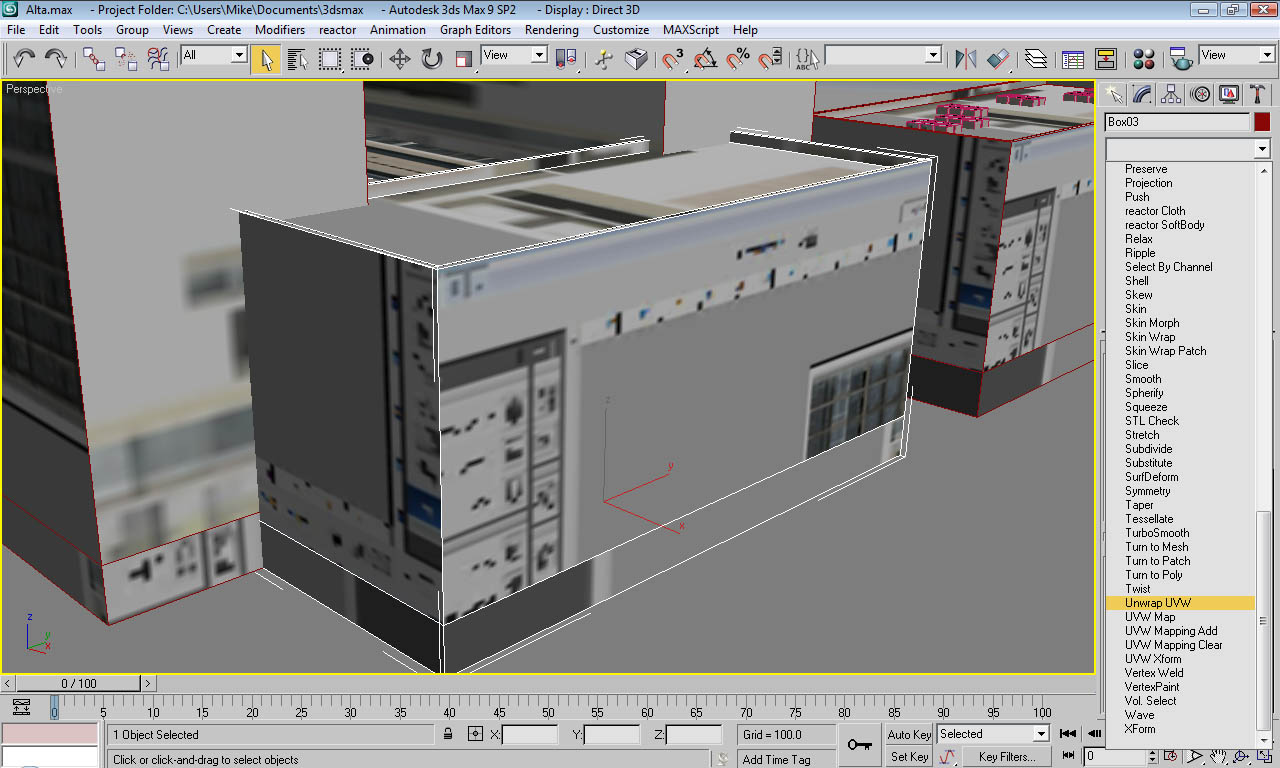
4. Unwrap UVW: After you have applied the texture to the editable poly model, add the
unwrap UVW modifier to the component of the model you wish to align the
texture to.
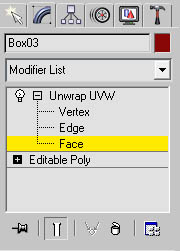
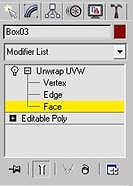
5. In the Unwrap UVW rollout menu, make sure face is highlighted as they
are easiest to line up with your texture:
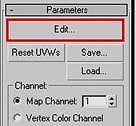
6. Now, further down in the Unwrap UVW rollout, under parameters, select
edit to manually line up the model faces with the texture:
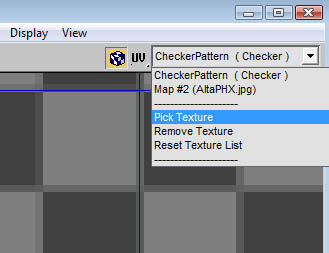
7. Apply Texture for Editing: This will open up a new window which allows you to manipulate the faces
of your model on top of your texture. You will initially see what looks
like a mess of green lines on top of a checkerboard. To make editing your
texture much easier, first hit the drop-down menu at the top-right of the
window and select pick Texture. The Material/Map Browser will pop up; now
double-click on bitmap and find the path to your texture. Your texture
should now appear in the edit window in place of the checkerboard.

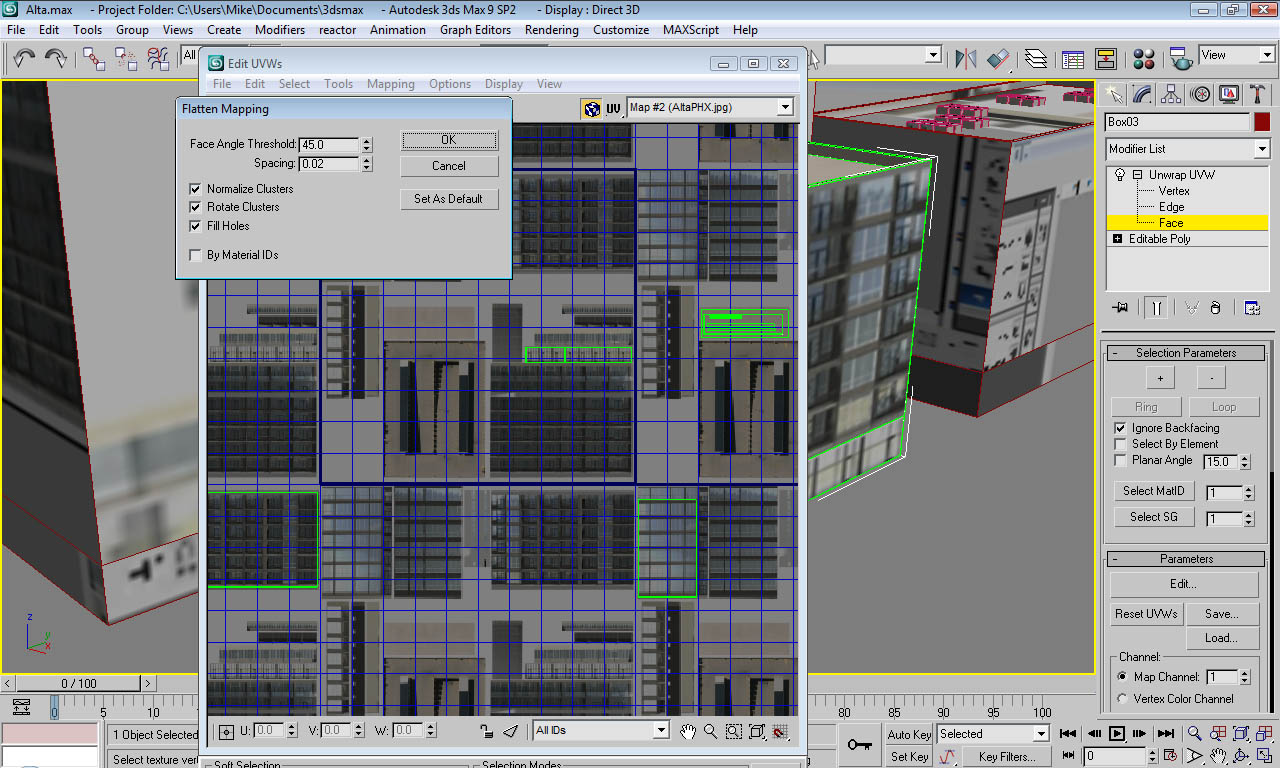
8. Clean-Up: To clean up the mess of green shapes so you can easily work with them,
hit the mapping tab and then choose Flatten Mapping from the drop-down
menu. A option menu will pop up; the default values work well in most cases,
so leave those alone, but make sure that all buttons are actively checked
except for By Material IDs. Once you hit OK, your geometry will look much
more recognizable and lining up your faces to your texture is fairly straightforward
from here. As long as your texture has been applied to the object, updates
appear live on the model as soon as you de-select the face you are working
on. You can also edit your texture itself in Photoshop and edits will appear
live in Studio Max.
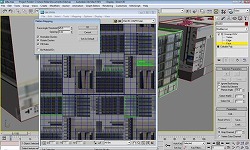
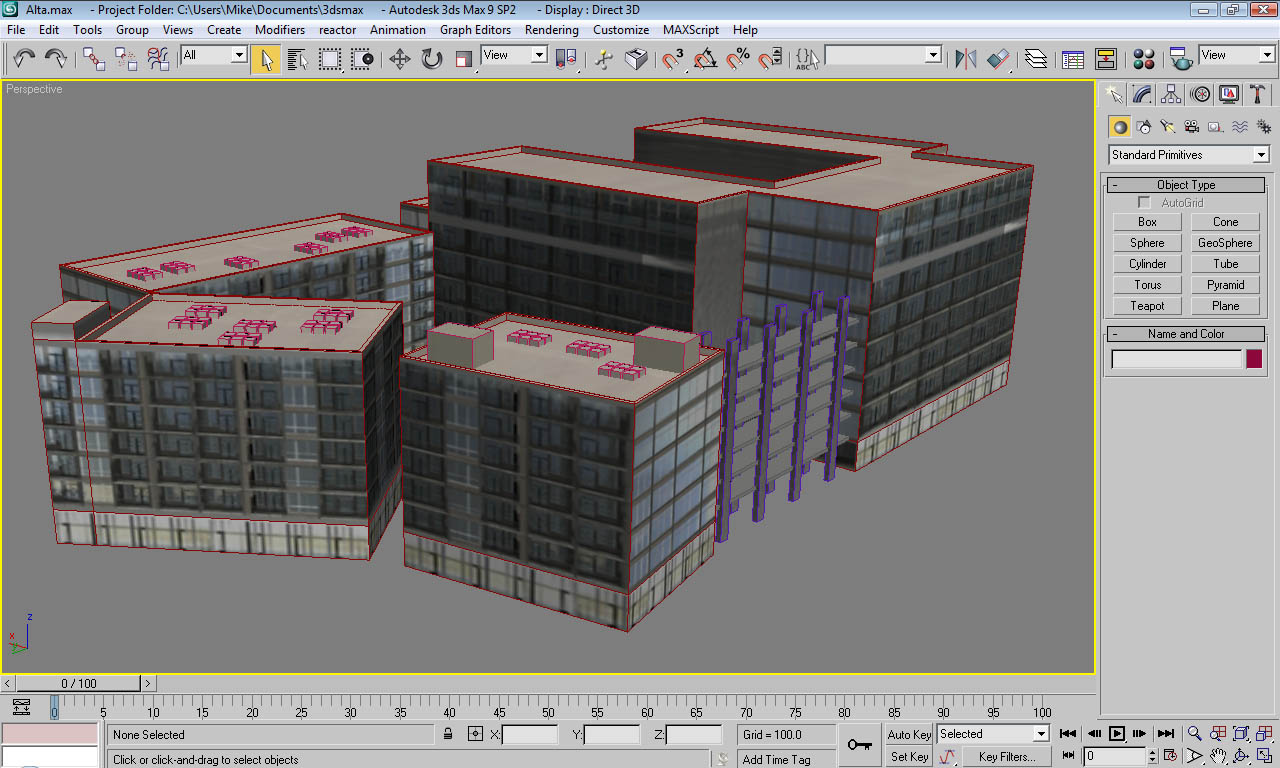
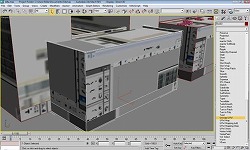
9. Repeat: Once you have a segment of your model aligned to the texture, repeat
the same steps until the whole scene is textured accurately:
First block after editing with Unwrap UVW:

And the finished model:

10. Export: Now that everything in Studio Max is done, select your entire scene (or
whatever parts you want to appear in UC-win/Road), and export to .3DS.
Make sure you check that texture coordinates will be preserved.
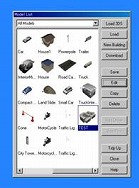
11. Import: Start UC-win/Road and load the data file in which you will import your
new model. Once your data has loaded, select File Load Models and the Model
List window will appear, which contains thumbnail previews of every model
in your data file that can all be edited using this window. To import your
new model, click Road 3DS at the top, right corner.
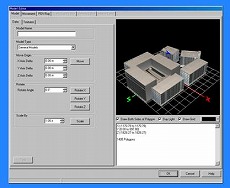
12. Model Editor: Once you have selected your .3DS file it will appear in the Model Editor
window. From here you can edit the model size and textures in a variety
of ways. The way your model appears in this window is the way it will render
in the main UC-win/Road viewer. Therefore, if it does not appear to have
a texture, or if the texture and/or geometry is incorrect in any way, there
has been an error elsewhere. See the Troubleshooting section at the end
of this tutorial for common issues. A variety of model and texture settings
can be set or changed in this window at any time, so for now just give
your model a name and click OK. Now your model is placed in the Model List
and is ready to be dropped into your project
The new model will appear in the Model List after a successful import:
13. Place Model in Project: Simply hit the add features button , select Models and scroll down to the bottom of the list to locate your
new model. Now simply highlight your model in the list window and click
anywhere on the ground and your model will be placed flush with the ground
plane. , select Models and scroll down to the bottom of the list to locate your
new model. Now simply highlight your model in the list window and click
anywhere on the ground and your model will be placed flush with the ground
plane.

Troubleshooting:
1. Model has no texture after importing into UC-win/Road.
First, check to make sure your .3DS and texture file are in the same folder.
If the problem is not fixed or the .3DS and texture are in the same folder,
try the following:
Your texture can be only a .JPEG or .BMP image file, so please check your
file extension. If you are working with a .BMP for transparency effects,
your .BMP must be saved as a 24-Bit OS/2 format. If it is saved in Windows
format, your texture will not appear in UC-win/Road. *Keep in mind that
3D Studio Max, conversely, does not support OS/2 bitmaps, so once you have
exported out of Studio Max, re-save your .BMP in Photoshop as a 24-bit
OS/2.
2. Parts of model are missing after Importing into UC-win/Road.
Make sure that before you export to .3DS from Studio Max that you have
selected all parts of your model. In complex models with many parts it
is easy to leave sections un-selected.
3. Parts of model are backwards/translated incorrectly after importing
into UC-win/Road.
The .3DS file format sometimes mis-interprets translation tools used during
the modeling process to build your object. An example would be a street
light that was copied from another street light, then mirrored to face
the opposite direction. When UC-win/Road imports the .3DS file, those translations
might be ignored. To fix this, simply select your model in 3D Studio Max,
then under the utilities panel (menu with the hammer icon) select Reset
x-form Your model should now import with all translations/edits in-tact.
4. Only some parts of model and texture appear incorrectly after importing
into UC-win/Road.
If your .3DS is overly large in terms of polygon count and texture data,
the margin for error when translating to external applications increases
dramatically. Try to break apart data-intensive scenes into multiple .3DS
files and import one at a time.
|
|
|